Mecanical
Lunacy is a collection of small, 3D printed obstacles housed in an enclosure with an embedded control panel, ball return system, and accessible electronics bed. CAD files of all of our components can be found here.
The Box
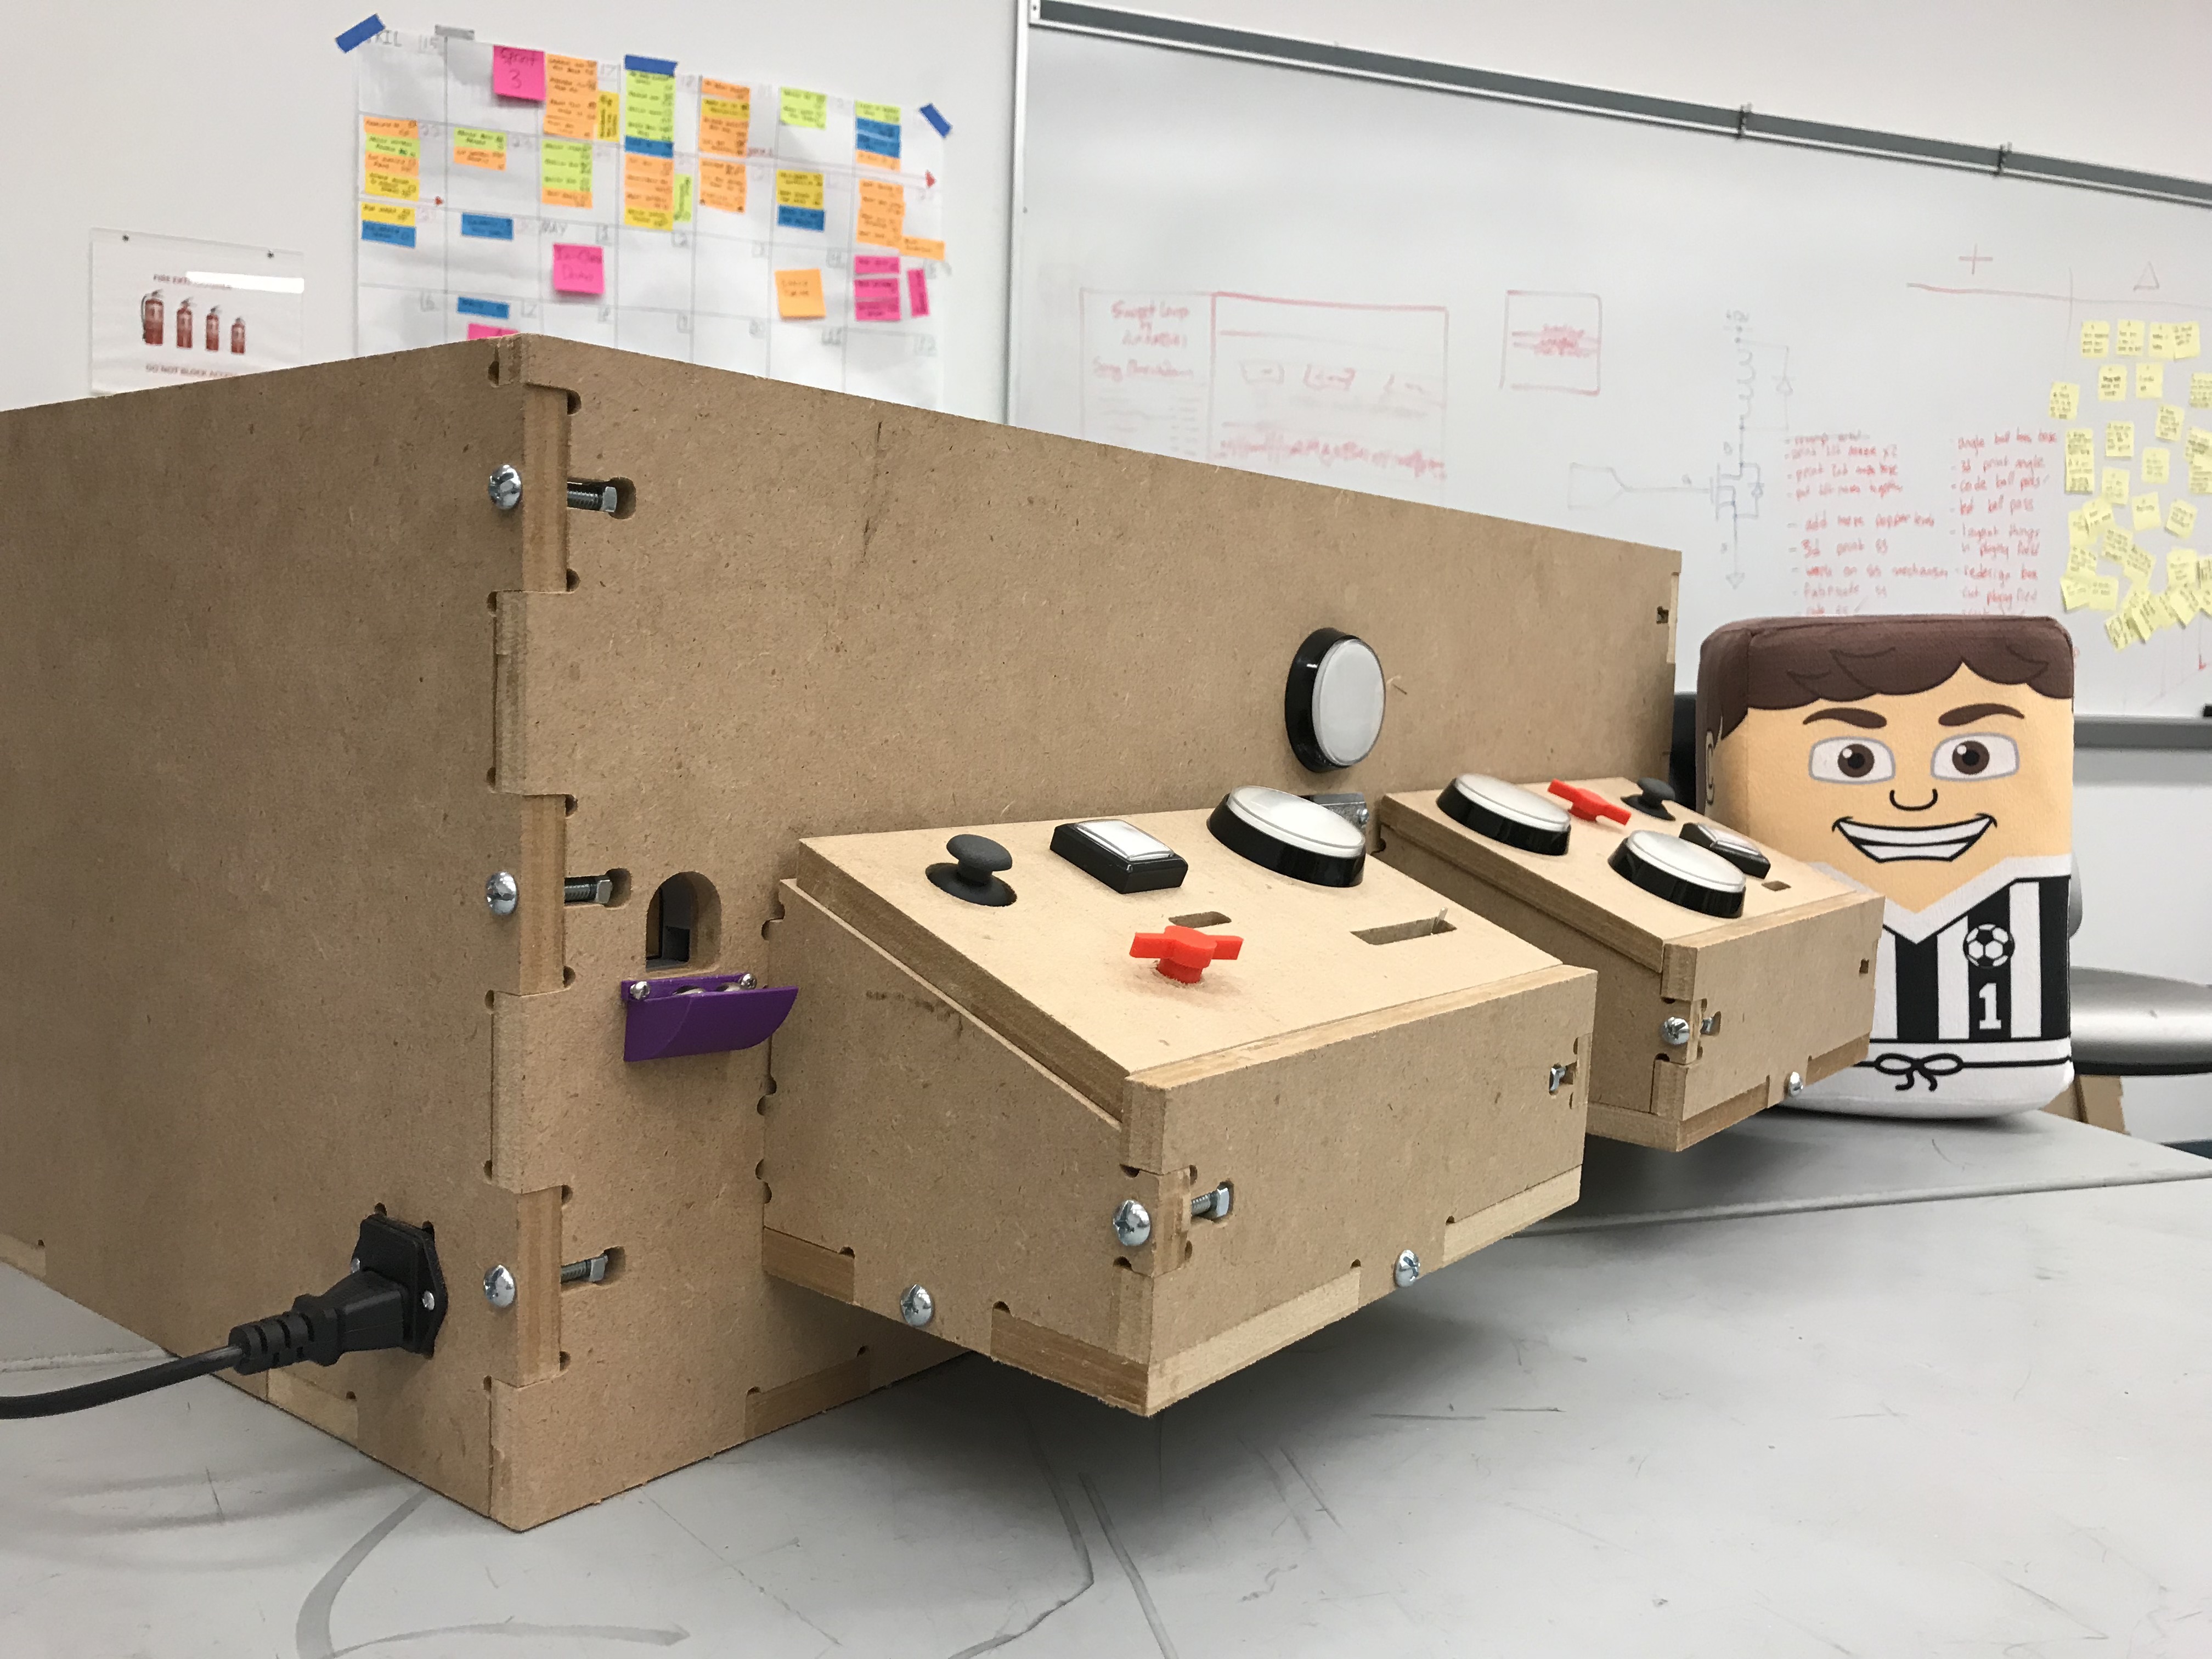
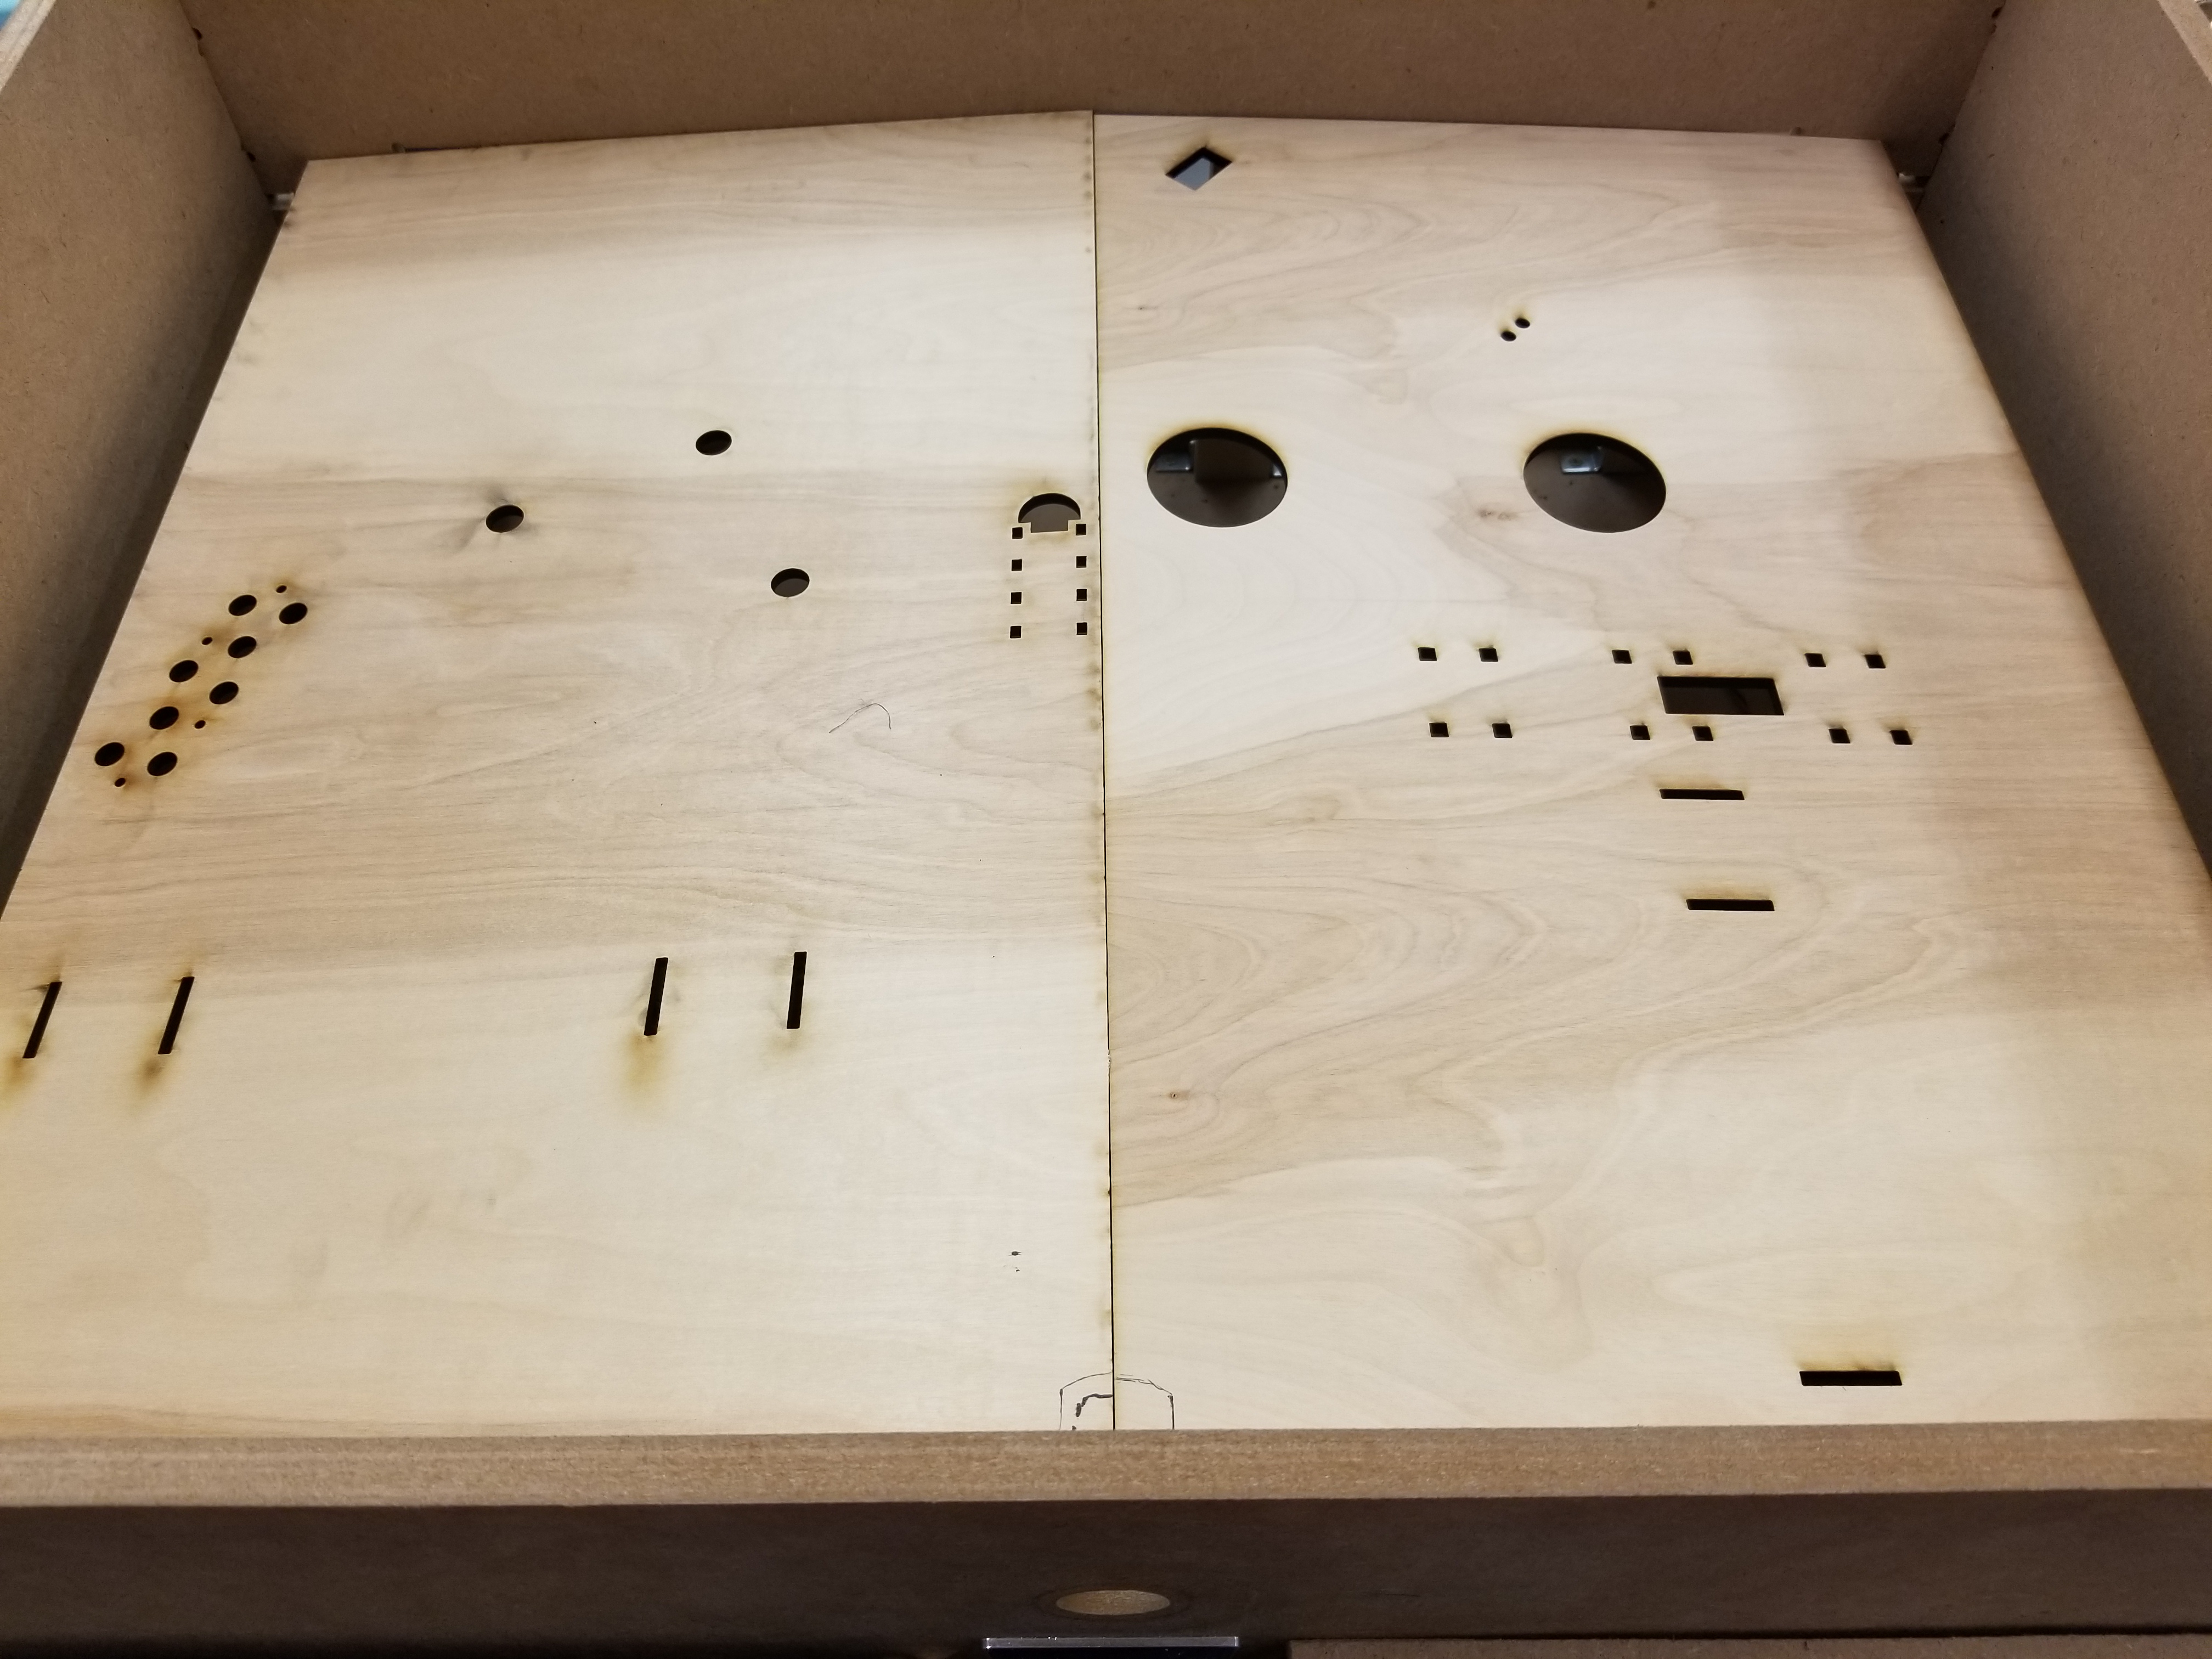
The housing for the game was manufactured using a CNC ShopBot and is made out of 1/2" MDF, with a 24" by 30" by 12" footprint. We determined the dimensions of the game after mapping out the obstacles we planned to include on paper and prototyping them for the 9/16" marble used in the game. In designing the box our goals were to create something that could house all desired components, be easily constructed and deconstructed, and feature easy access to electronics for troubleshooting.
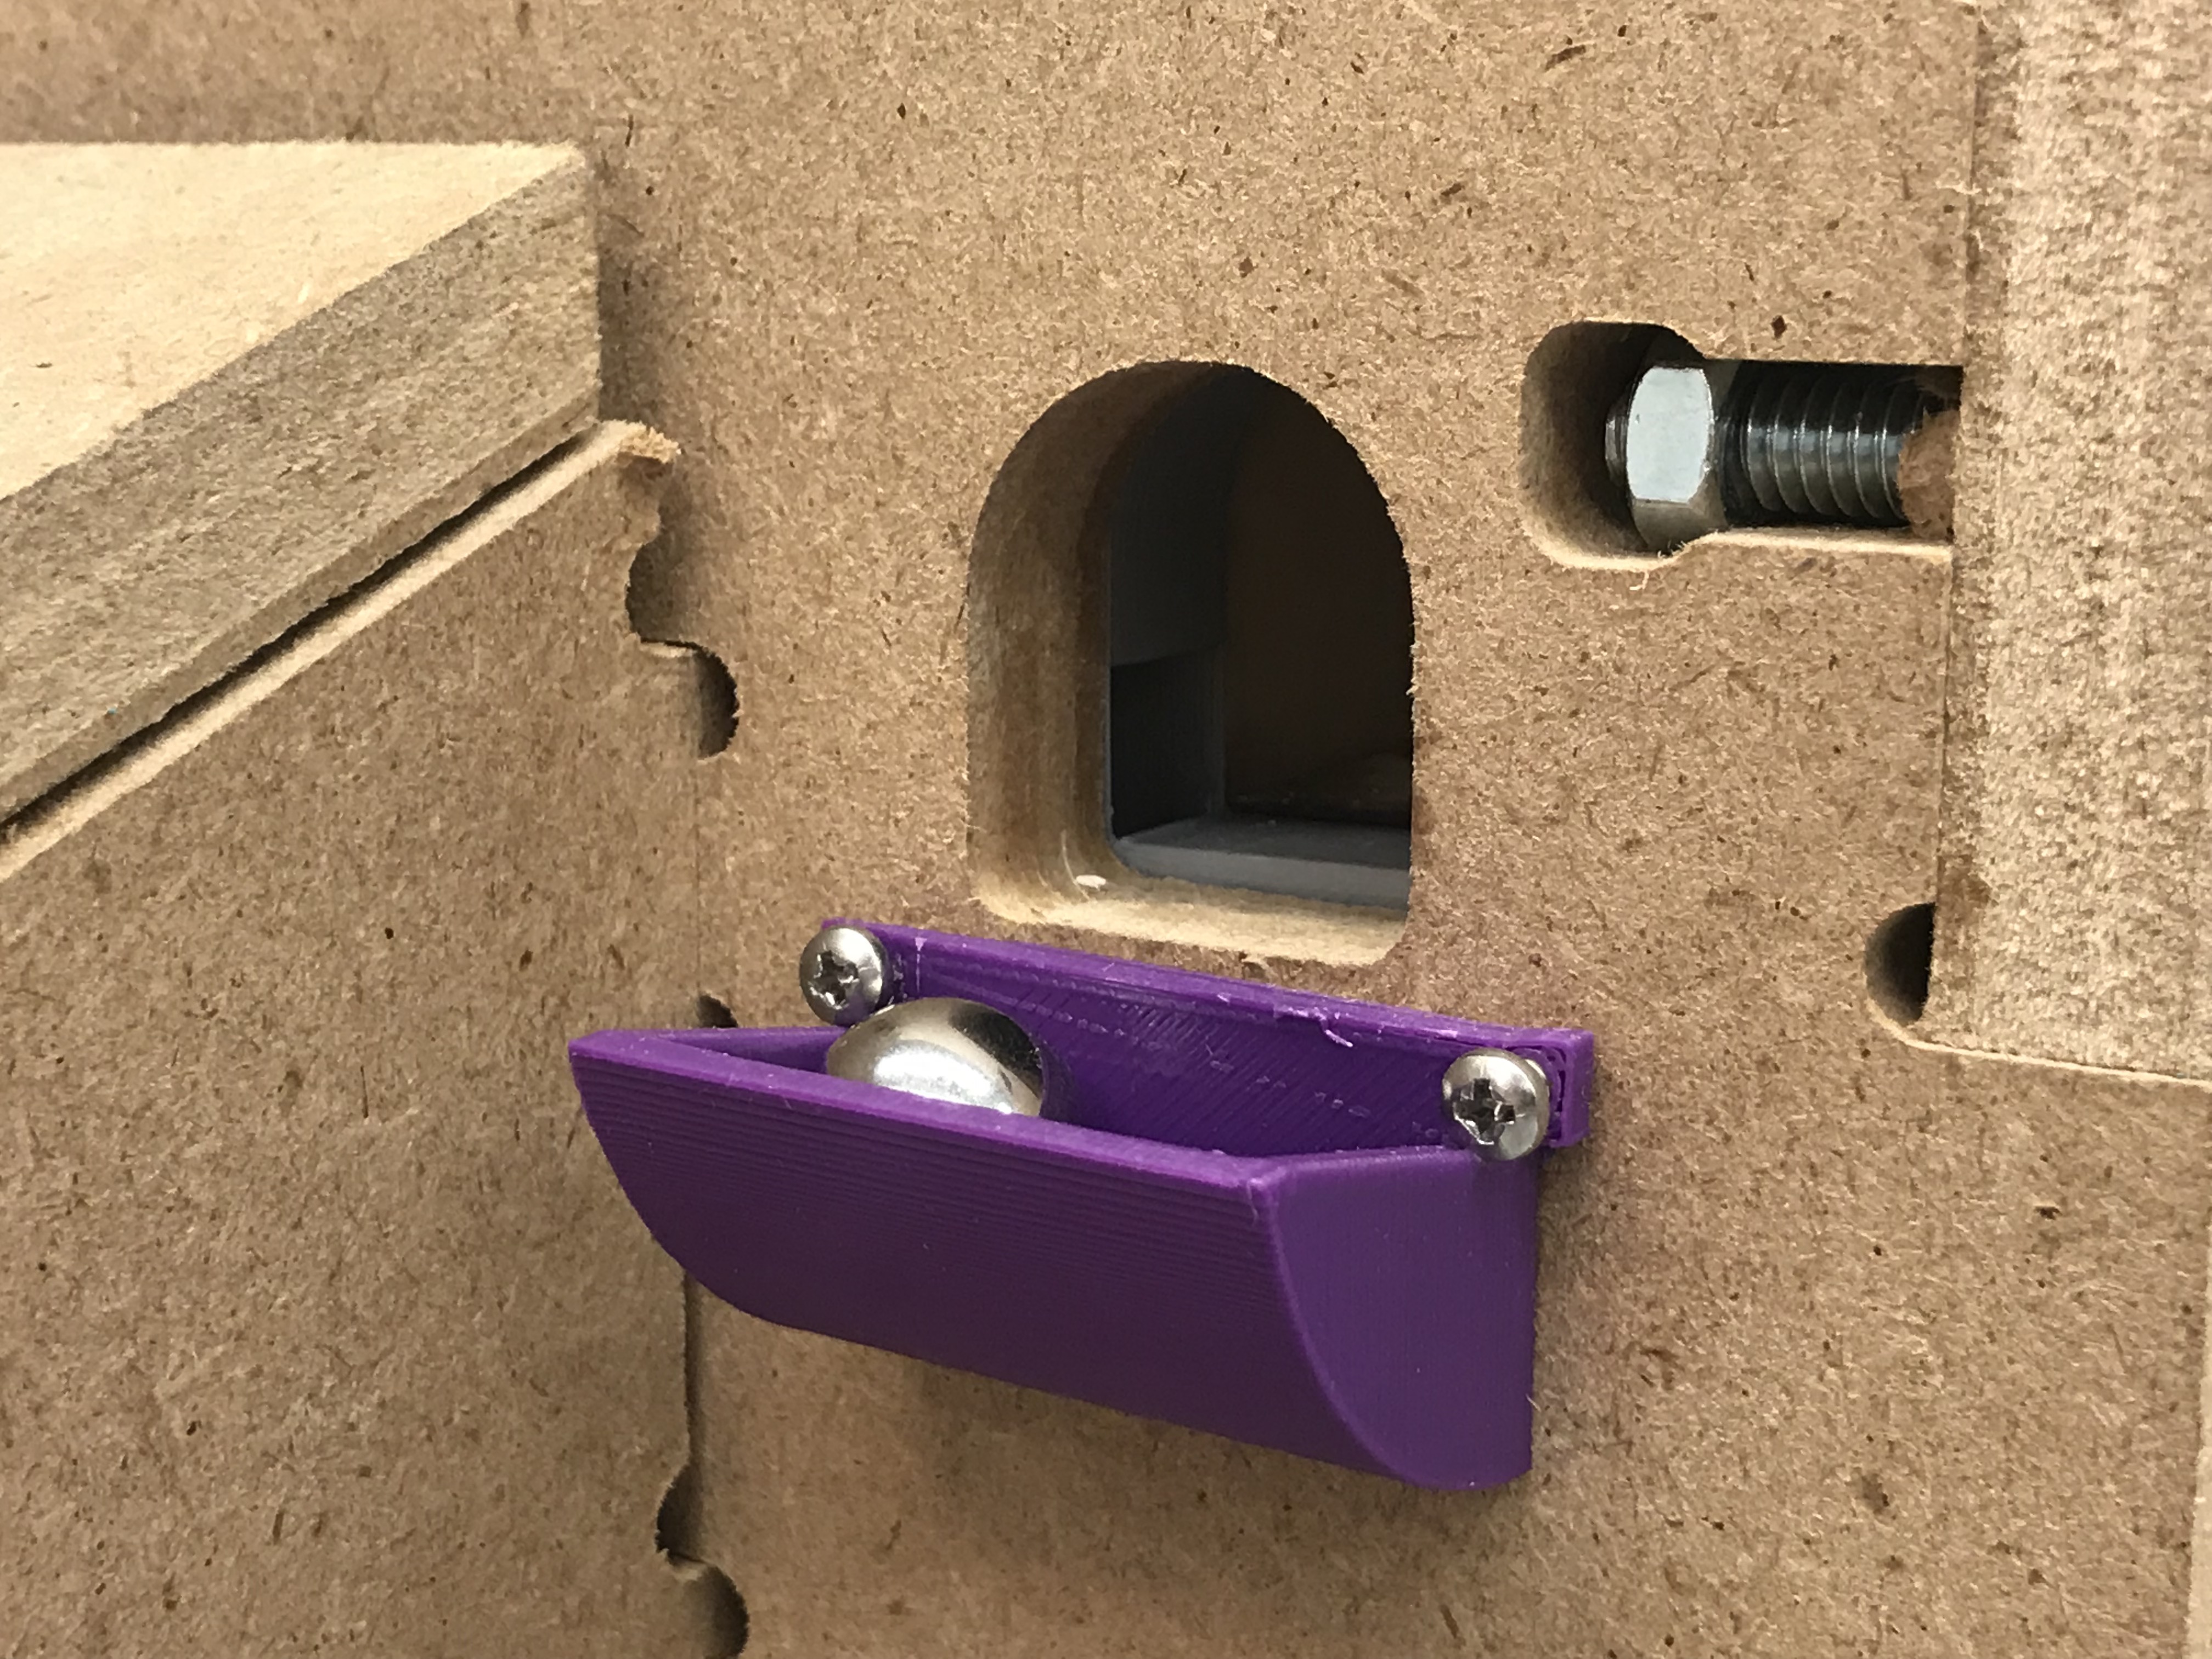
The sides of the box and control panels all connect with 1/4"-20 screws and captured nuts which enables us to easily remove the sides of the game if needed. After cutting the panels on the ShopBot we pressed hex nuts into the openings with an arbor press. When screwed together the nut grips the material, pulling the two panels together at the corner. Although we used hex nuts, we recommend square nuts as their increased surface area creates a better connection.
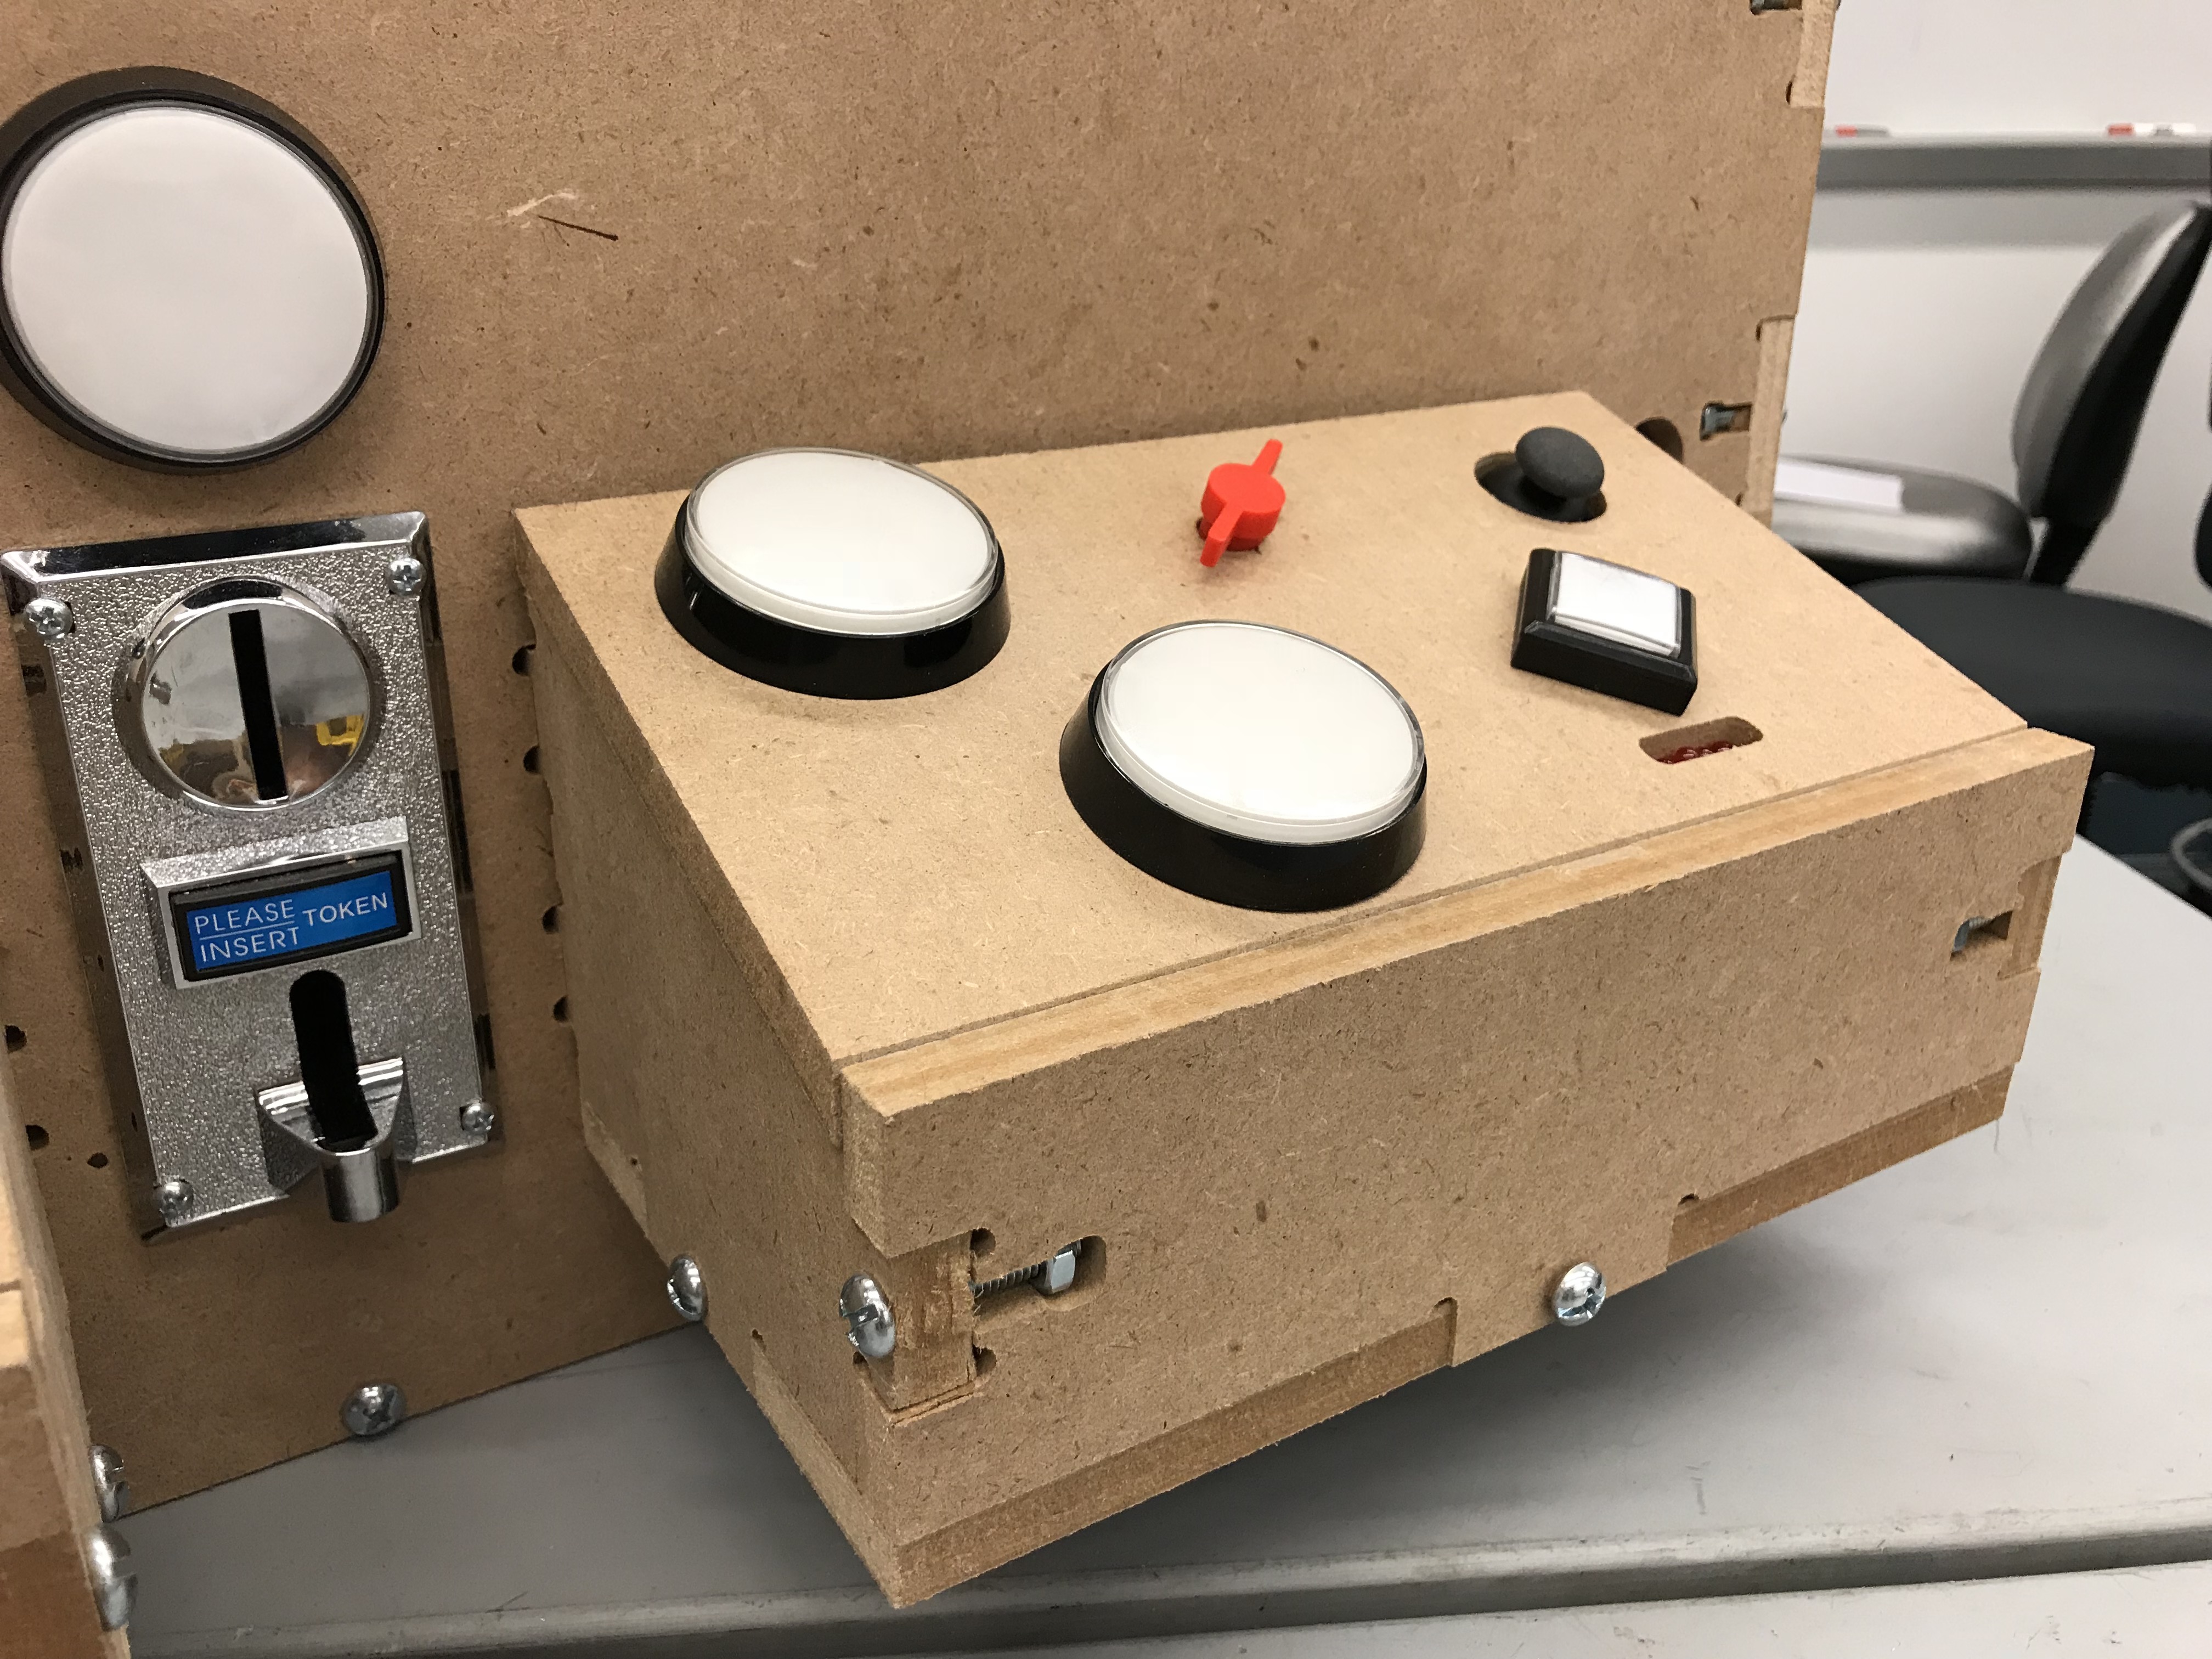
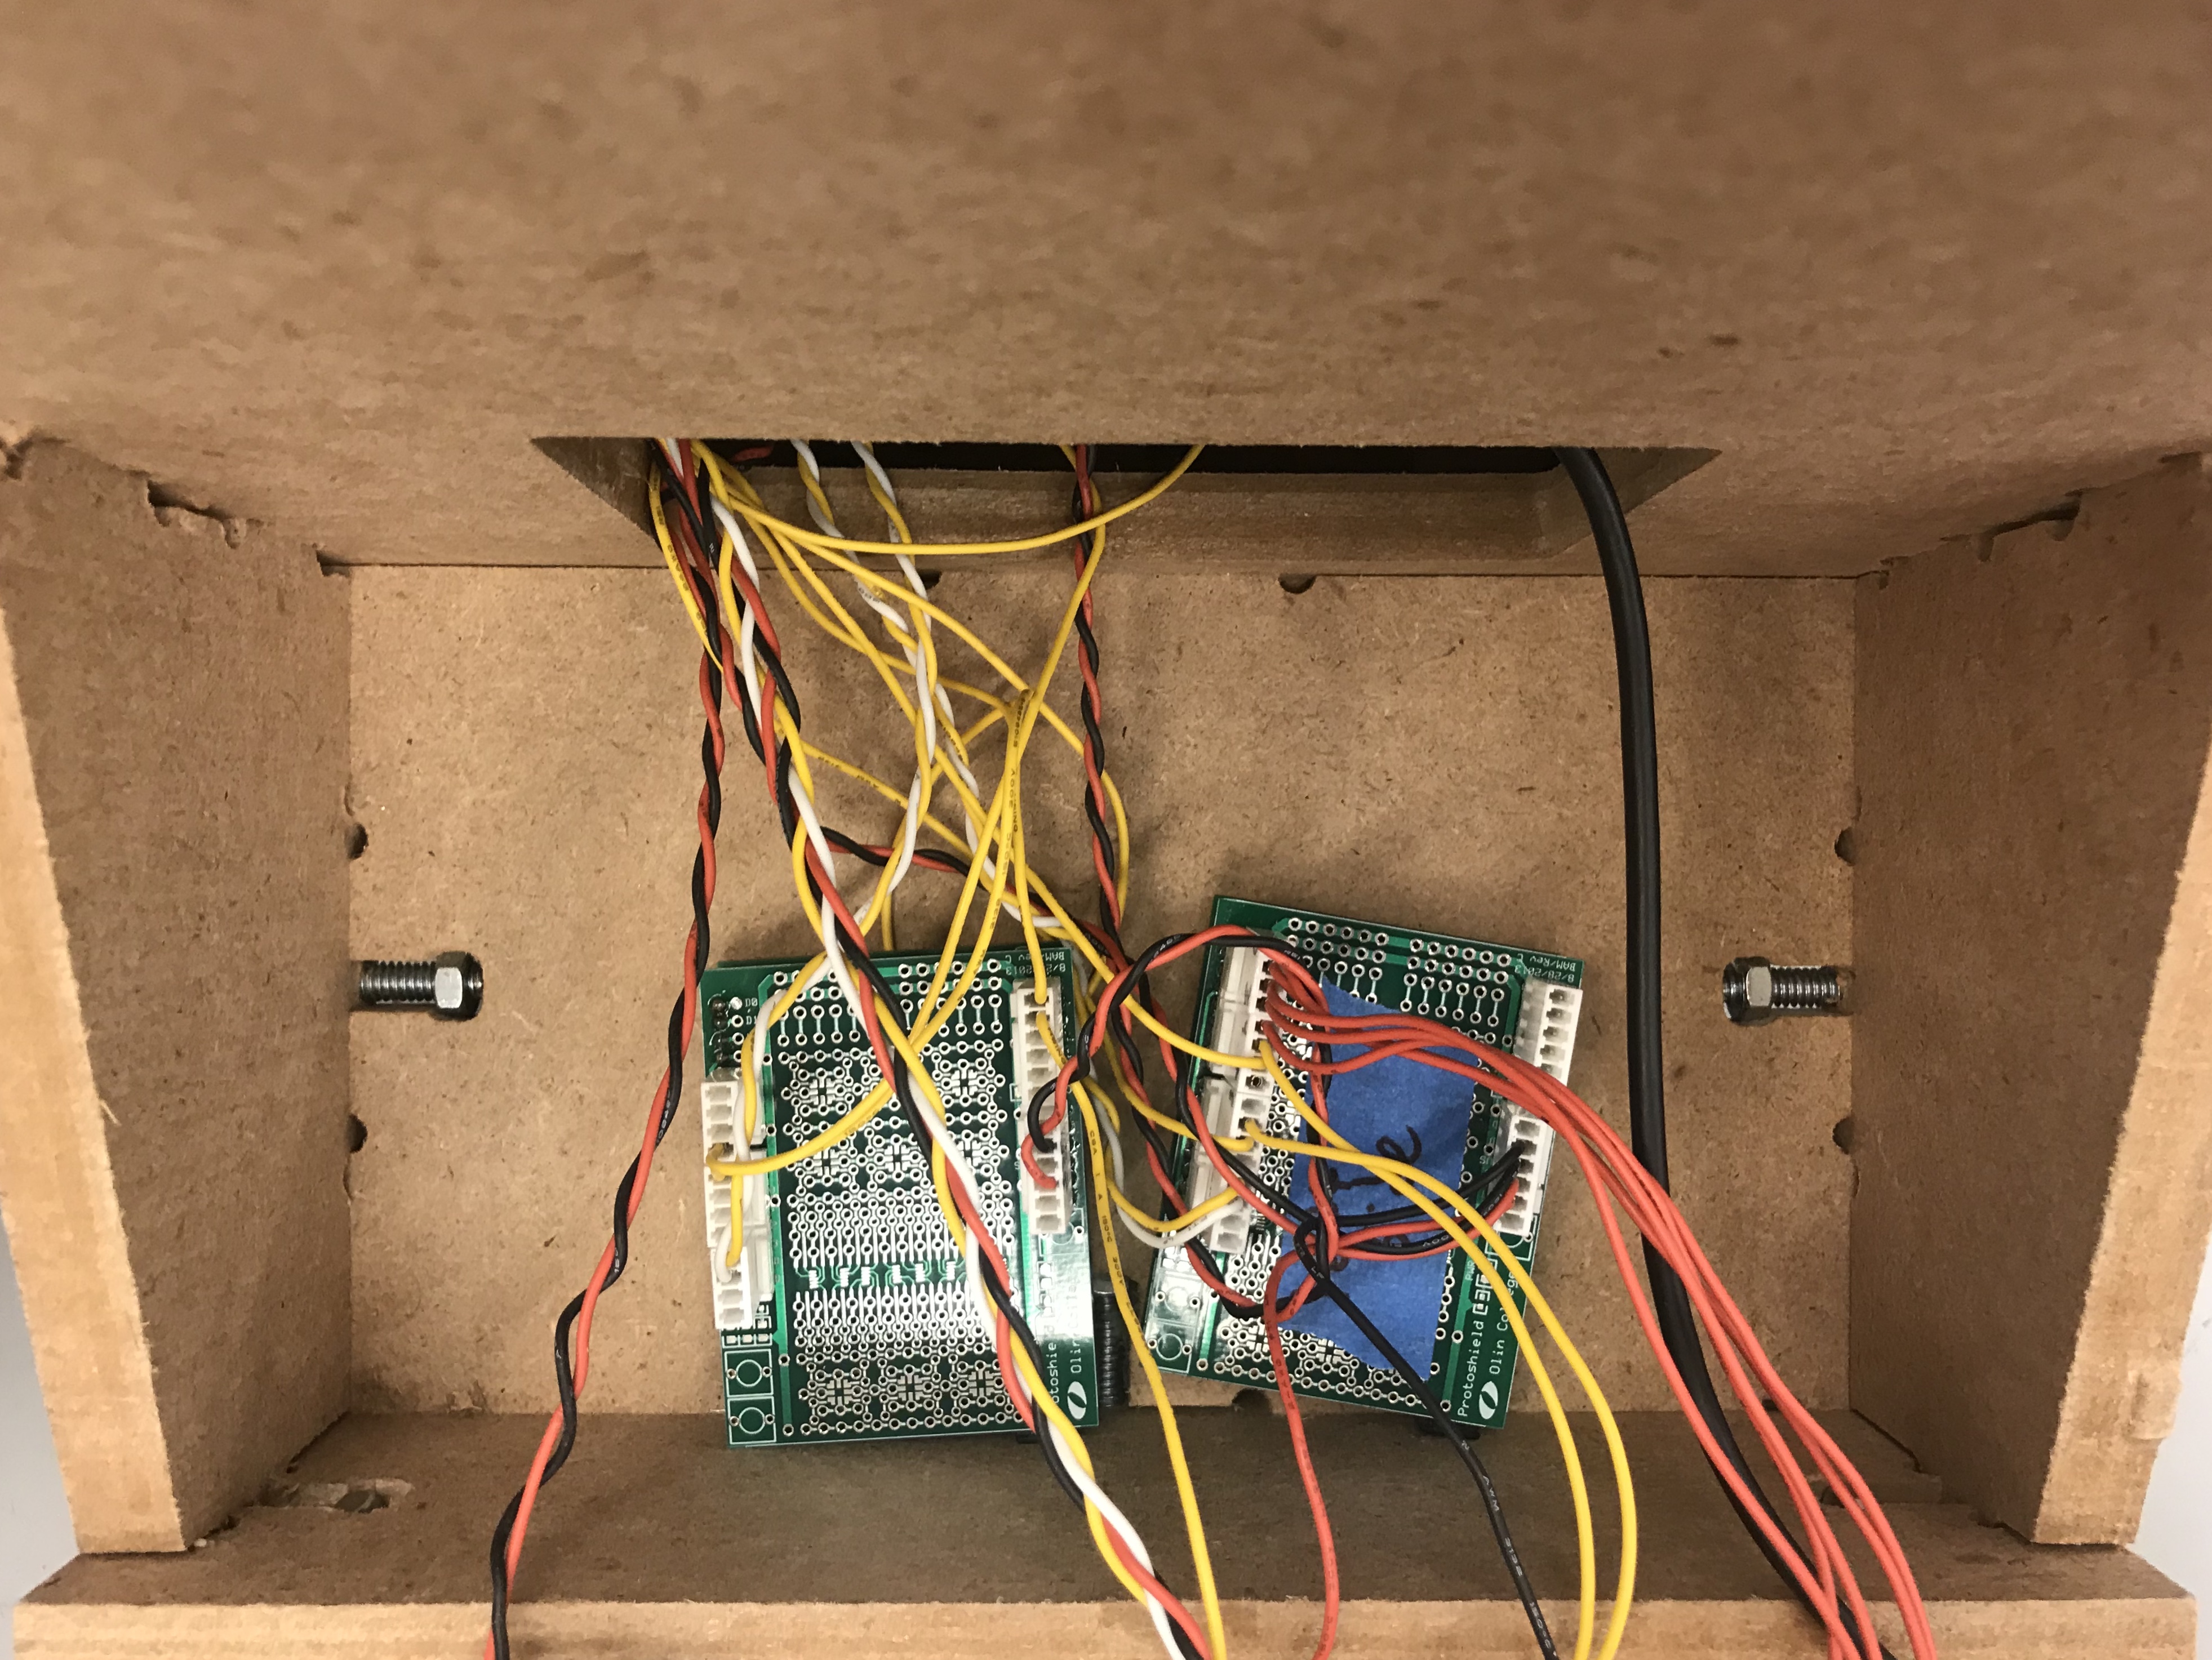
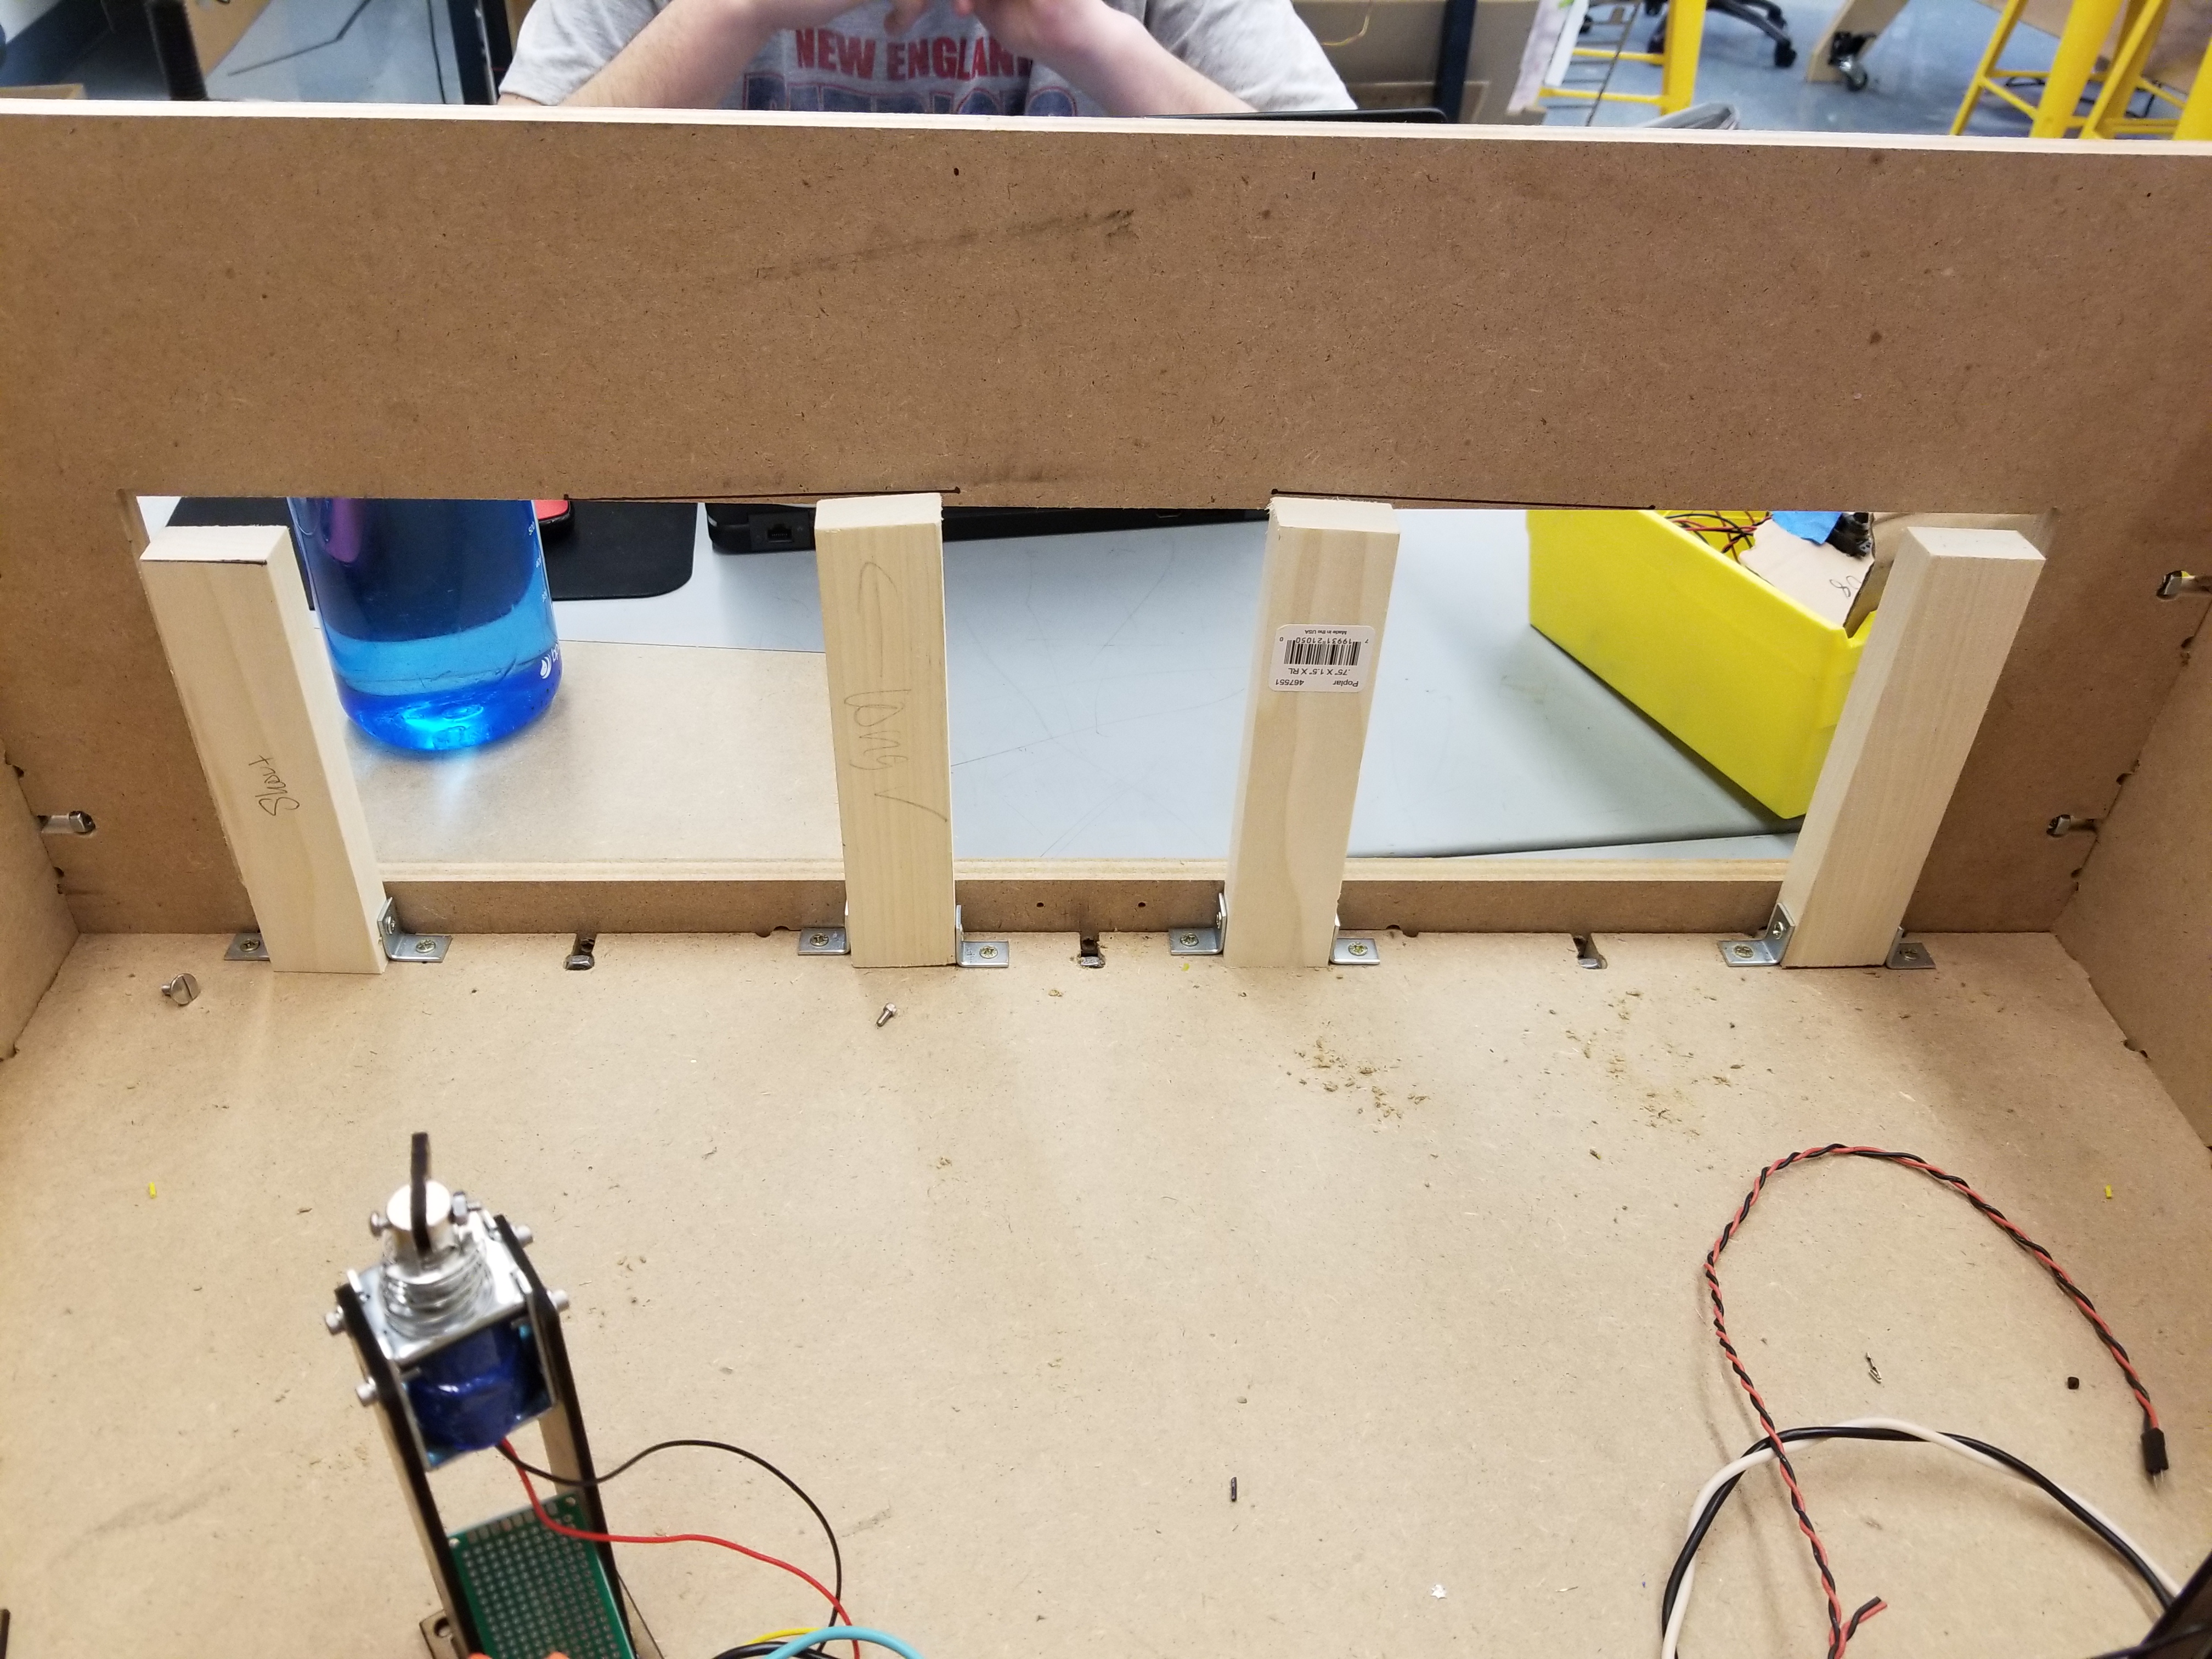
The control panels are mounted to the side of the enclosure using mortise and tenon joints, which are fastened with brackets on the inside for rigidity. The top panel features cutouts for the controls and is mounted to the rest of the control panel with magnets to create a structurally sound structure that can still be easily removed for troubleshooting. The inside of the control panel is hollow, with a 3" by 5" opening that connects it to the rest of the enclosure for easy wiring. Every element that the player interacts with is mounted to the front of the box, including the coin receptor, start button, two control panels, and two ball outputs.
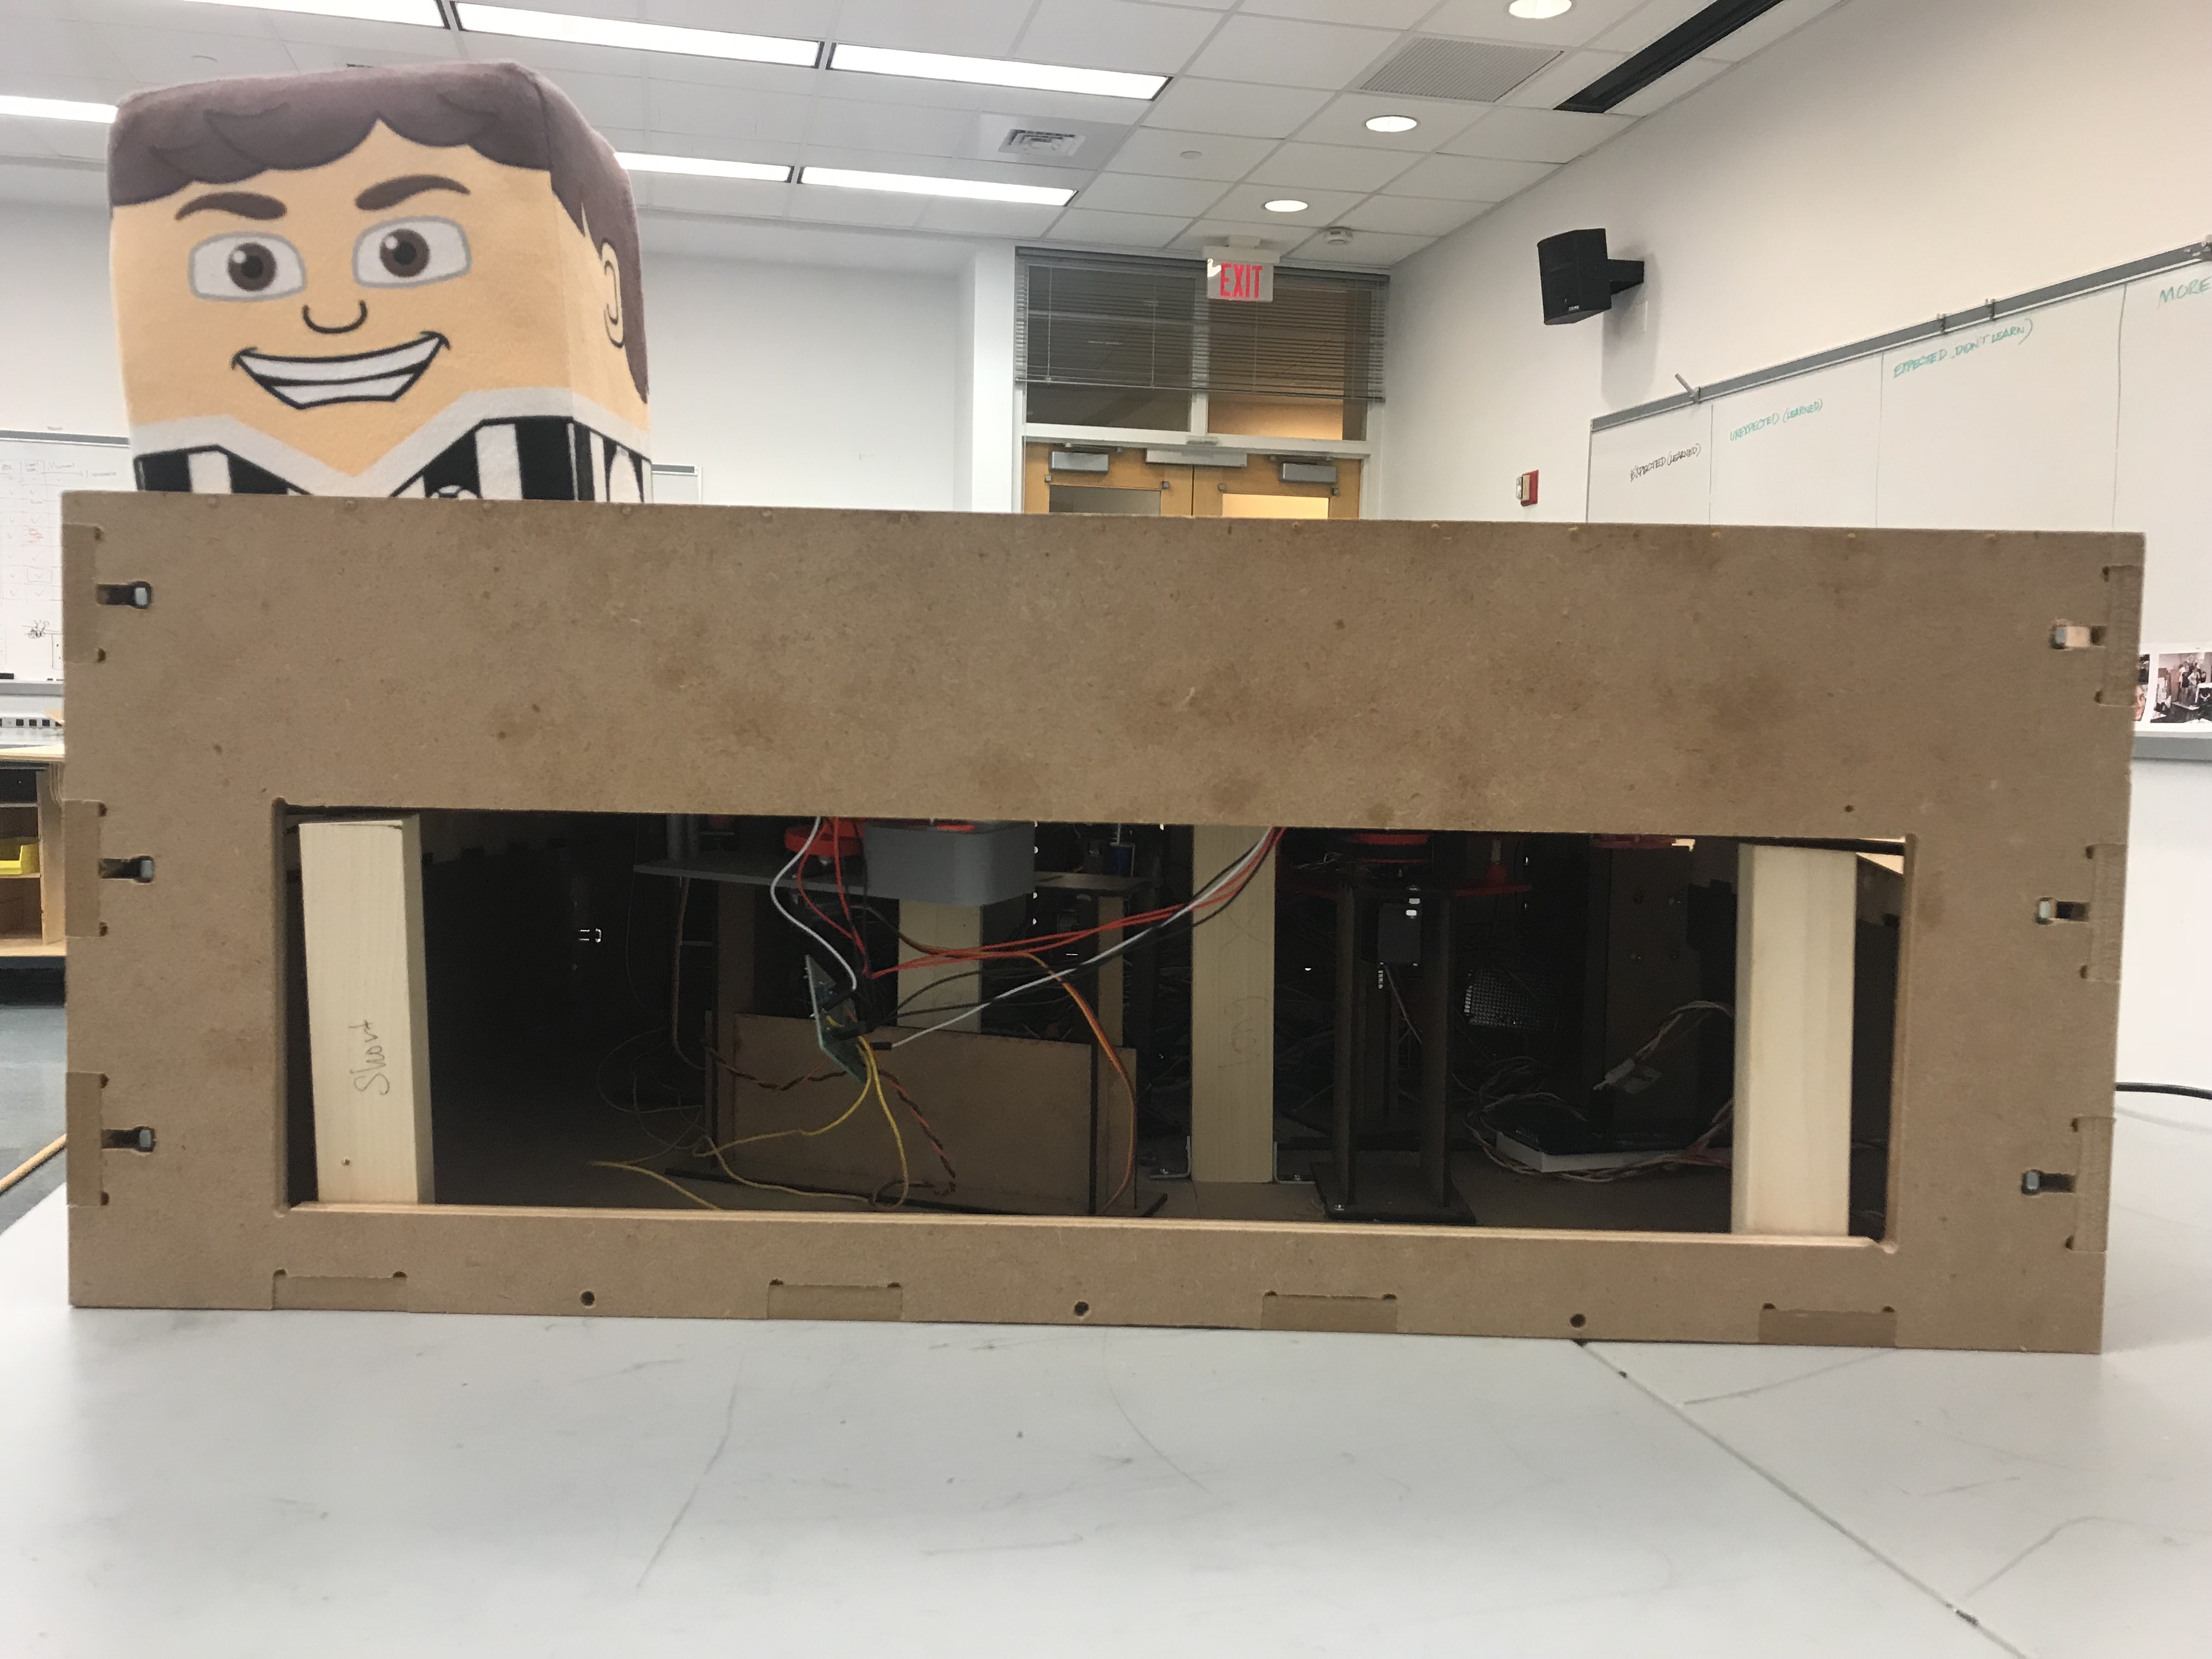
COMING SOON! There is a large opening on the back of the box with two cabinet doors from which electronics can be accessed. The enclosure is covered with a 1/4" polycarbonate sheet mounted on two piano hinges, containing stray balls and ensuring no foul play from the players.
The Playing Field and Ball Return
The playing field was laser cut from 1/4" plywood. It is supported by pillars on either end and has cutouts for the various obstacles. The playing field is sloped at a 3 degree angle so that if a ball falls off of an obstacle, it rolls towards the sides of the box and falls onto the ball return ramp. Supports for the playing field were measured and cut at an angle on a chop saw. Many of the obstacles are designed at a slight incline to counteract the angle of the playing field, so it was extremely important that the angle be precise. We set the position of each obstacle in SolidWorks to determine where the mounting cutouts would be placed such that the ball could move from one obstacle to the next.
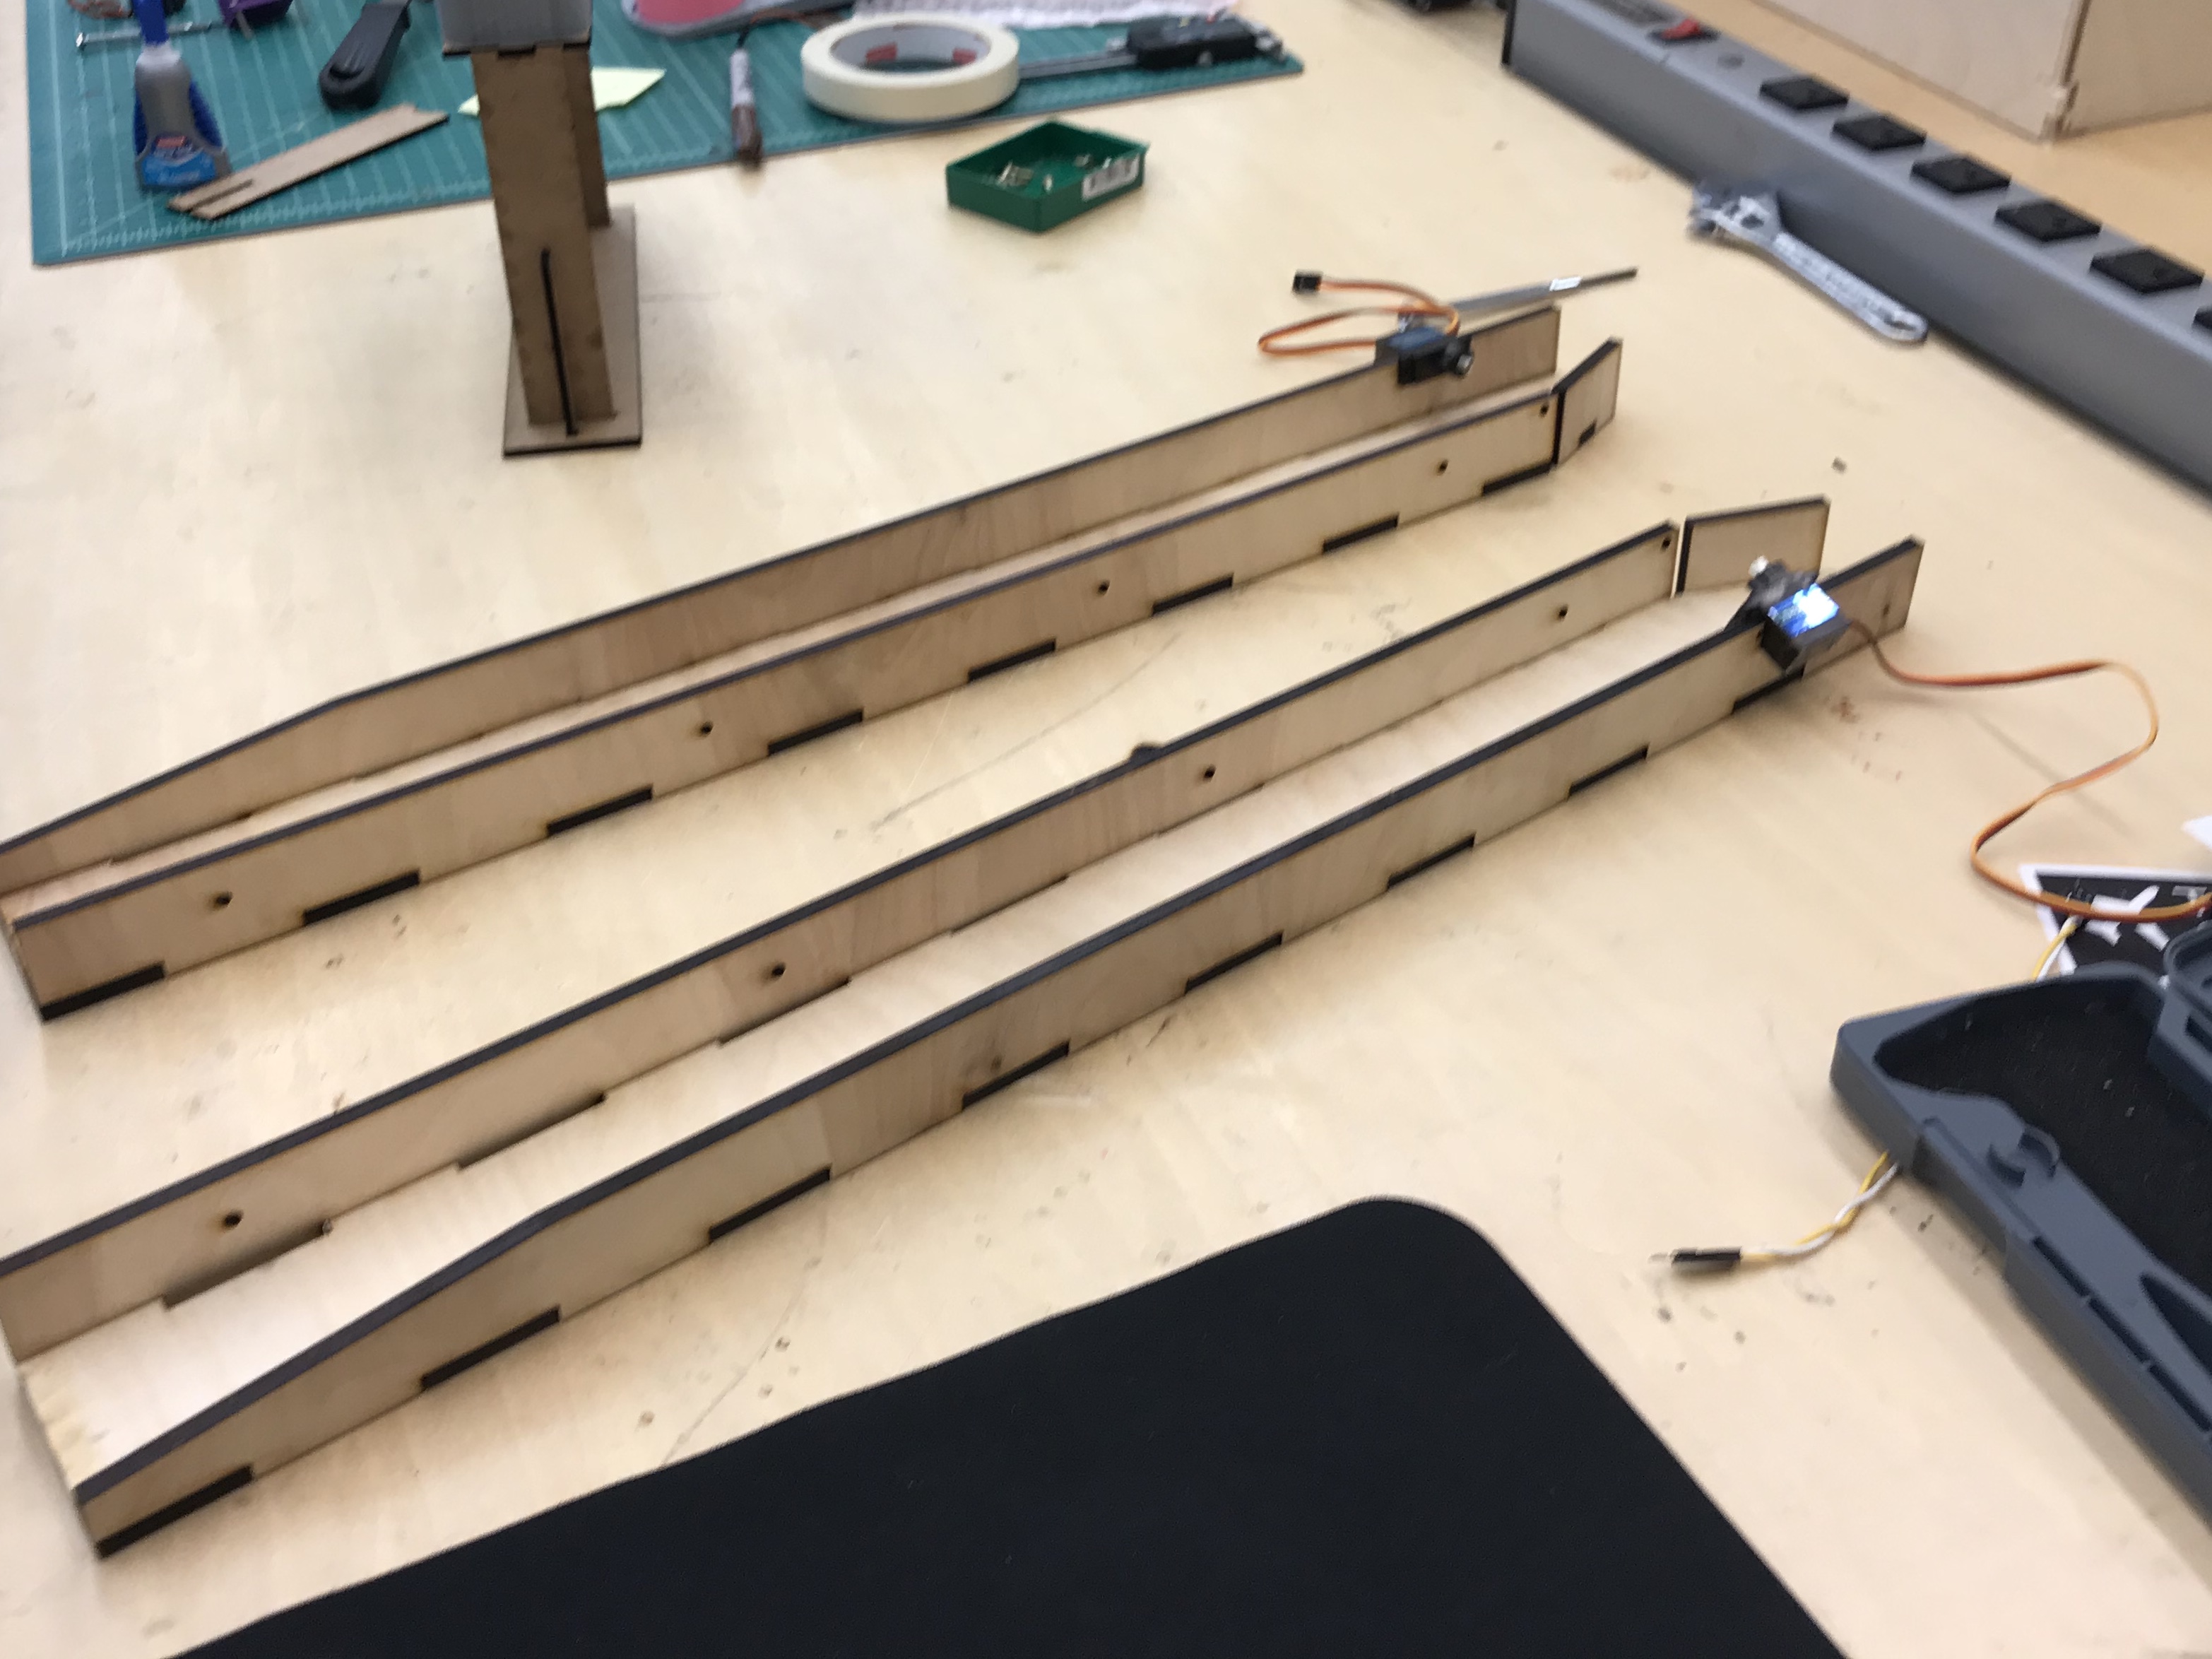
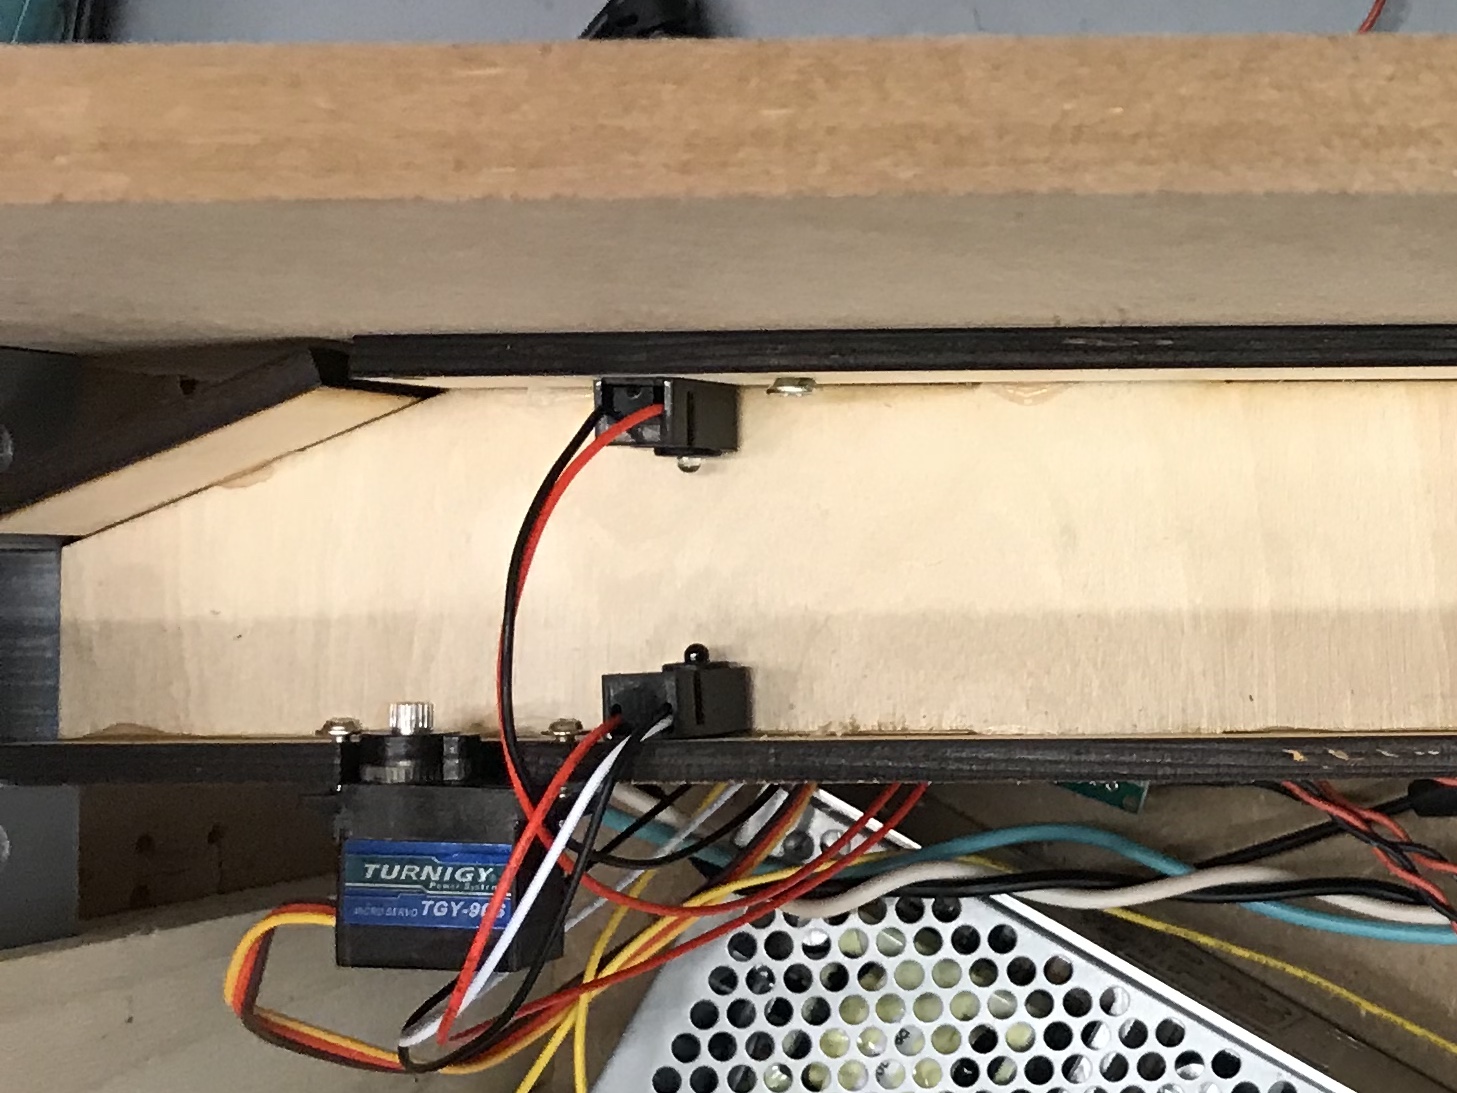
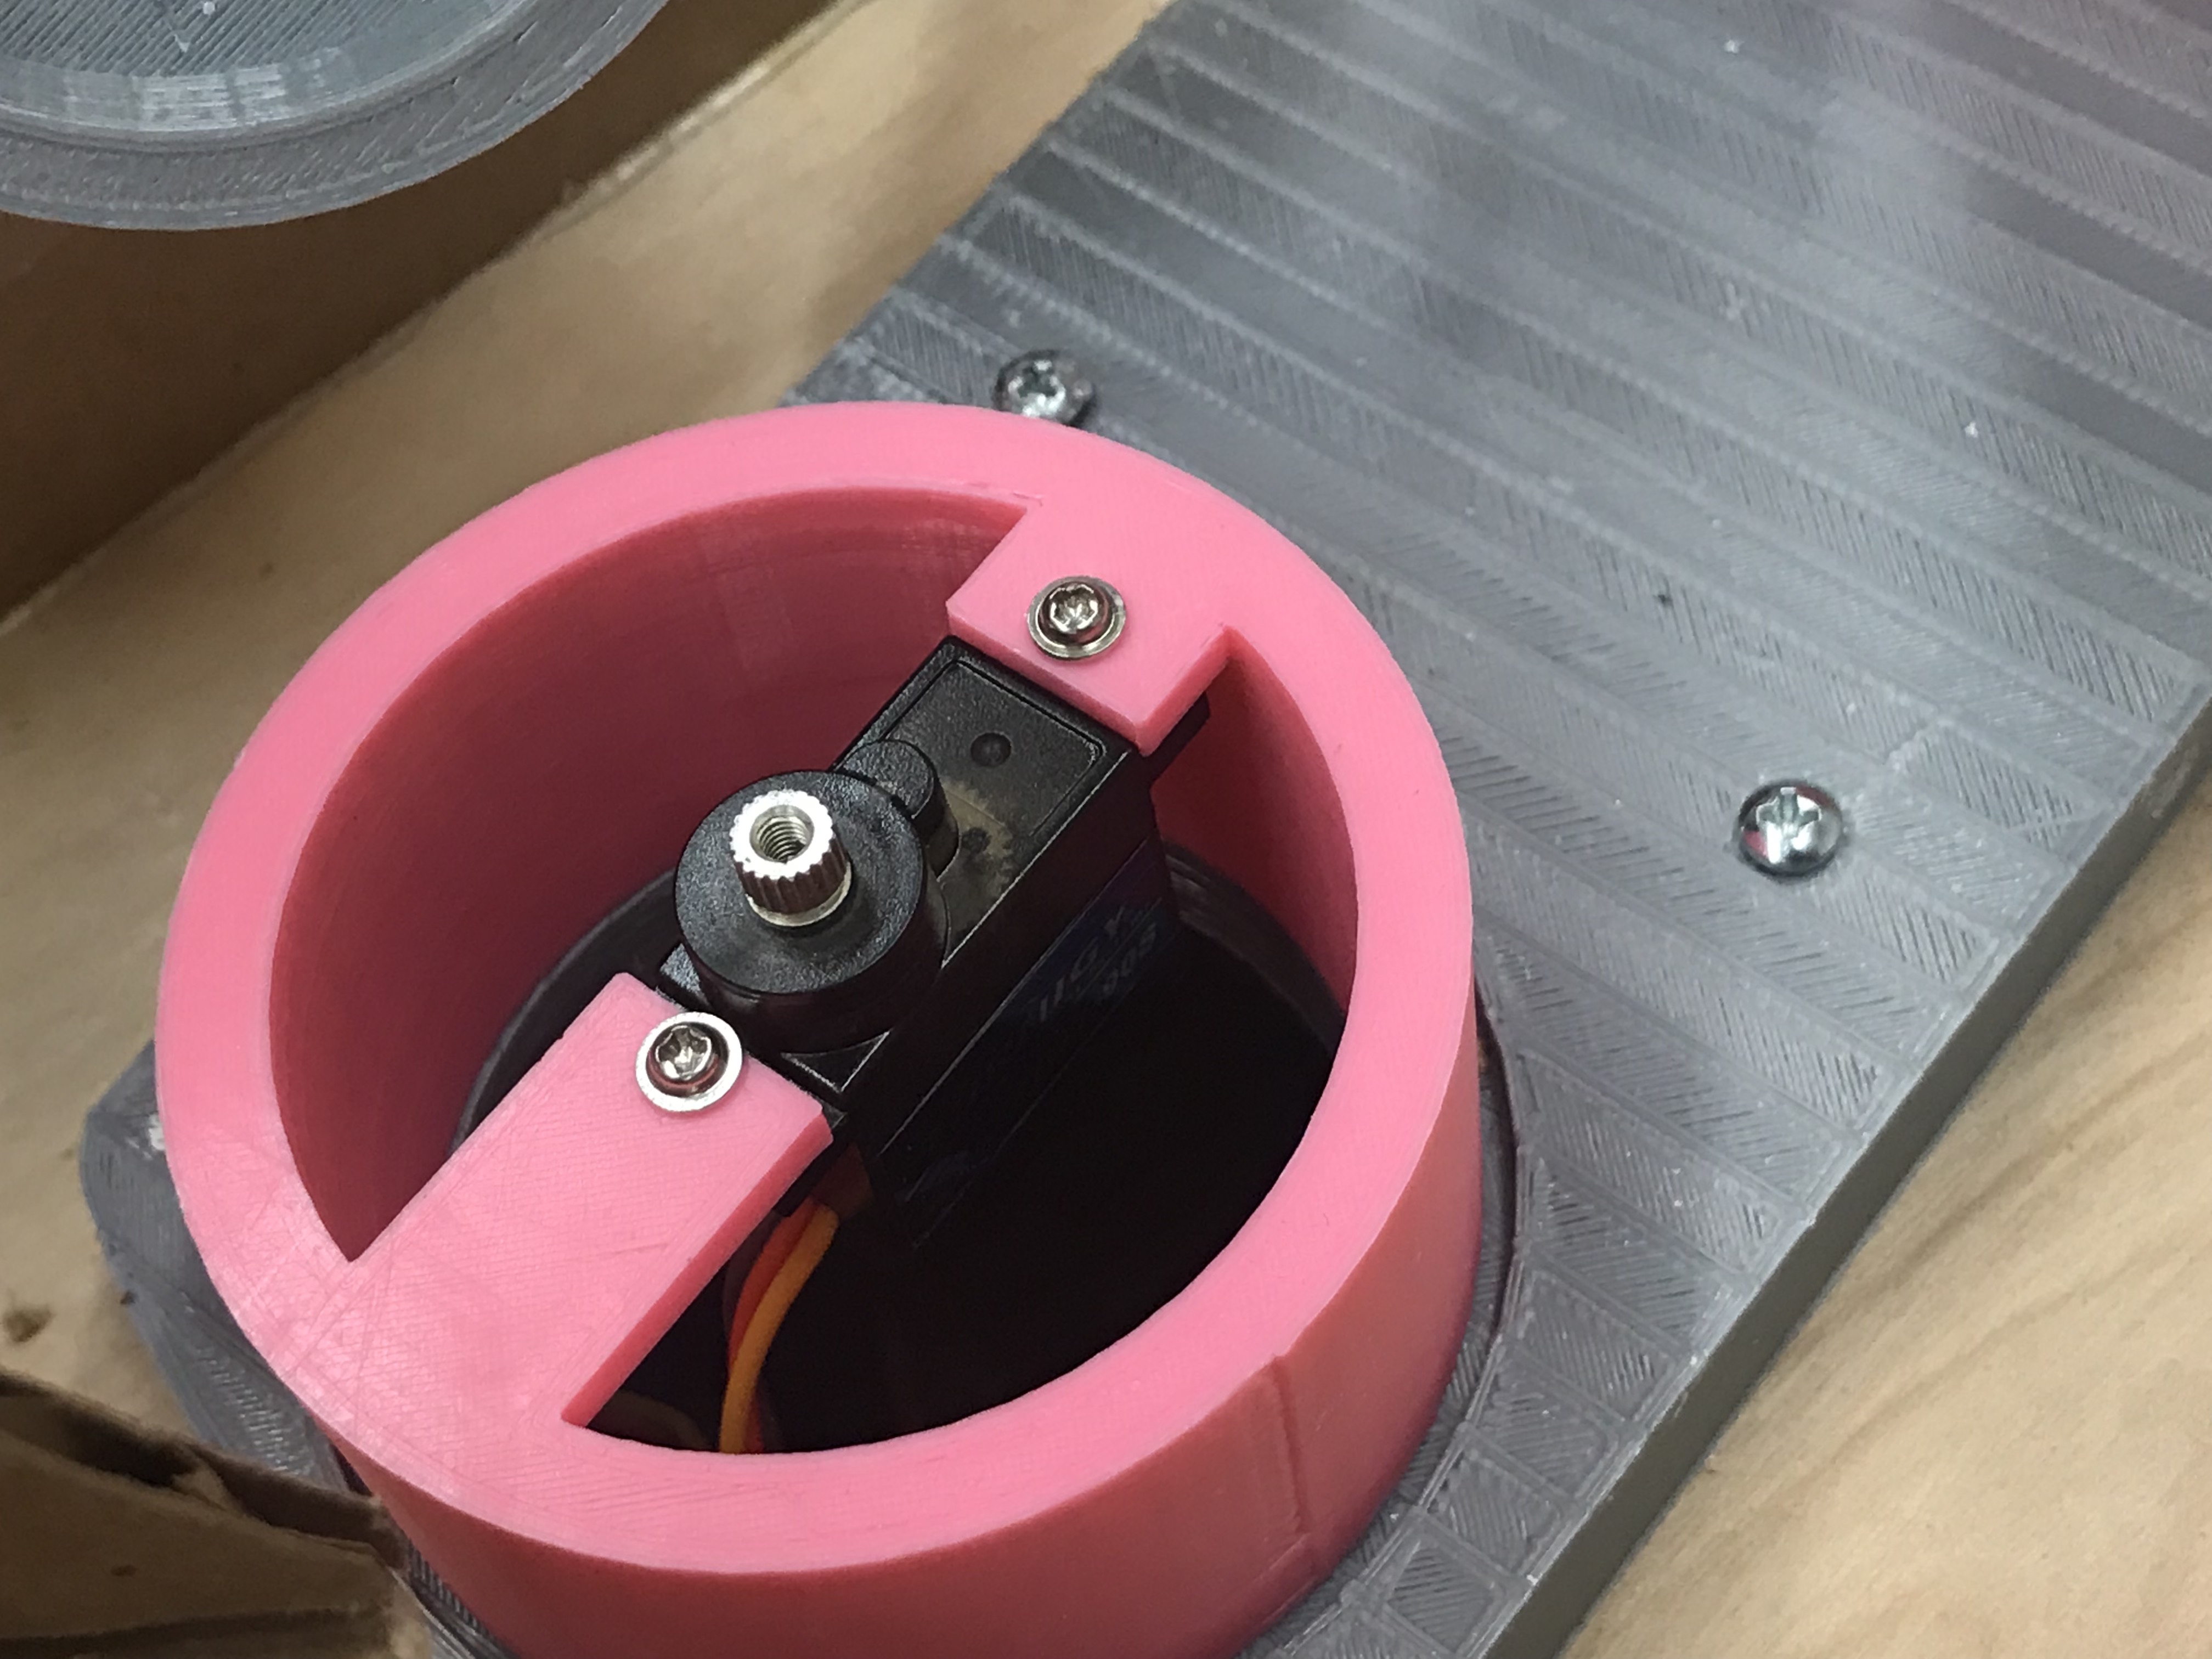
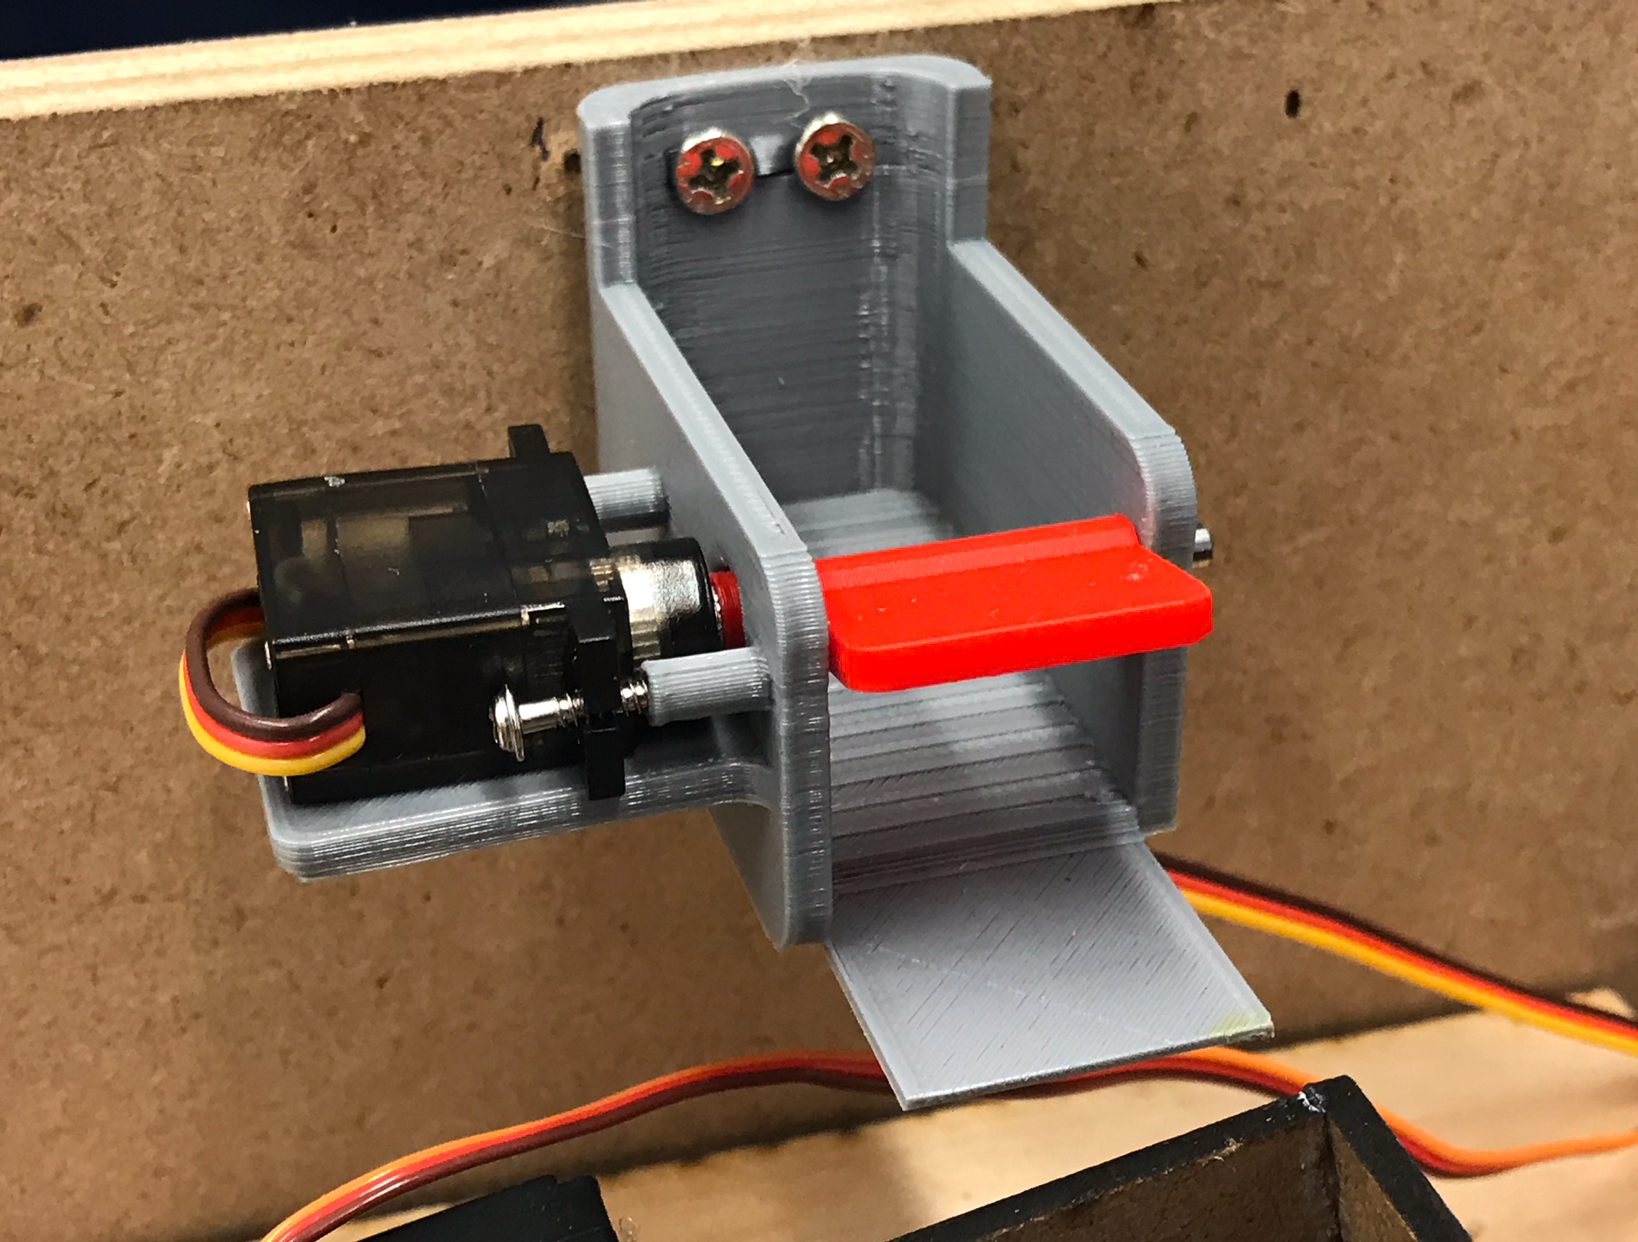
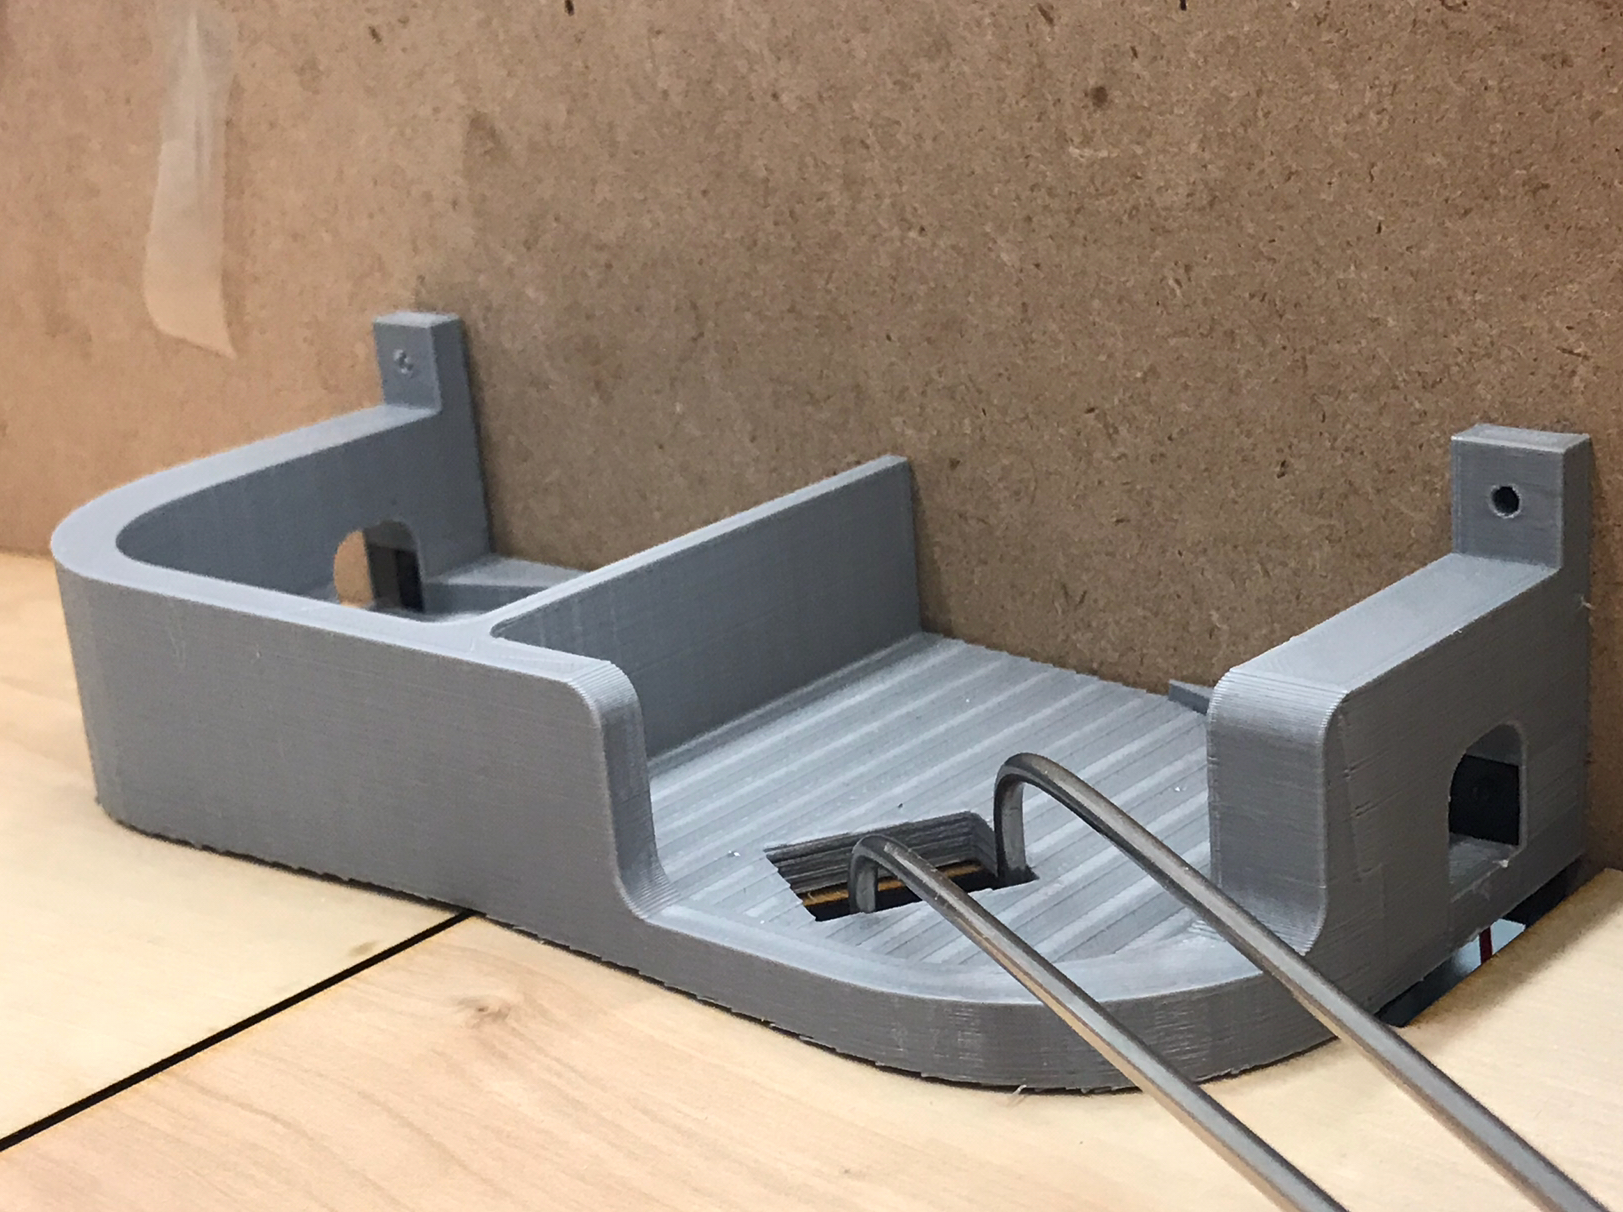
The ball return is designed to catch the ball after it falls off of the playing field and return it through the hole at the front of the box. It consists of a ramp on either side that slopes towards the front of the box. Towards the end of each side of the ball return, there is a door attached to a servo and a break beam sensor. The door allows us to keep the ball inside the game when the game is not running, and the break beam sensor lets us know when a ball has fallen into the ramp.
Right Side Obstacles
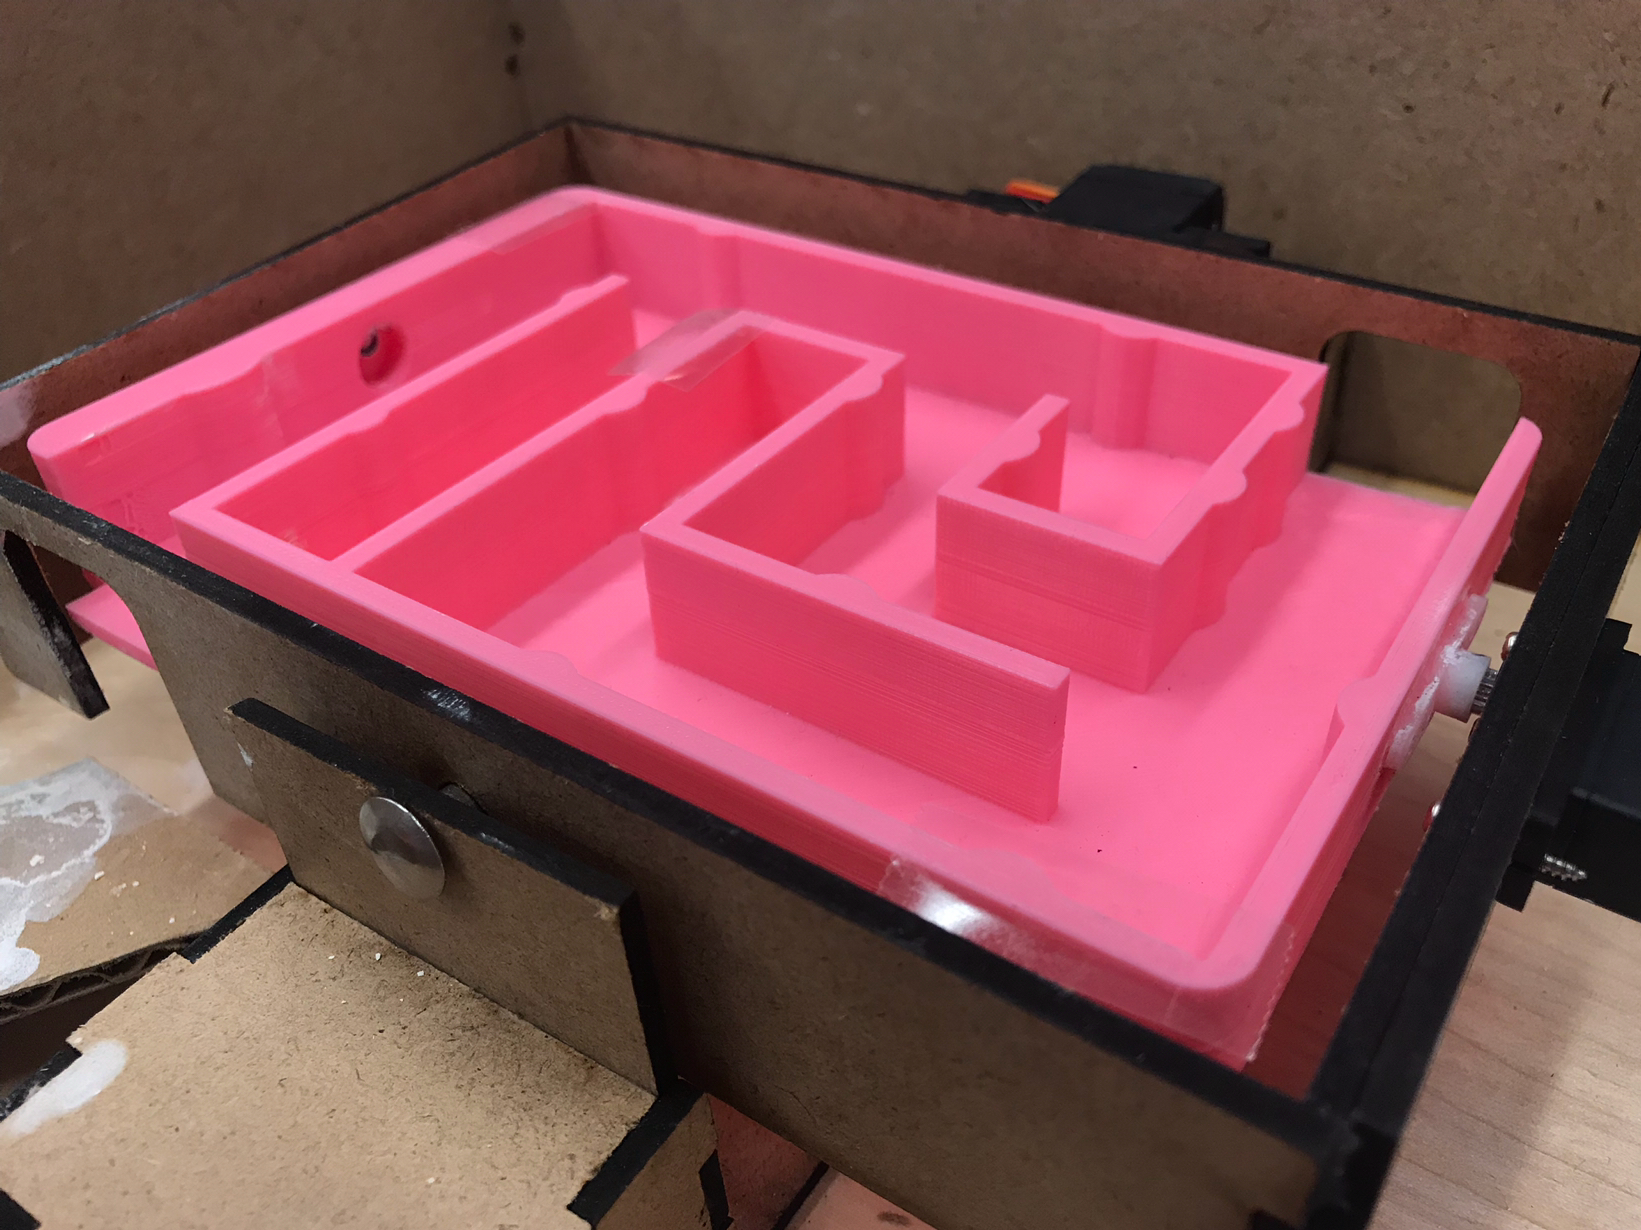
Uncovered Tilt Maze
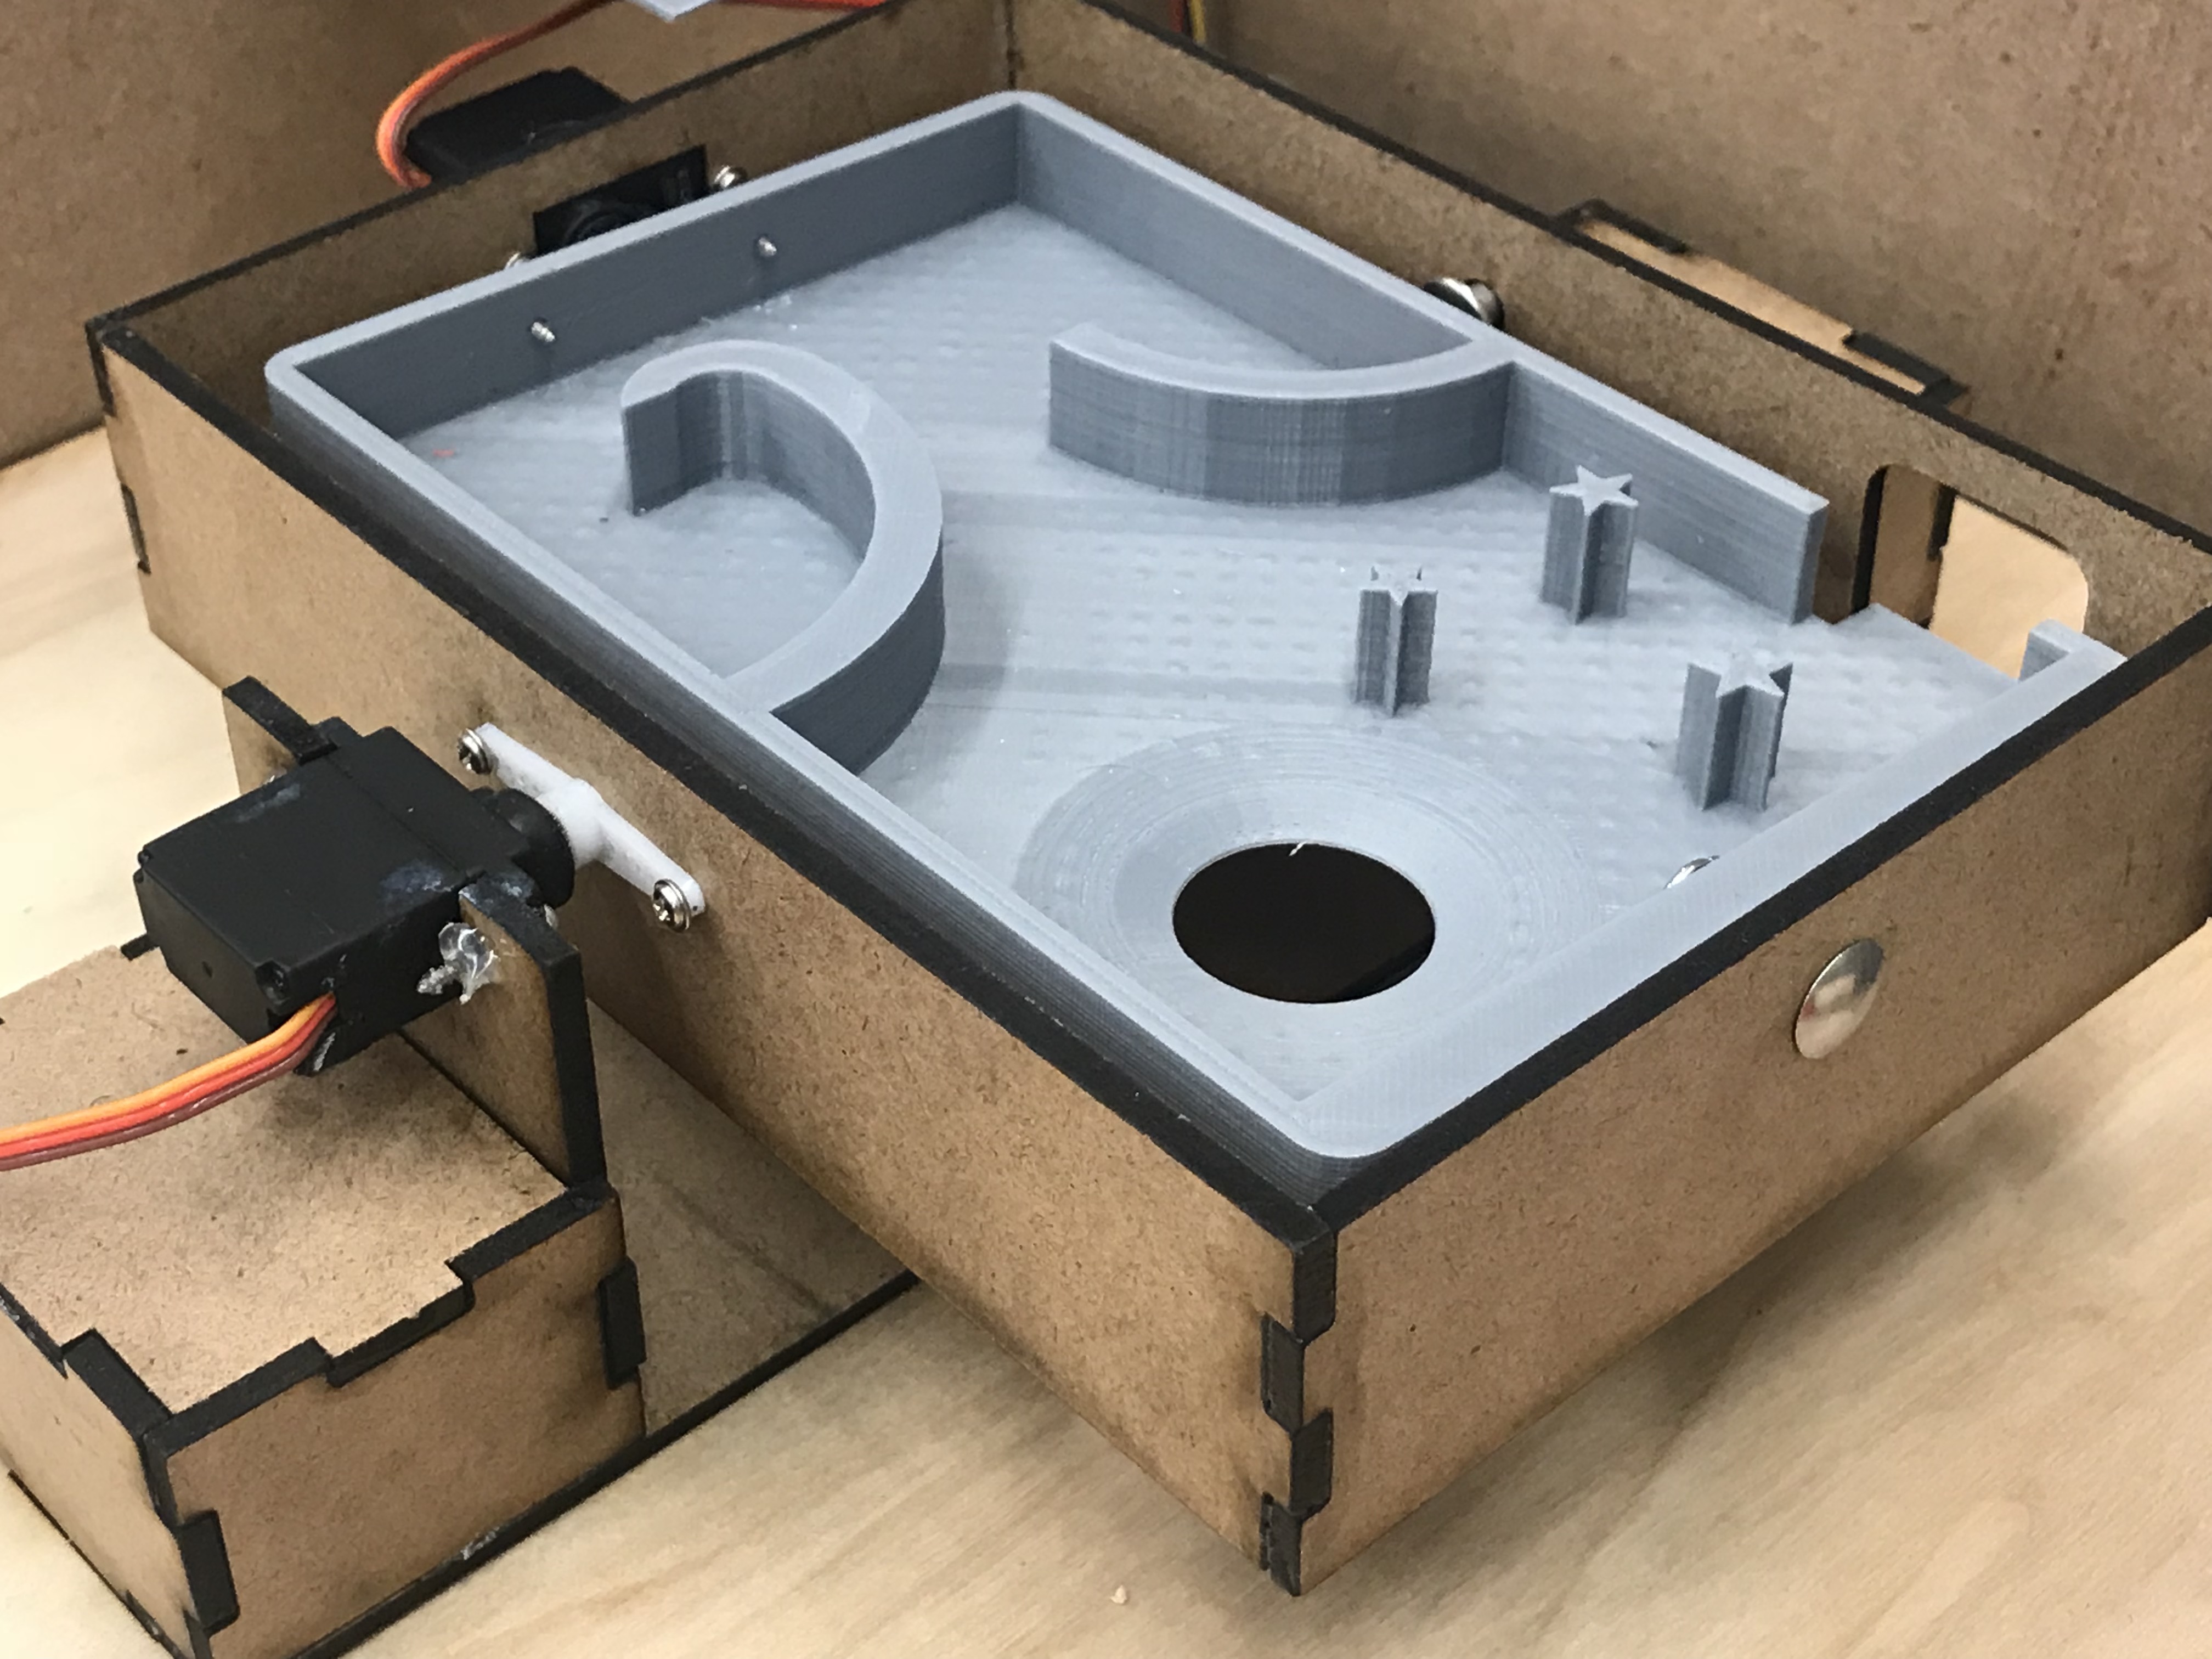
In this obstacle, the player uses a joystick to control the tilt of the maze. The player has to navigate from one side to the other without getting stuck or falling into the black hole. The 3D printed tilt maze is mounted to a servo on a laser cut rectangular frame, allowing for rotation of one axis, and that entire assembly is mounted to another servo on the board, allowing for control of the other axis.
Popper
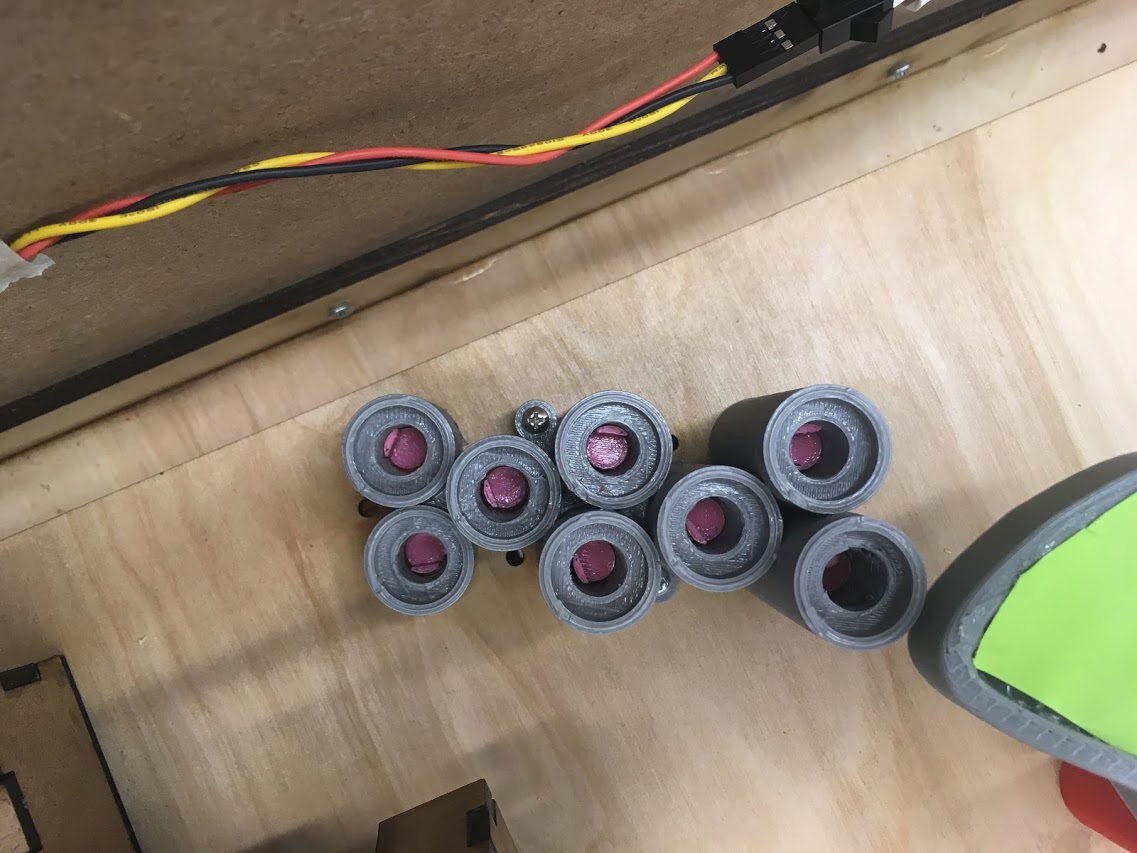
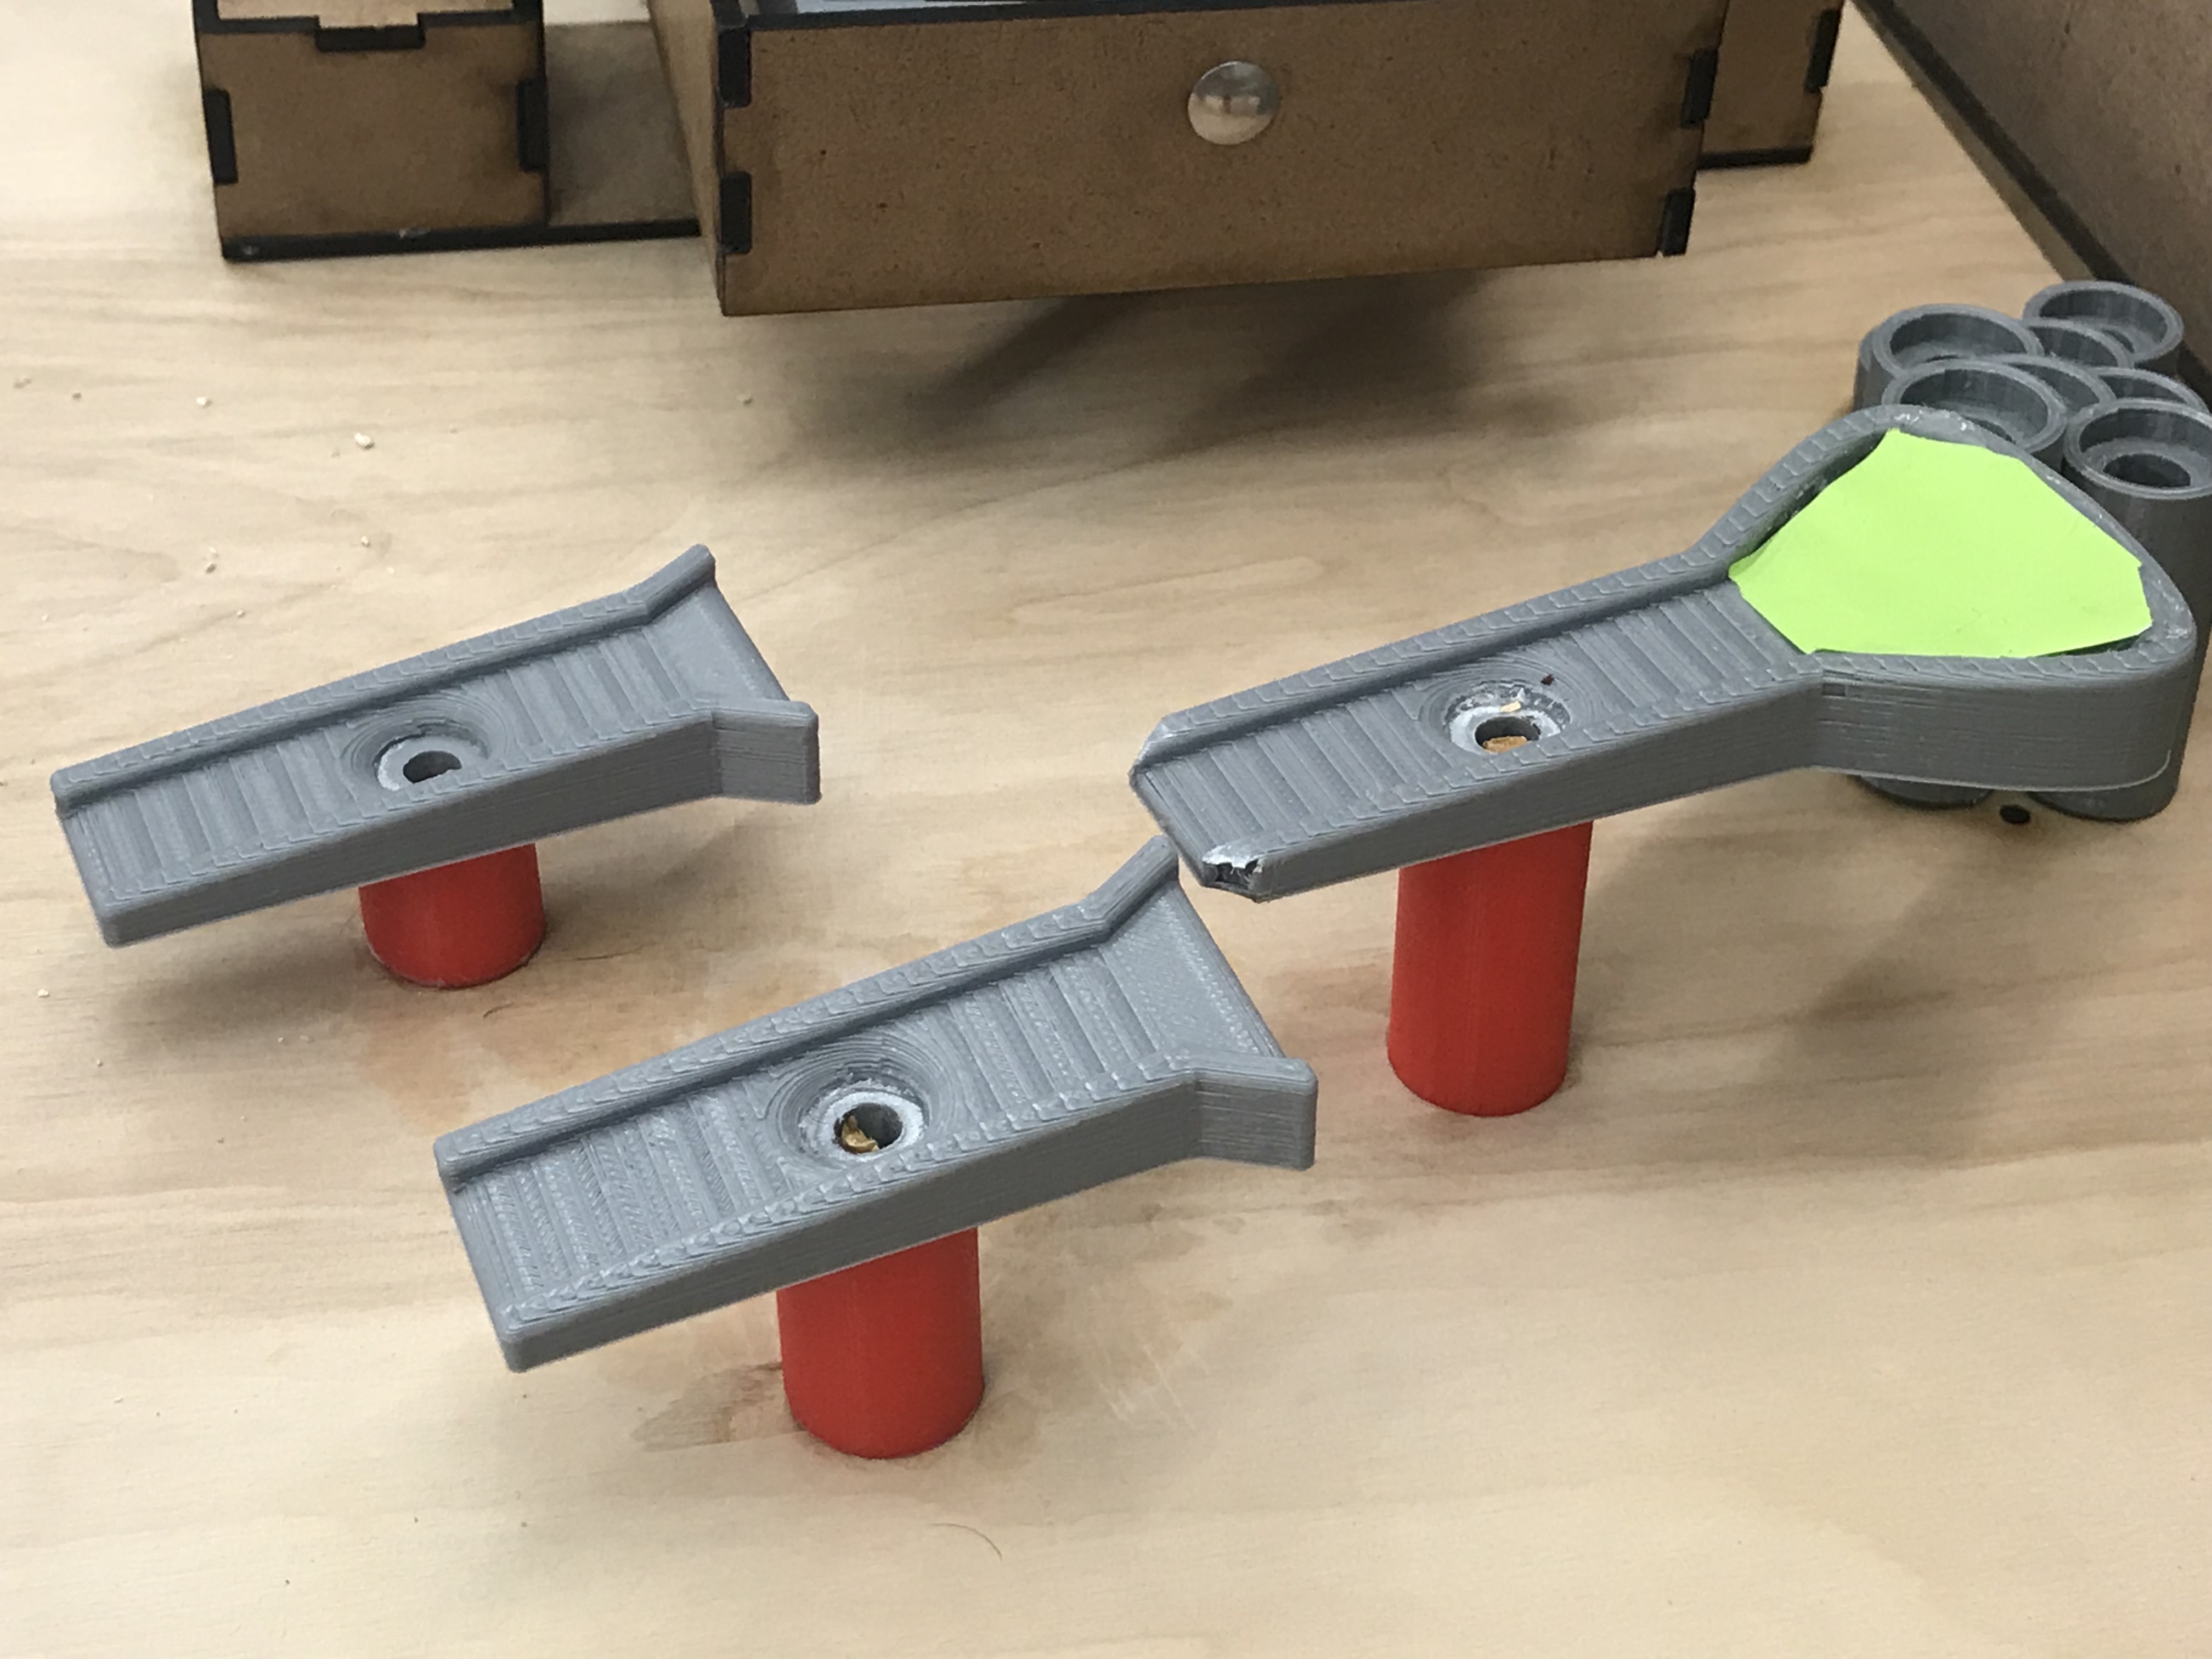
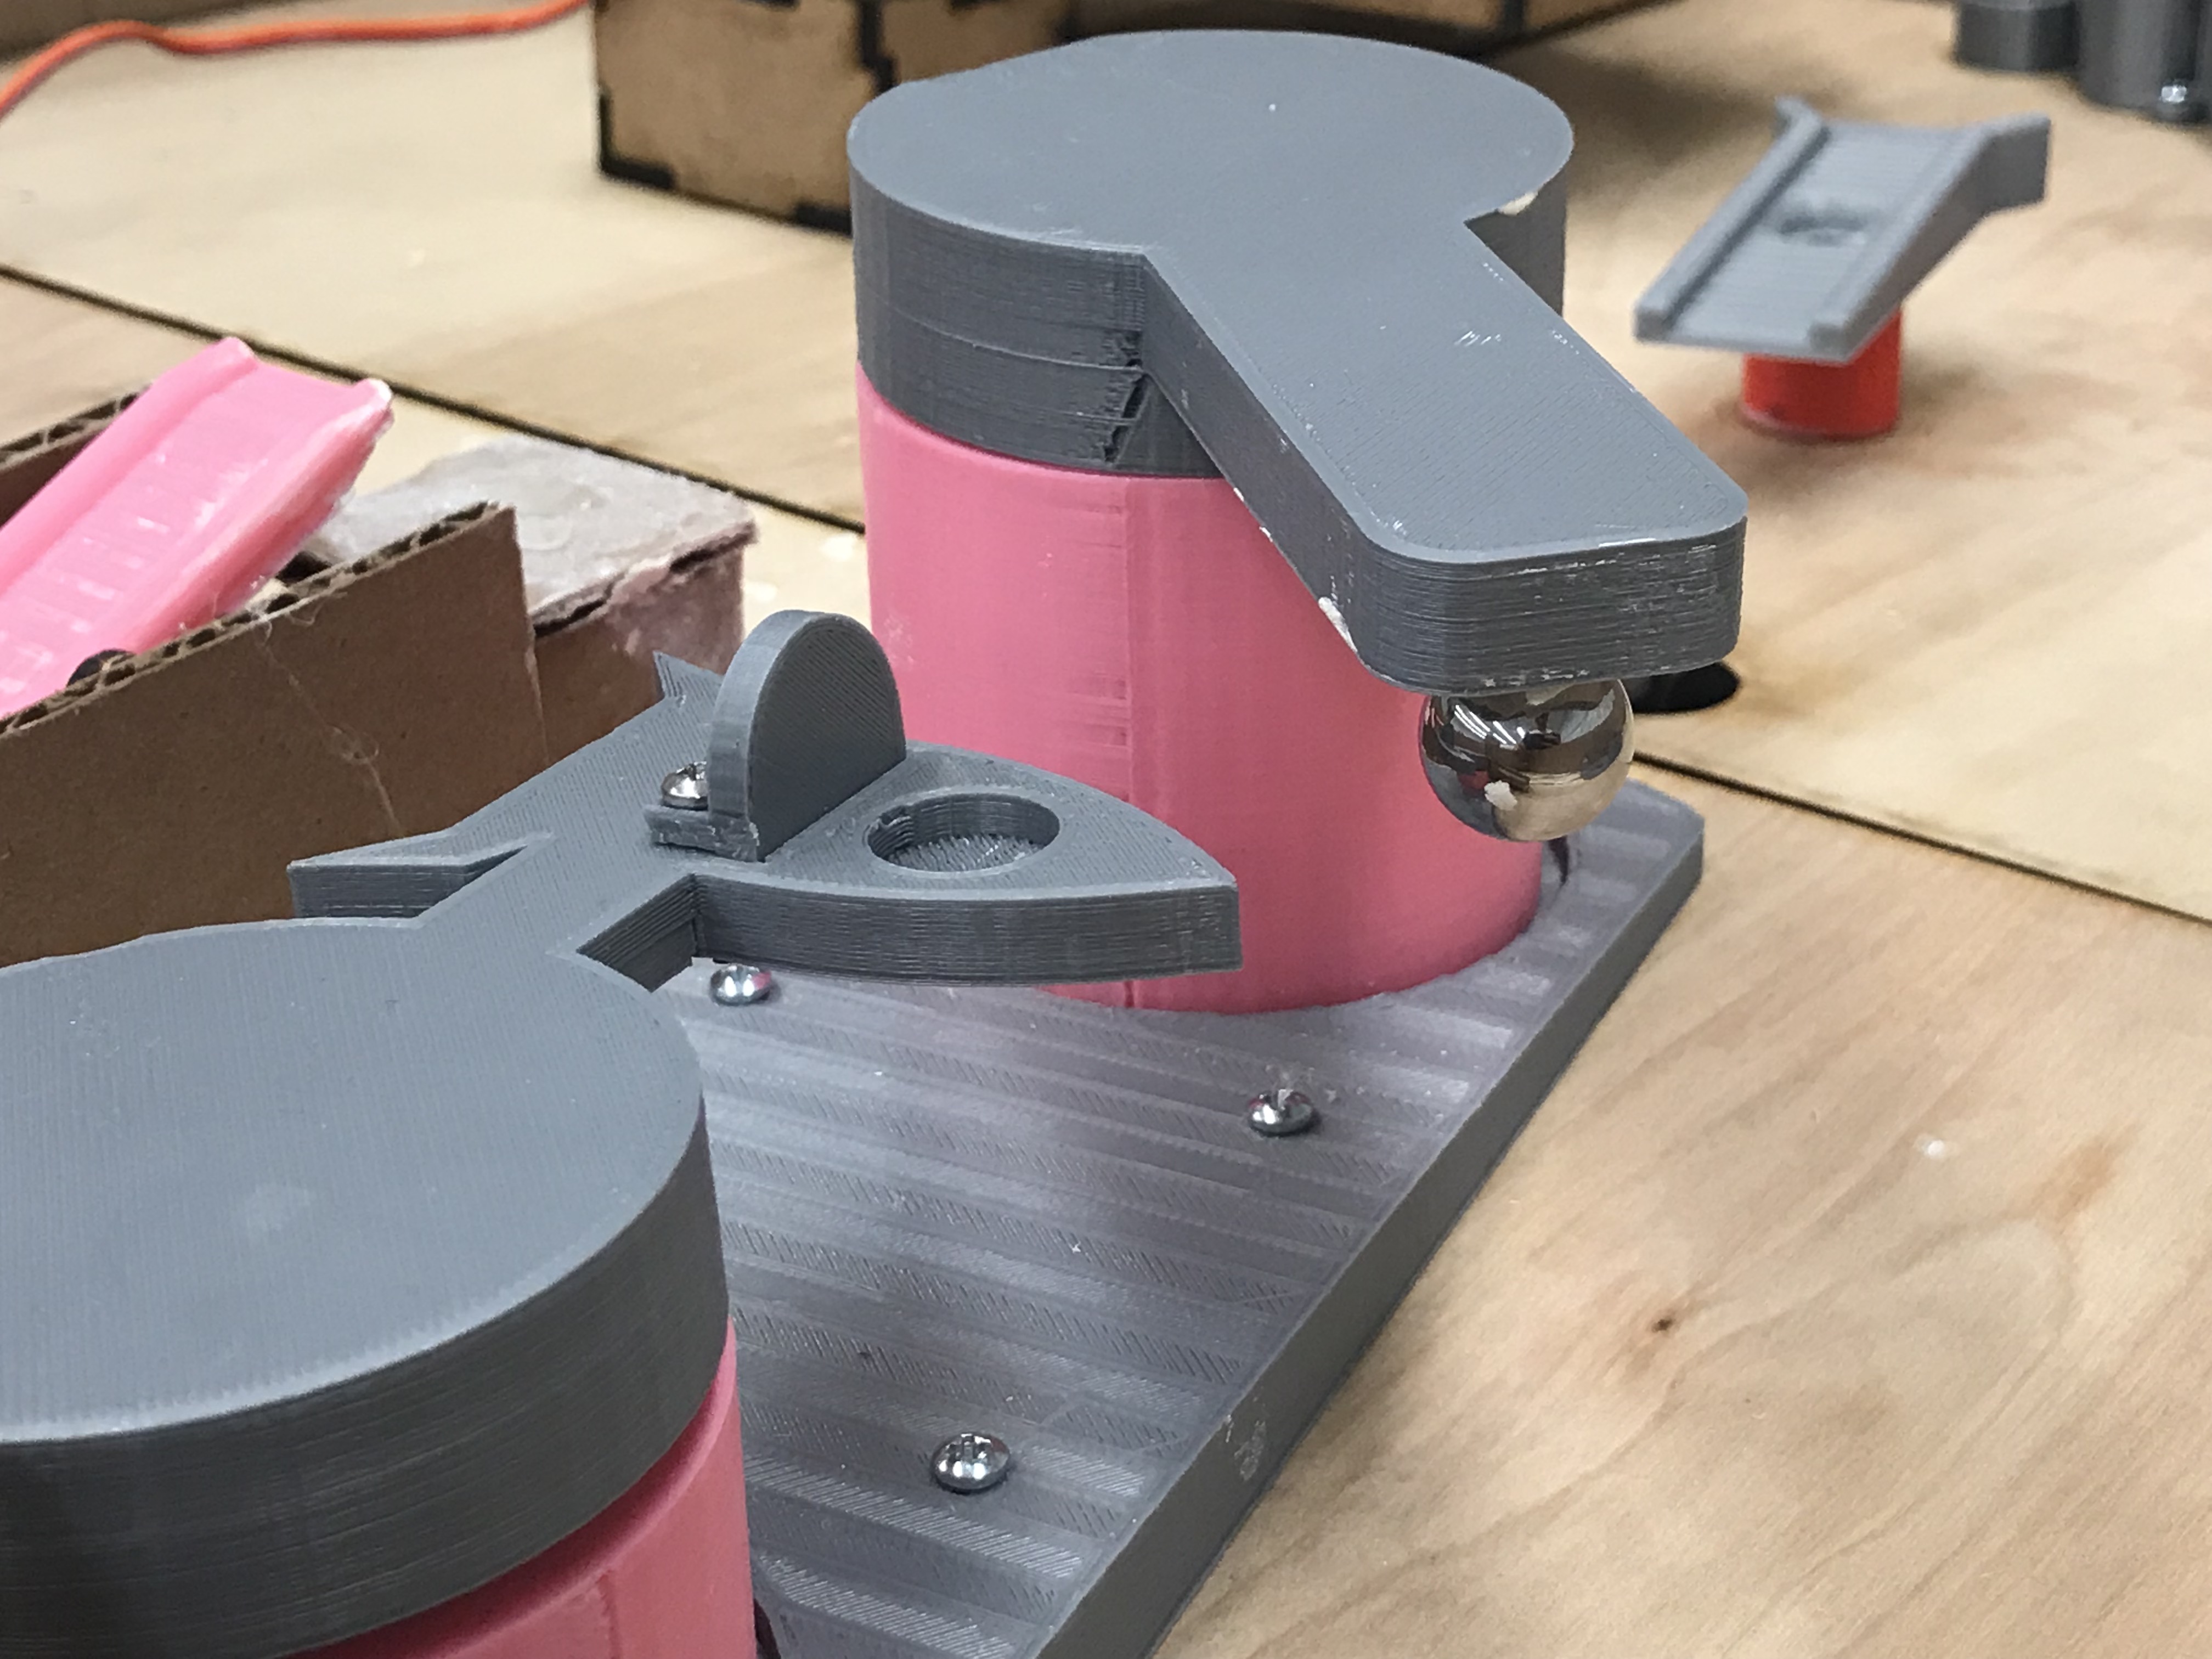
The player has to pop the ball from one level to the other to pass through this obstacle. This obstacle has a corresponding force gauge that determines how hard the pop will be when the player presses the button. If the player presses the button at the wrong time, the ball either won't pop high enough to get to the next obstacle, or will fly off the obstacle. The popper is made from two 3D printed parts: the round shells that hold the ball, and a bed of cylindrical pins that rest on a solenoid and poke through each shell to propel the ball. The top of each pin is angled to accurately push the ball from one level to the next.
Swishel Swashel
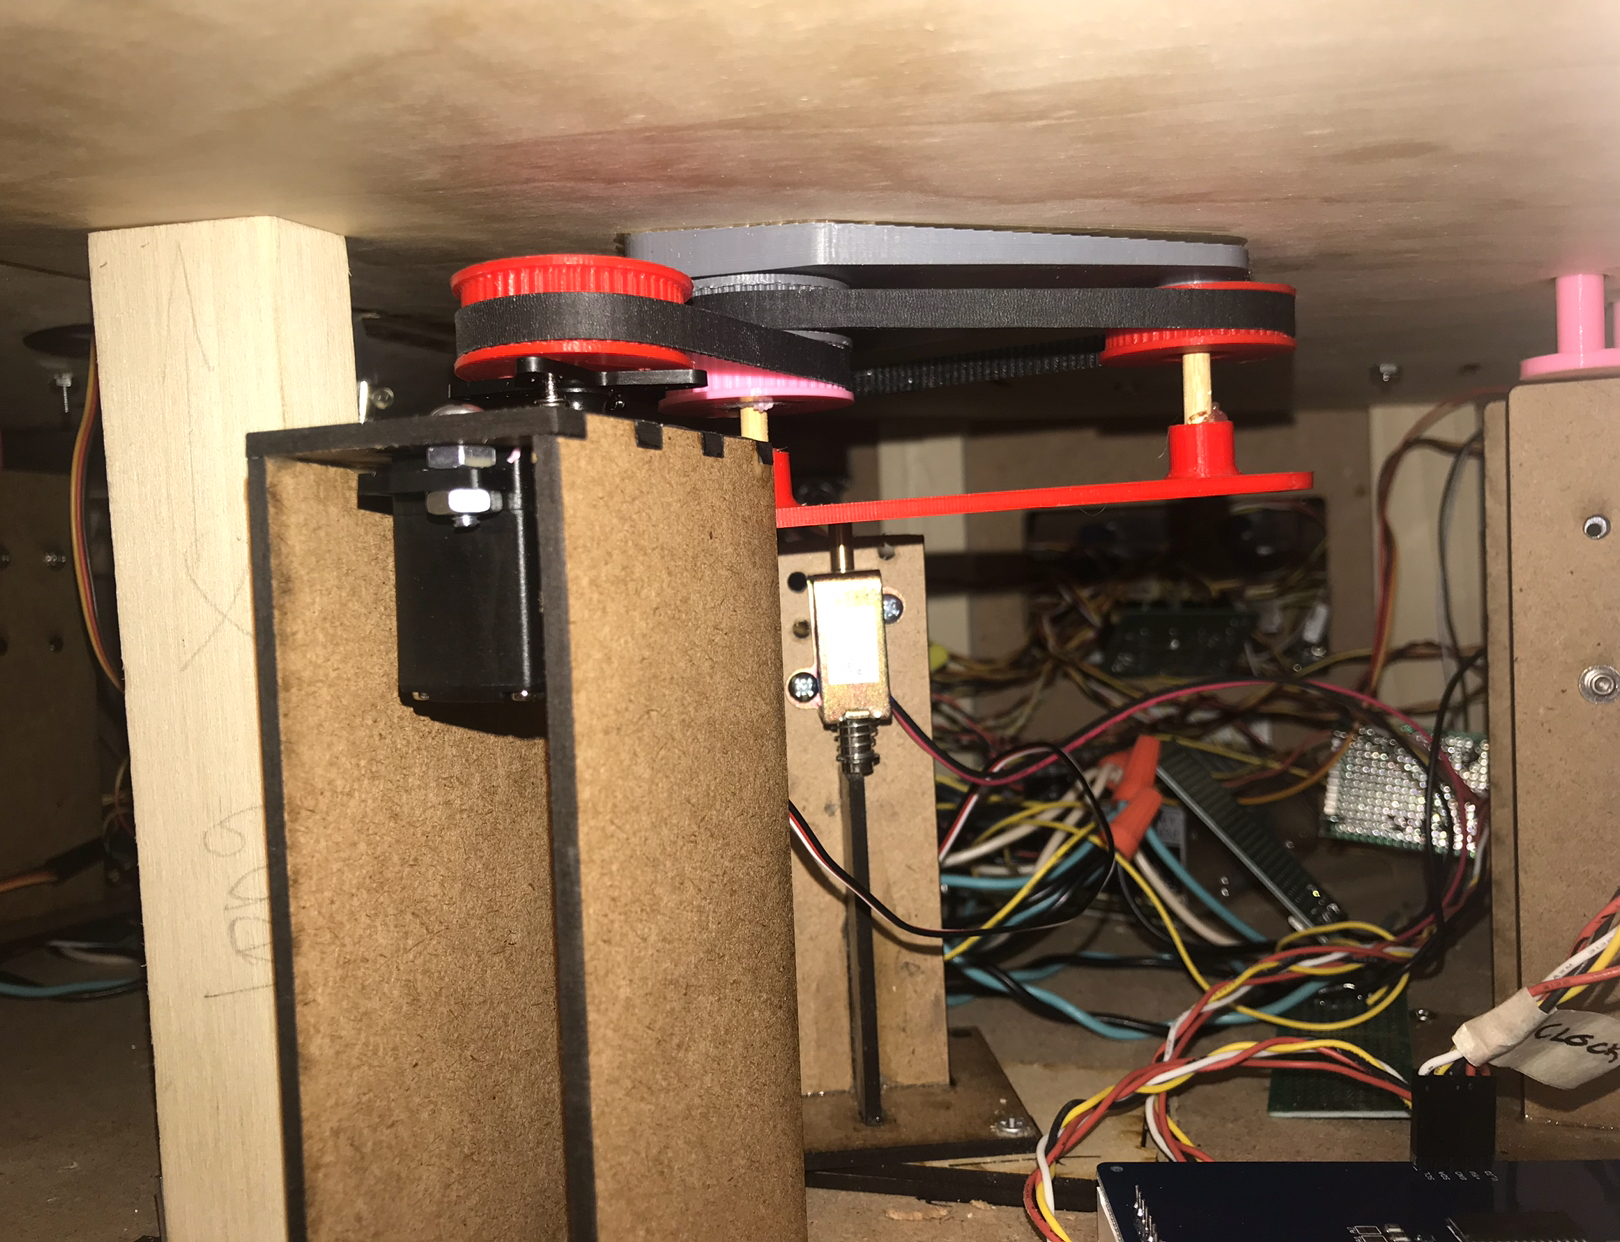
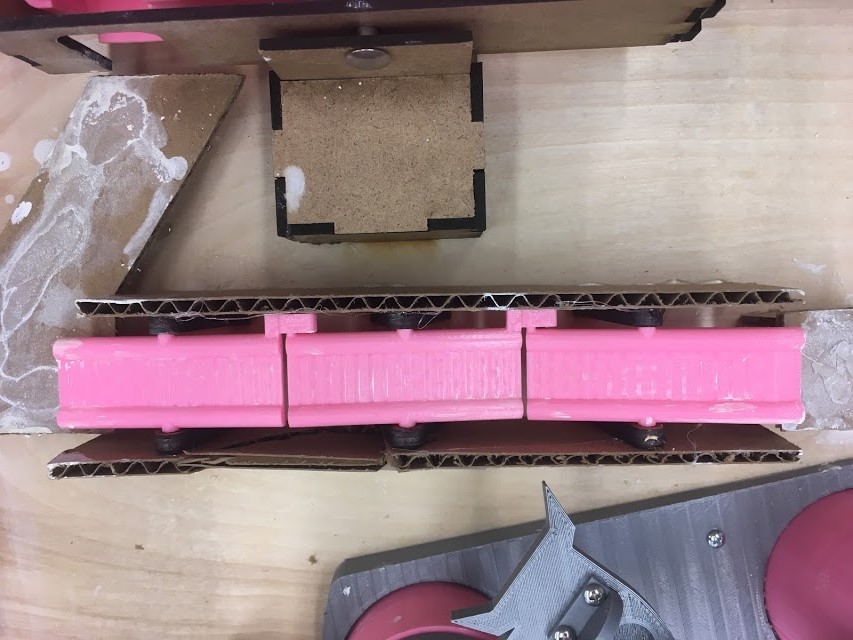
This is a cooperative obstacle. The three ramps on swishel swashel rotate back and forth automatically, controlled by a belt drive system underneath the playing field. The goal is to get the ball from one side of the ramps to the other. Initially, the ball rolls onto the first ramp and get stuck in the hole in the middle of it. When the second ramp lines up with the first ramp, one player has to press a button to momentarily stop the rotation, and another player has to press another button at the same time to actuate a solenoid which pops the ball out of the hole, rolling the ball down the ramp and onto the next one.
Lever Toss
Lever toss, like popper, uses a force guage, a button, and a solenoid. The player has to time their button press to the constantly moving force guage and flip the ball into the end goal. The ball will only land in the goal if enough force is applied. Otherwise, it will either go flying off or it won't go anywhere.
Left Side Obstacles
Weeble Wobble
In this obstacle, the player presses a button which actuates a solenoid to change the orientation of the ramps. The player has to time button presses so that the ball rolls along the ramps without flying off or moving backwards. This is the first obstacle in the traditional screwball scramble game.
Ball Pass
Ball Pass is the second cooperative obstacle. Each half rotates and is controlled by a potentiometer, and each player has control of the rotation of one half. The players have to pass the ball from the magnetic arm to the space ship arm and then on to the next obstacle. A servo is mounted inside each pillar to control the movement of the crane.
Covered Tilt Maze
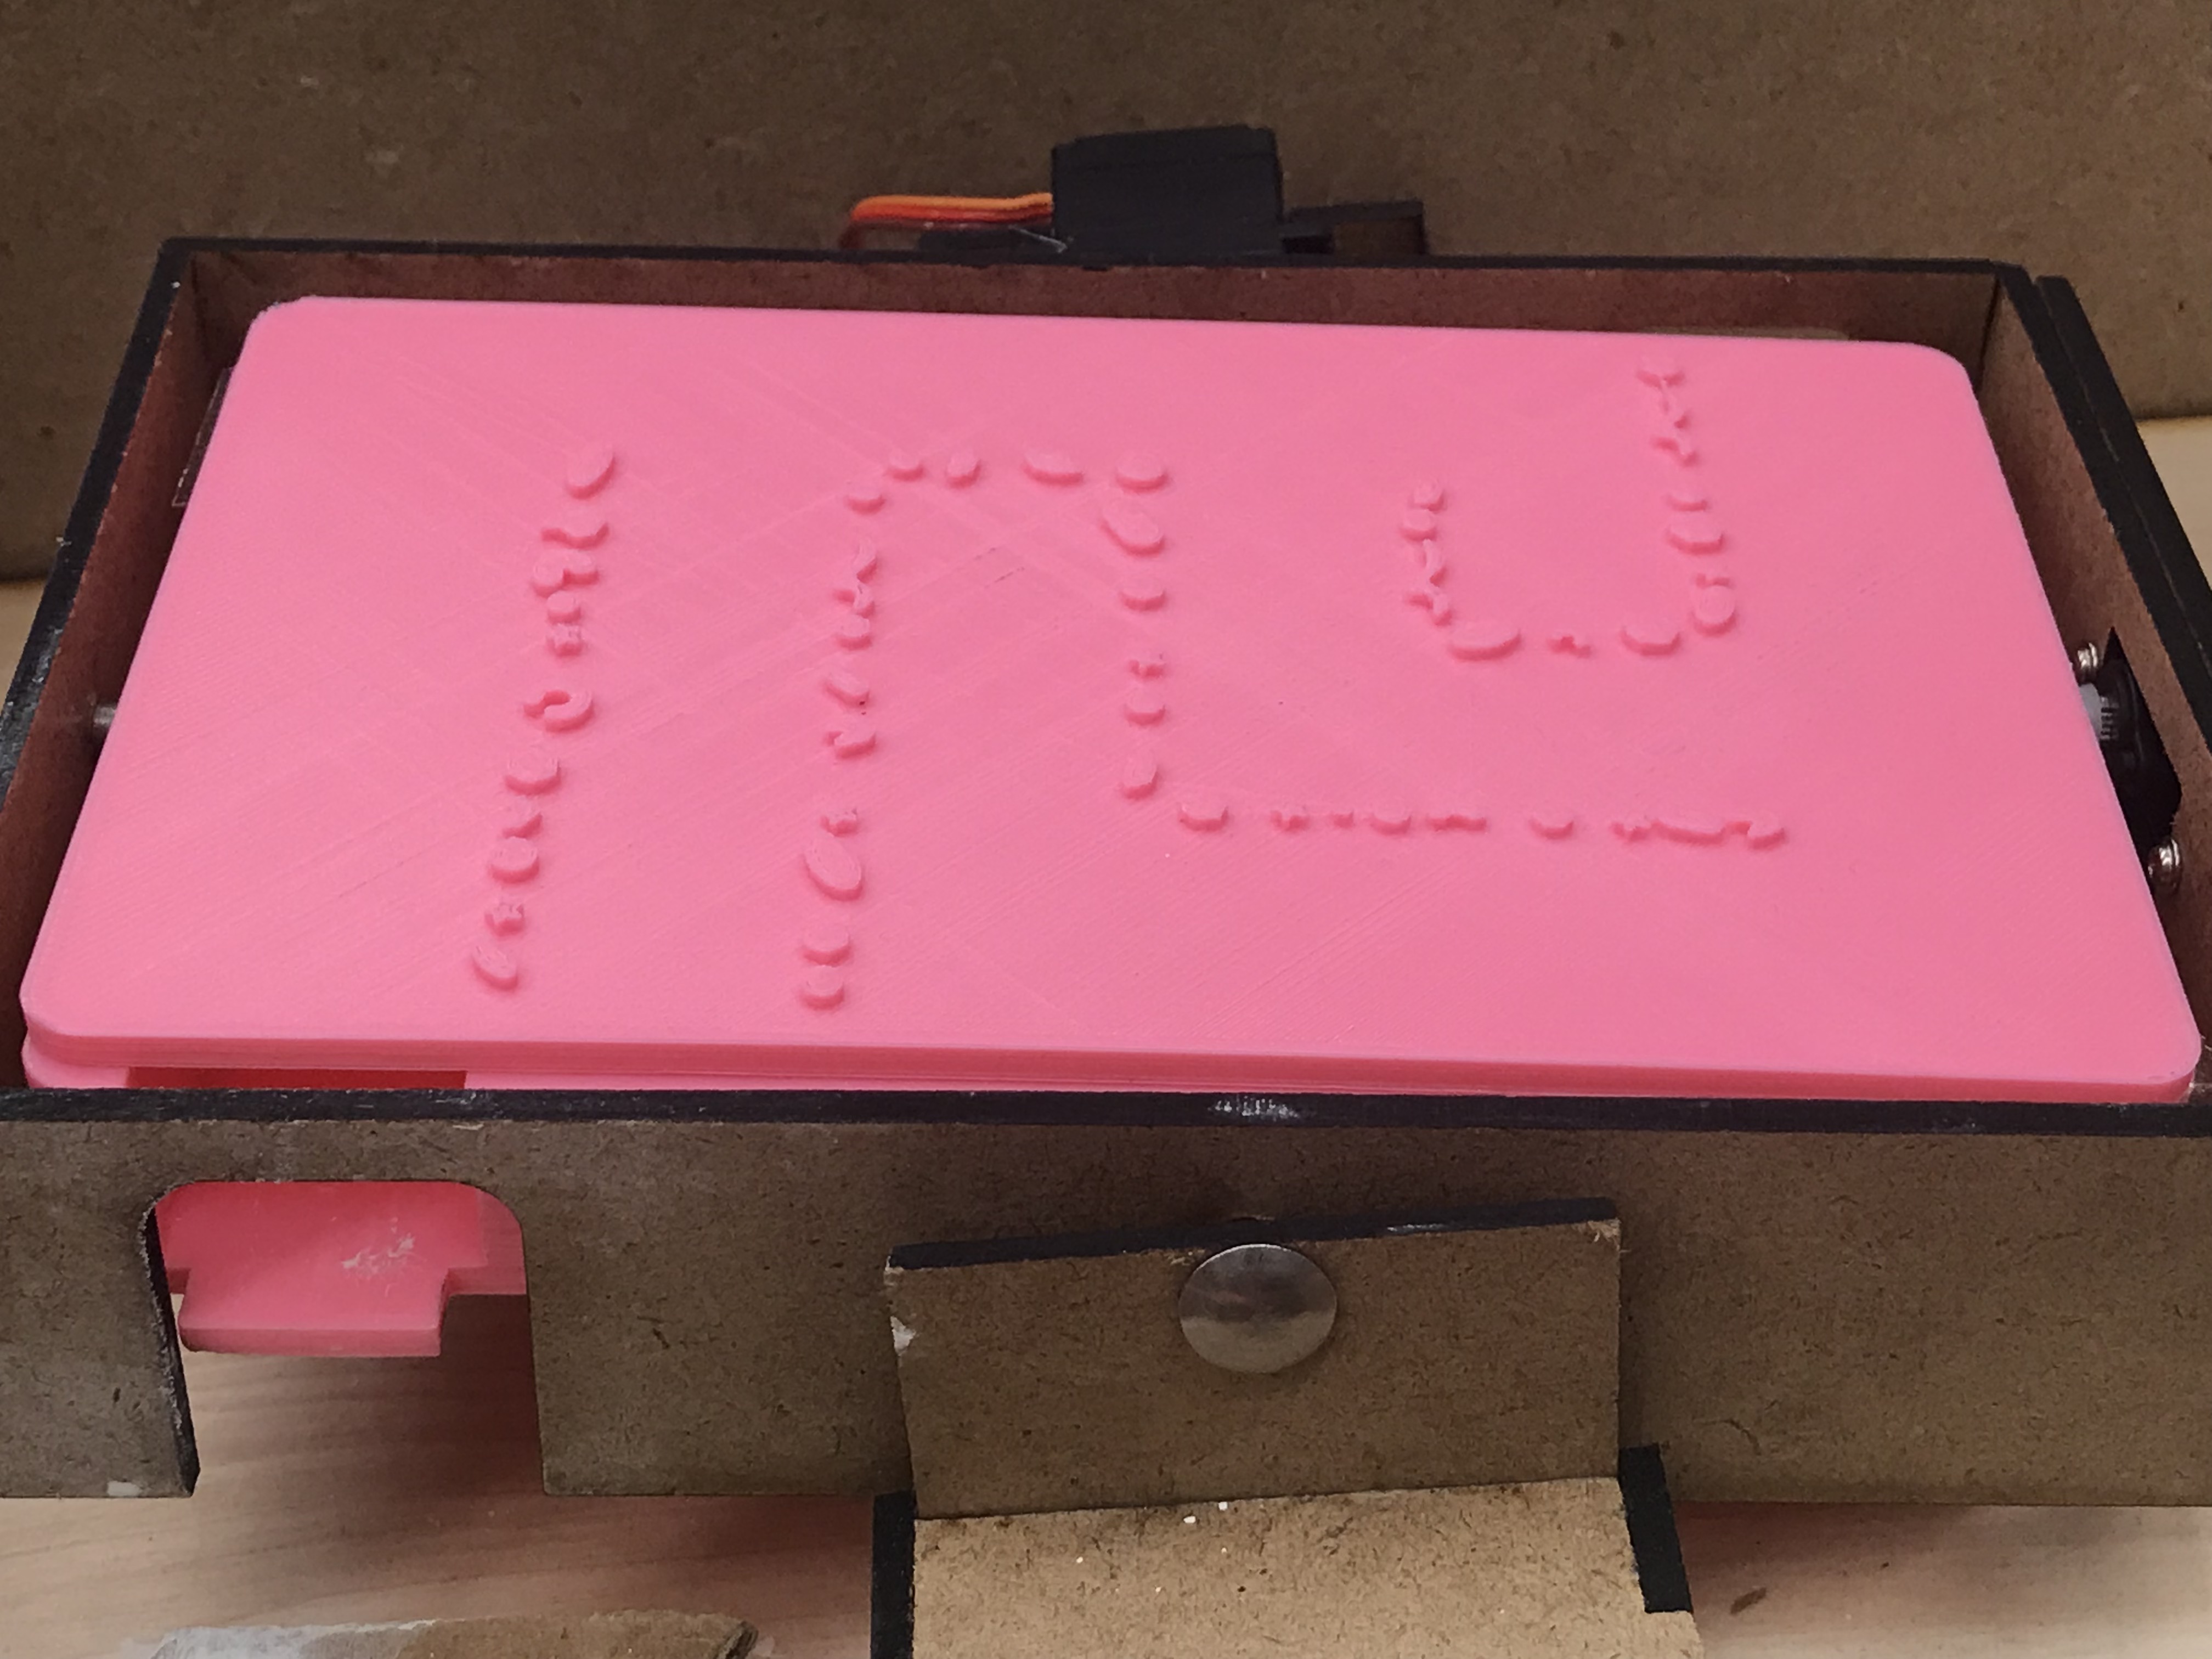
Covered tilt maze uses the exact same mechanism as uncovered tilt maze, except this time the player can't see inside! The pattern of the tilt maze is printed on the top and the player has to trust their instincts to know where the ball is located. There are no black holes in this tilt maze, but it is possible to hit is dead end if you go in the wrong direction.
Shoot the Moon
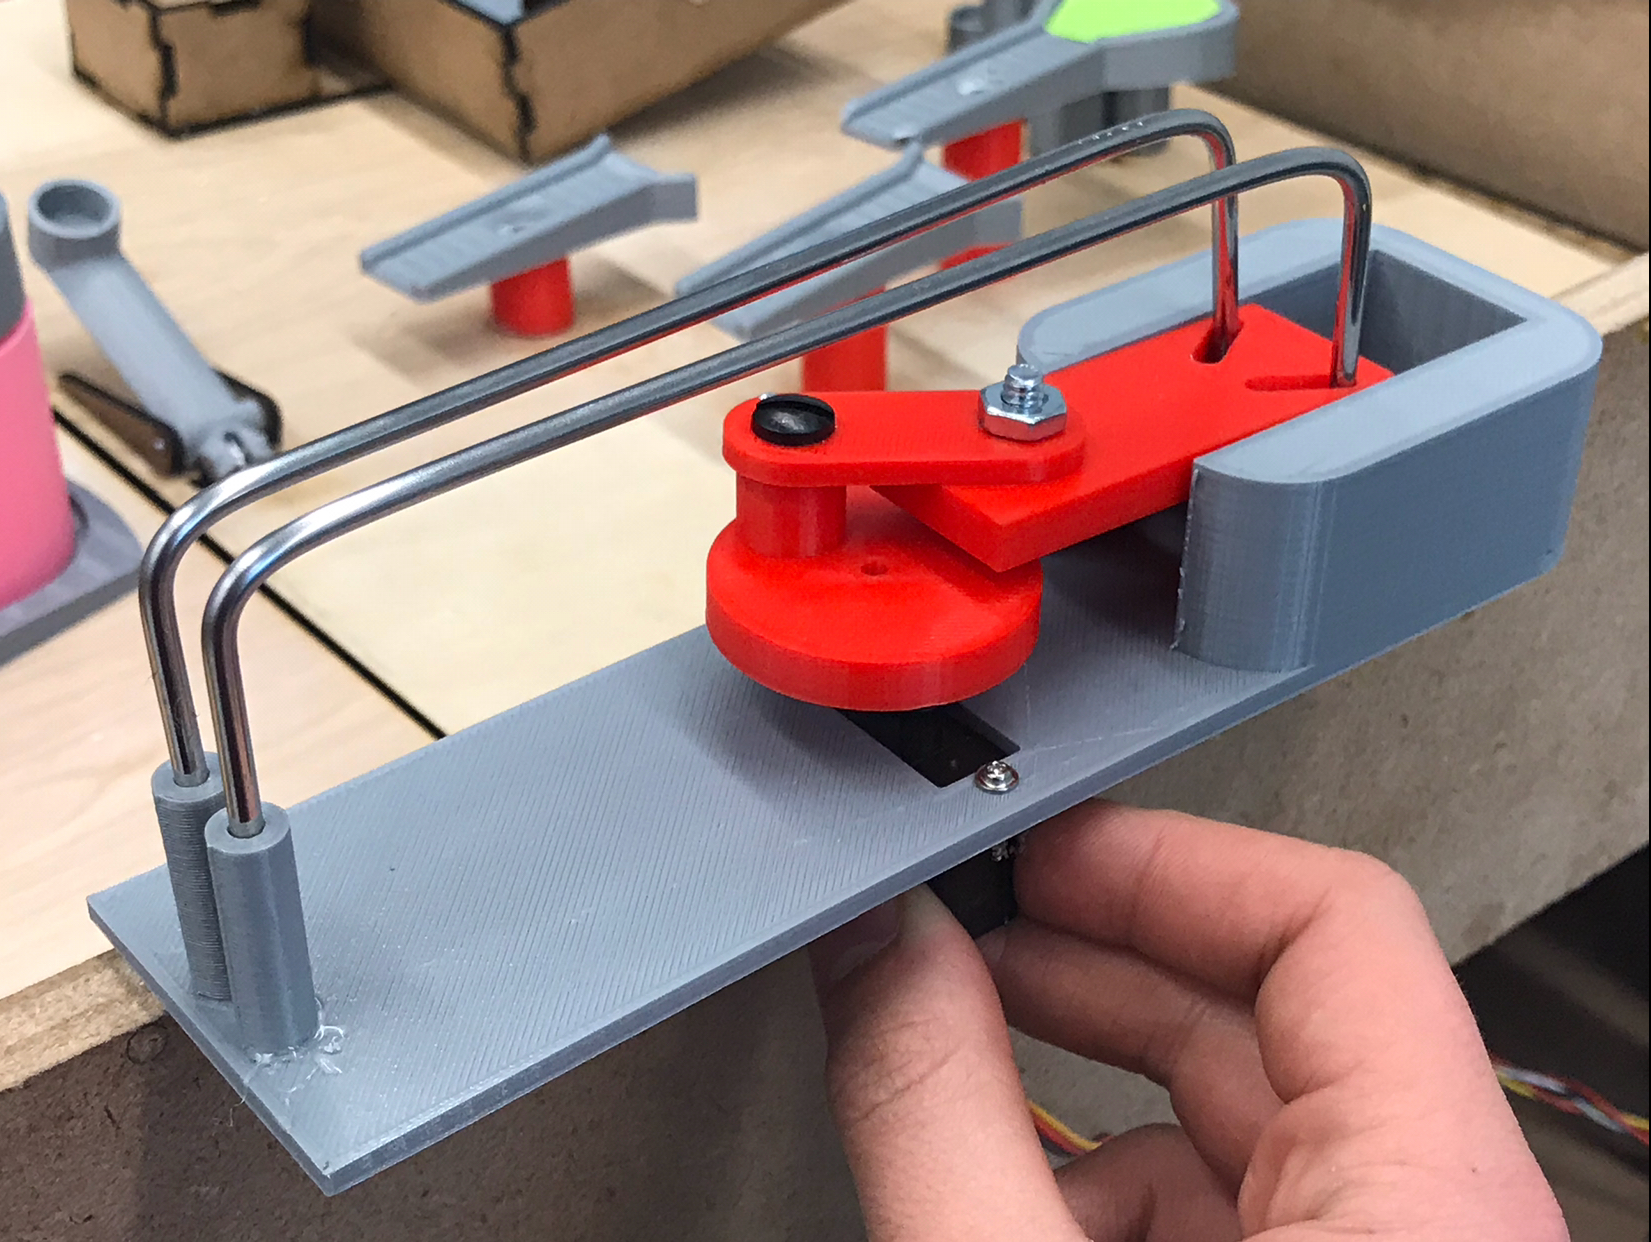
This obstacle is also commonly referred to as Catch the Moon. The player must open and close the rods to get the ball across using a slide potentiometer. A servo is connected to a circular CAM. As the CAM rotates, the attached linkage pushes and pulls back and forth on a 3D printed piece with angled slots that the rods run through, forcing the gap between the rods to expand and contract.
Miscellaneous
Start Point
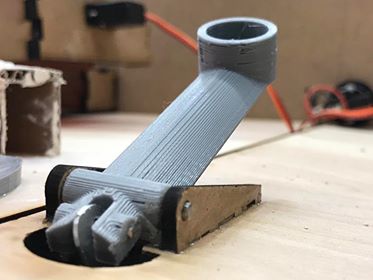
The player drops the ball through a slot in the lid, landing the ball in the start. The start is designed at a slight incline so that the ball rolls into the first obstacle, and features a door actuated by a servo that rotates open at the beginning of the game.
End Point
The end goal for the game is divided into two sections - one for each player's side of the game. The left side is designed with higher walls to catch the ball that is launched from the lever toss, while the right side is designed with a low wall that the shoot the moon game passes through. After landing in the end goal, the ball passes through the door on either side and lands back in the ball return. Each door on the end goal has cutouts on either side for break beam sensors, detecting that the player has oficially won the game.