Structures and Mechanisms
General Overview
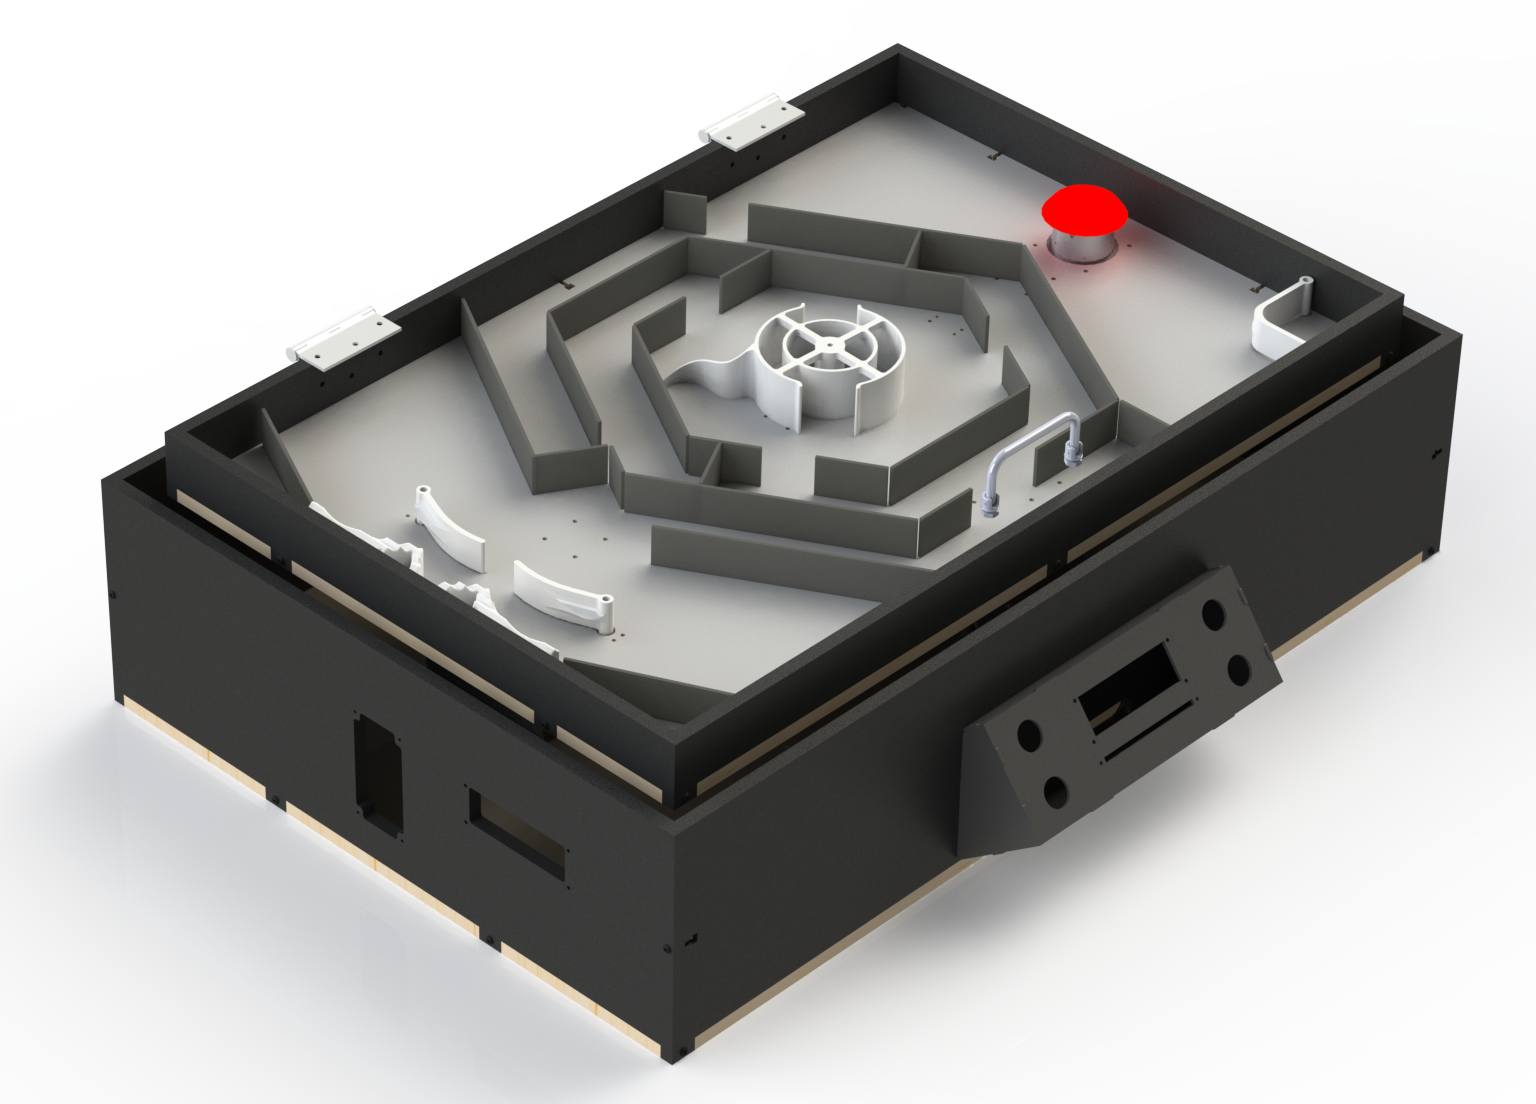
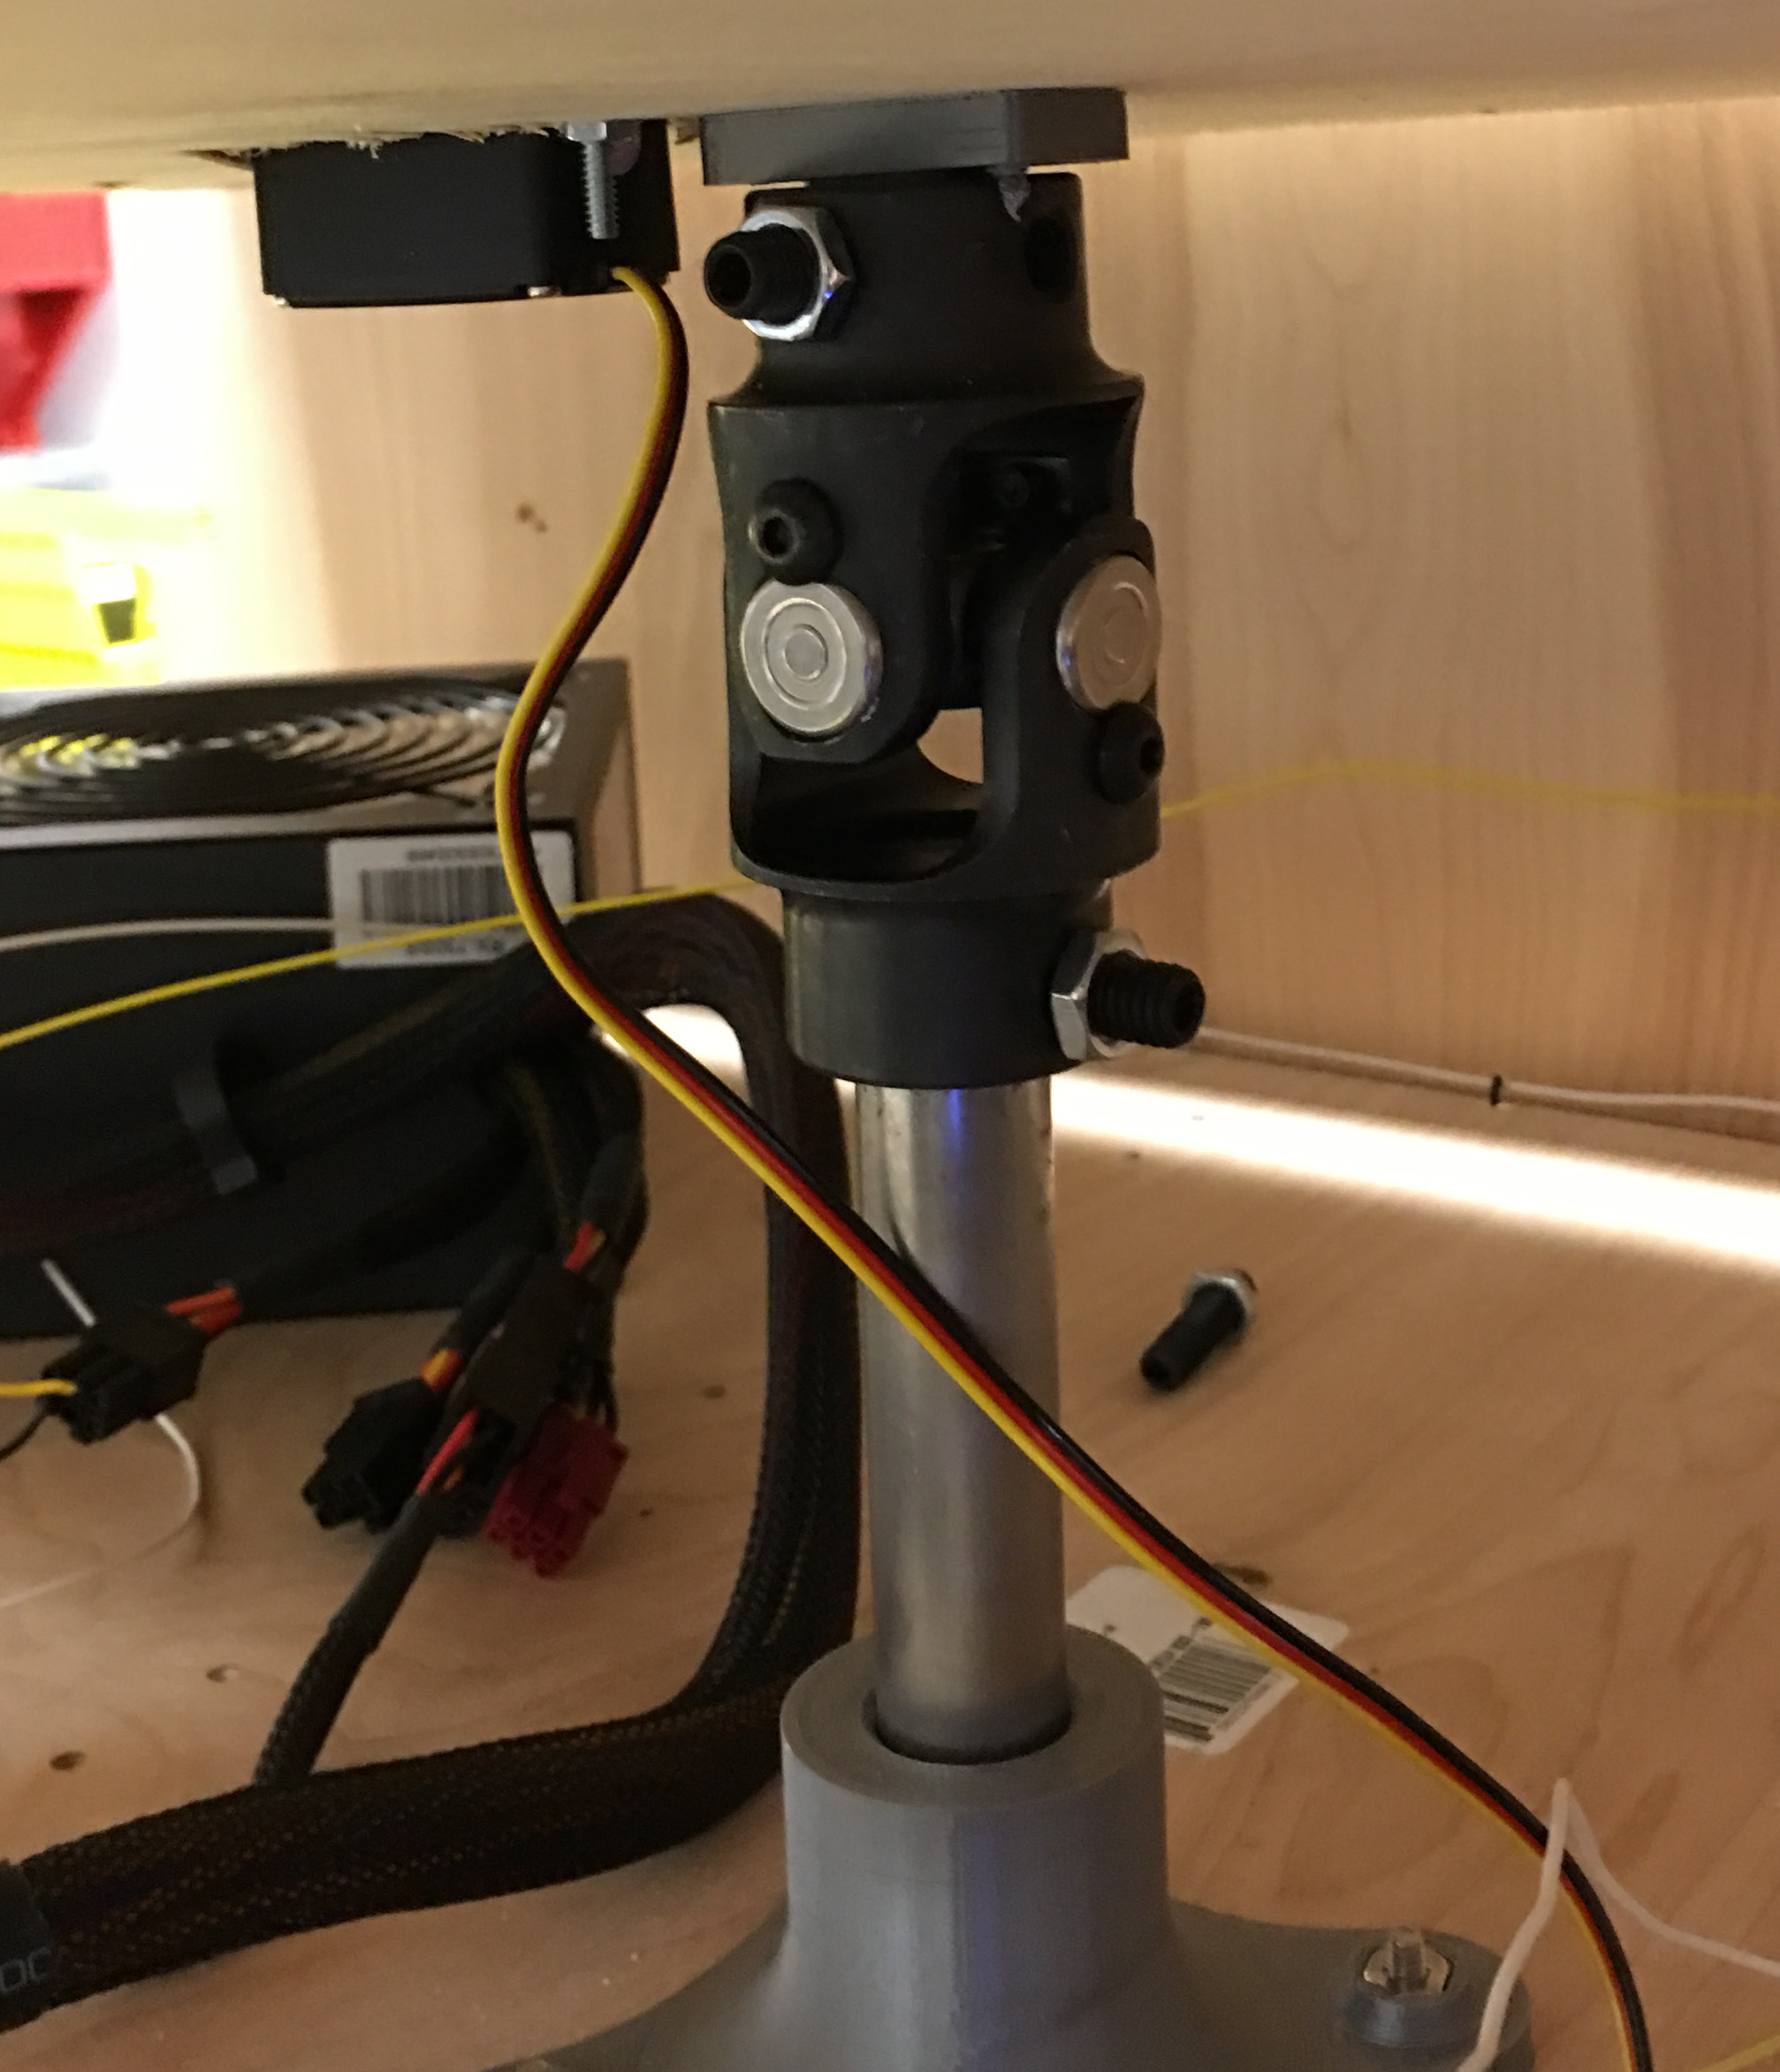
Our game has the general dimensions of 36” x 24” x 12”. The primary construction was ½” MDF and ⅛” hardboard. The tilting functionality of the game is acheived through 2 servos acting as linear actuators to control the X and Y axes. The center of the board is affixed to a larger U-Joint to constrain any rotation about the center. The servos connect to a linkage mounted 7-½” from the origin through a linkage and attach to the tilting surface via a ball joint.
View our CAD Files Here!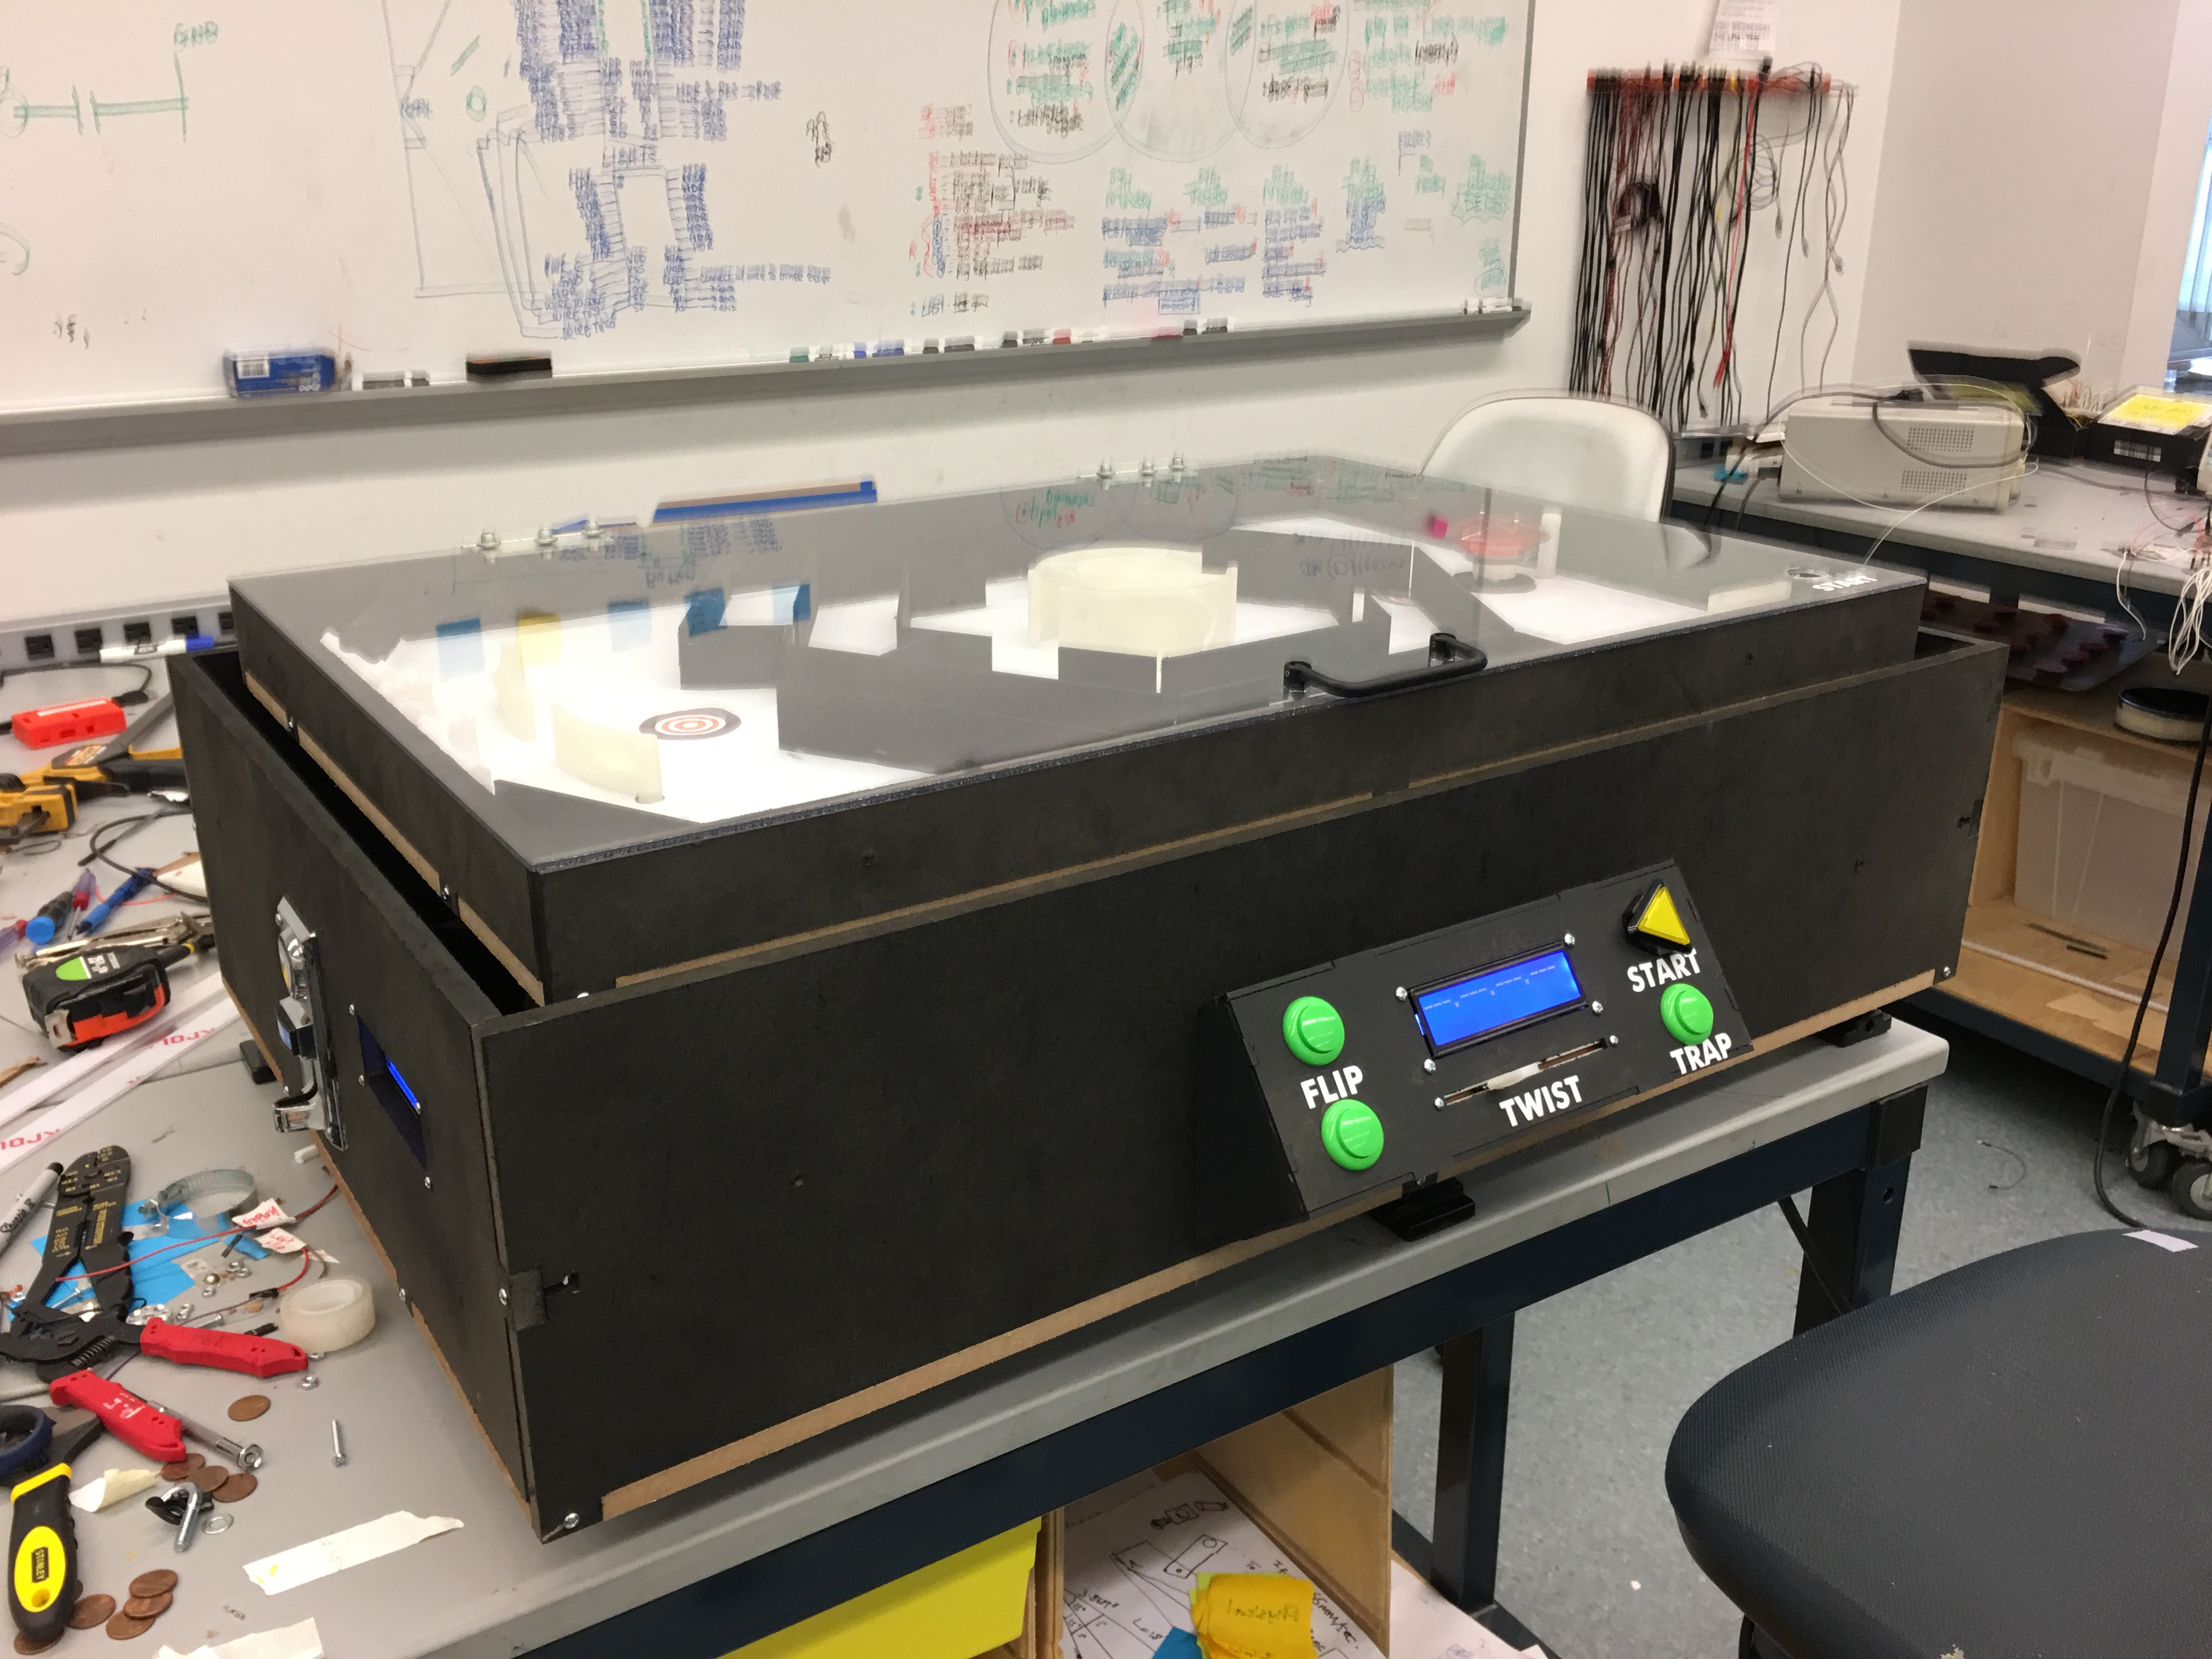
Housing
All electronic components, including the power supply, proto-board, and various controllers are enclosed within the game. A series of holes perforate the bottom face of the box to allow easy fastening of components. Clearance between the coin mechanism and tilting plane is very small as we wanted to keep the Z height as compact as possible. A pass-through hole was added to allow inserted pennies to pass through back to the exterior of the machine easily: it would not be a very profitable operation as-is.
Tilting Action
Our original design featured exclusively ball joints but was found to be underconstrained.
While we could achieve the desired tilting action, rotations of the surface was possible in
any position. After attempting to implement custom made U-joints made in the a Autodesk
Ember, a more robust solution was needed. We purchased a U-joint meant for automotive use to
ensure that it would not be a weak link in our operation.
With the origin of the board being the center point, the longer side was defined as the x
axis while the shorter side was parallel to the y axis. We placed the servo mechanism At
equal distances from the center on each axis. To get sufficient force out of our linear
actuators, we first spec'd very large HS-805BB servos and gave them a moment arm of just 1
½”. This was enough mechanical advantage to both achieve the desired tilt angle and leave
the servos plenty of mechanical overhead while tilting the platform to an acceptable
angle.
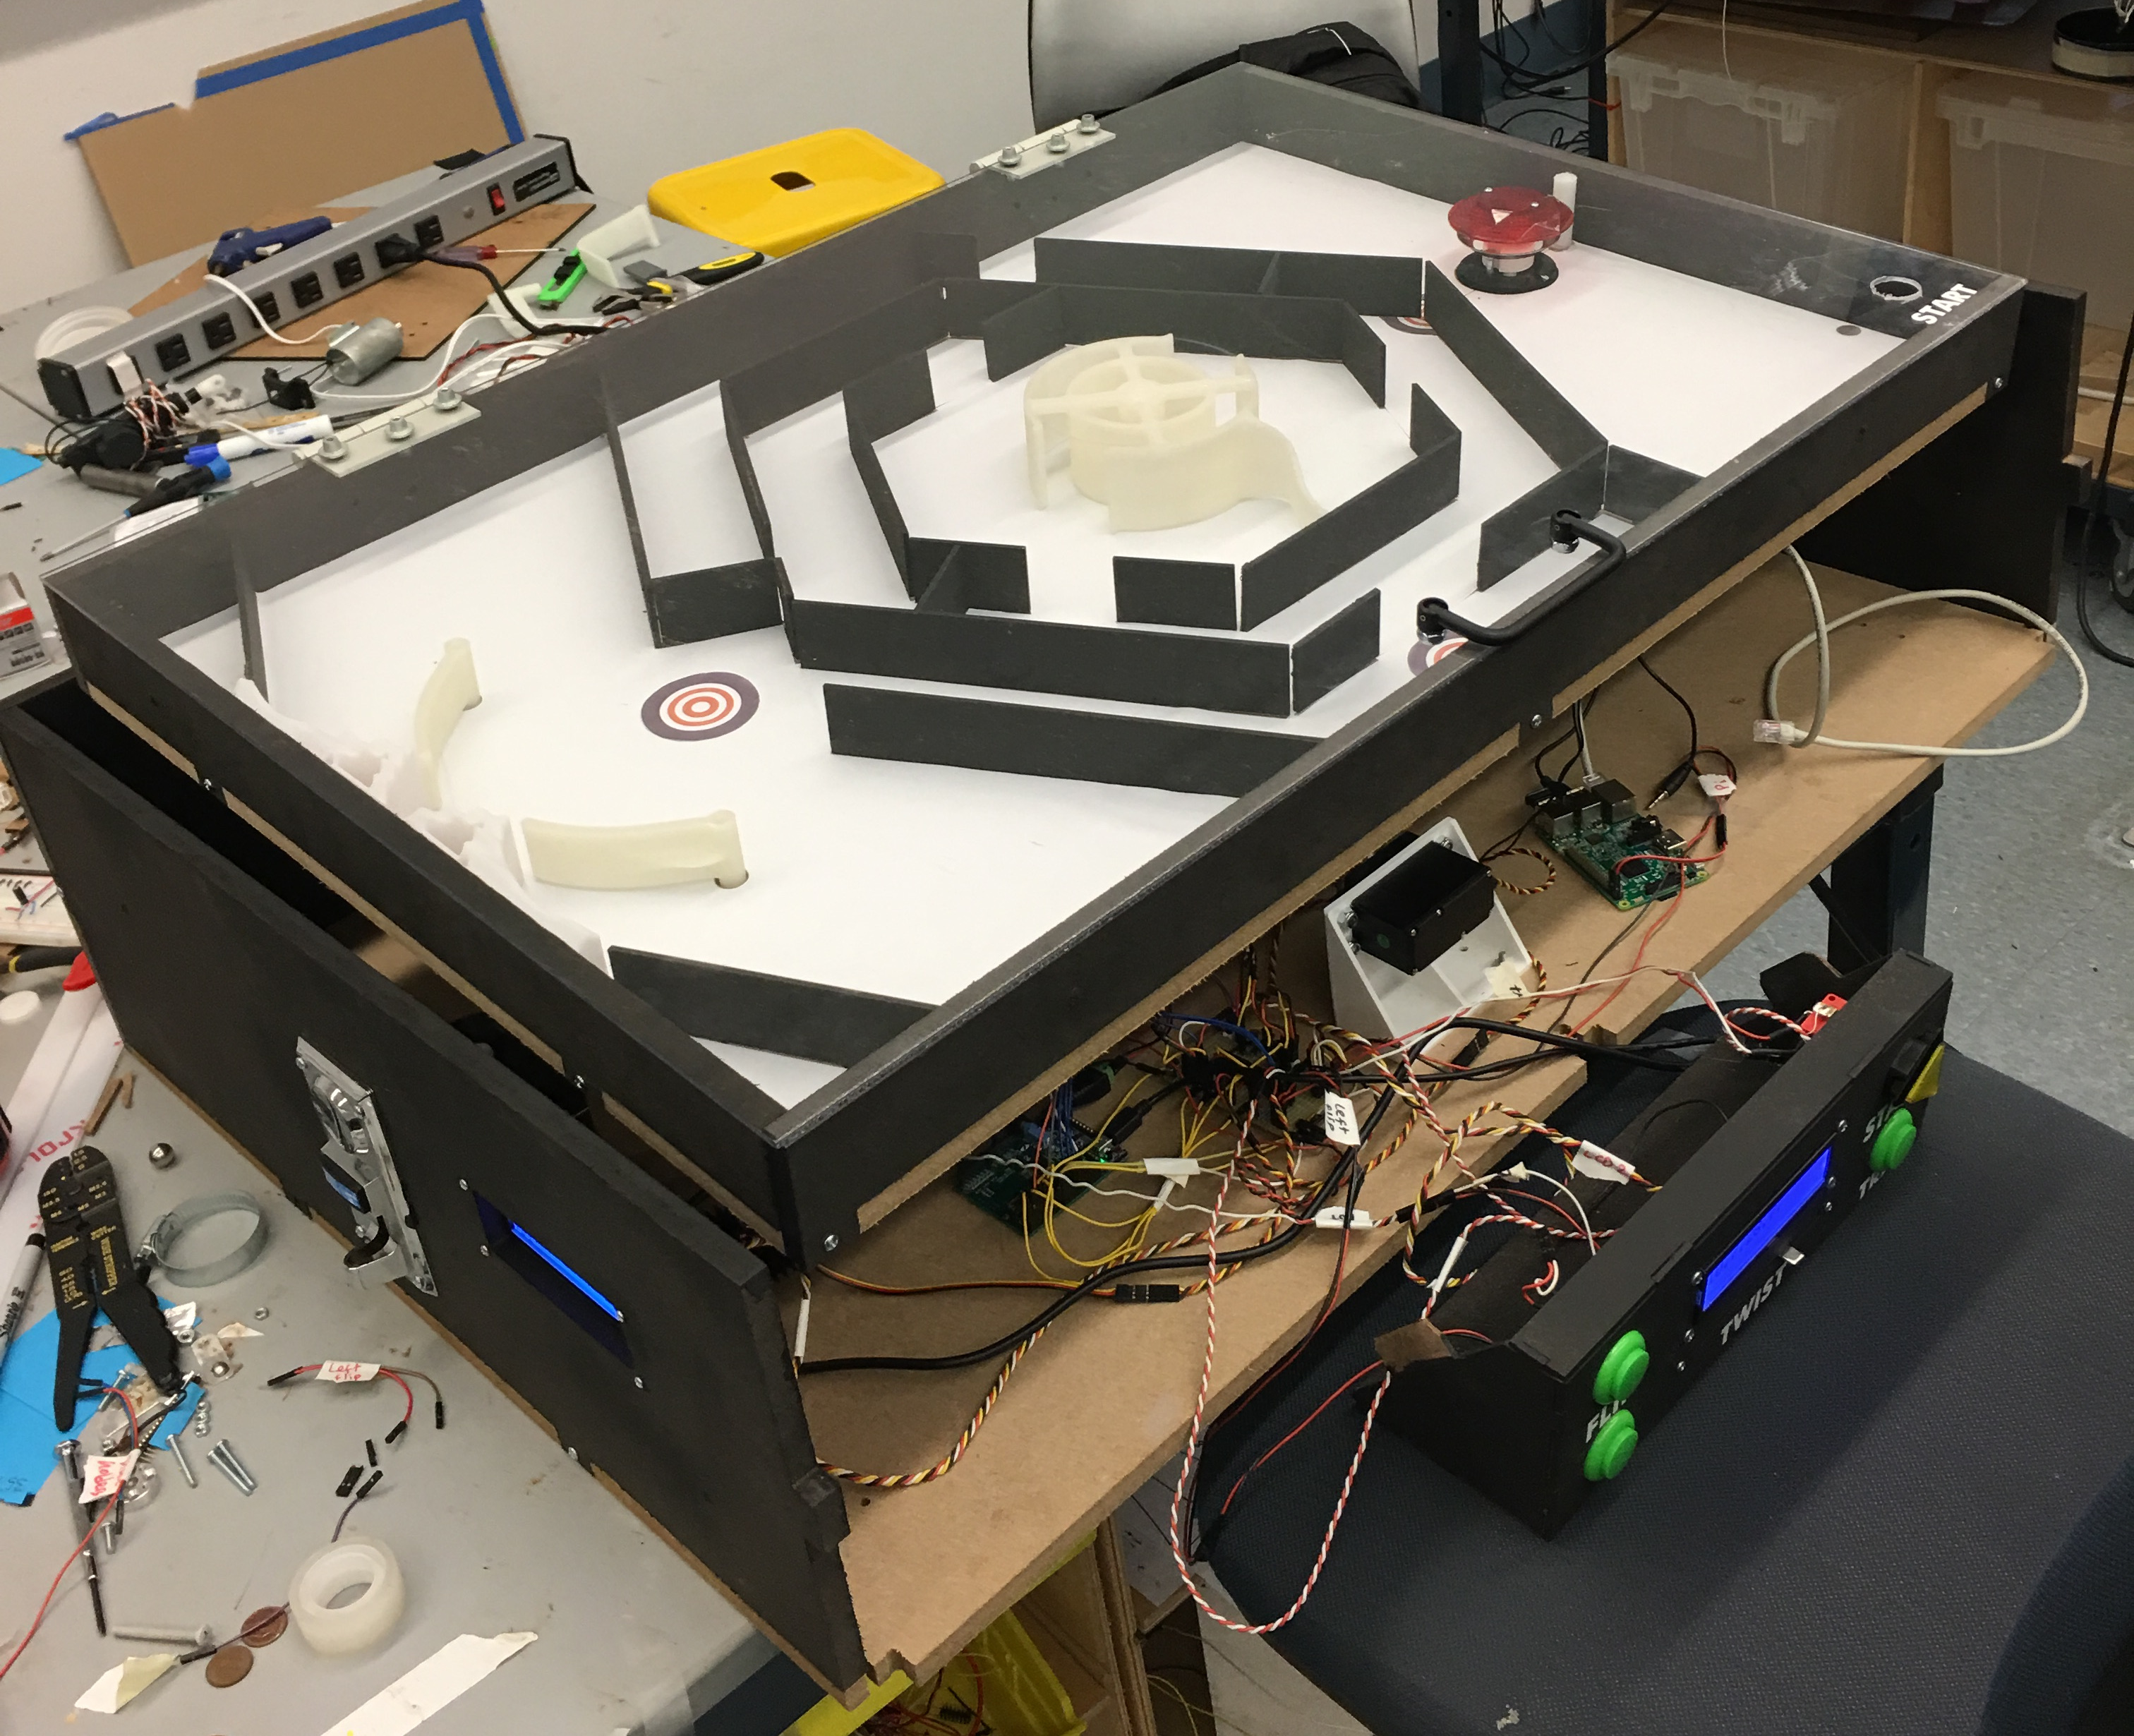
Main Area
The Main game area was made up of a series of both static and dynamic
components. The
perimeter walls stand 2” high and surround three layers of concentric
hexagons. The majority of our static obstacles are part of this structure. Gaps and
extra walls are strategically placed throughout the design to allow the Player to
traverse through the game but also
challenge them to take specific routes that expose the ball to the active elements.
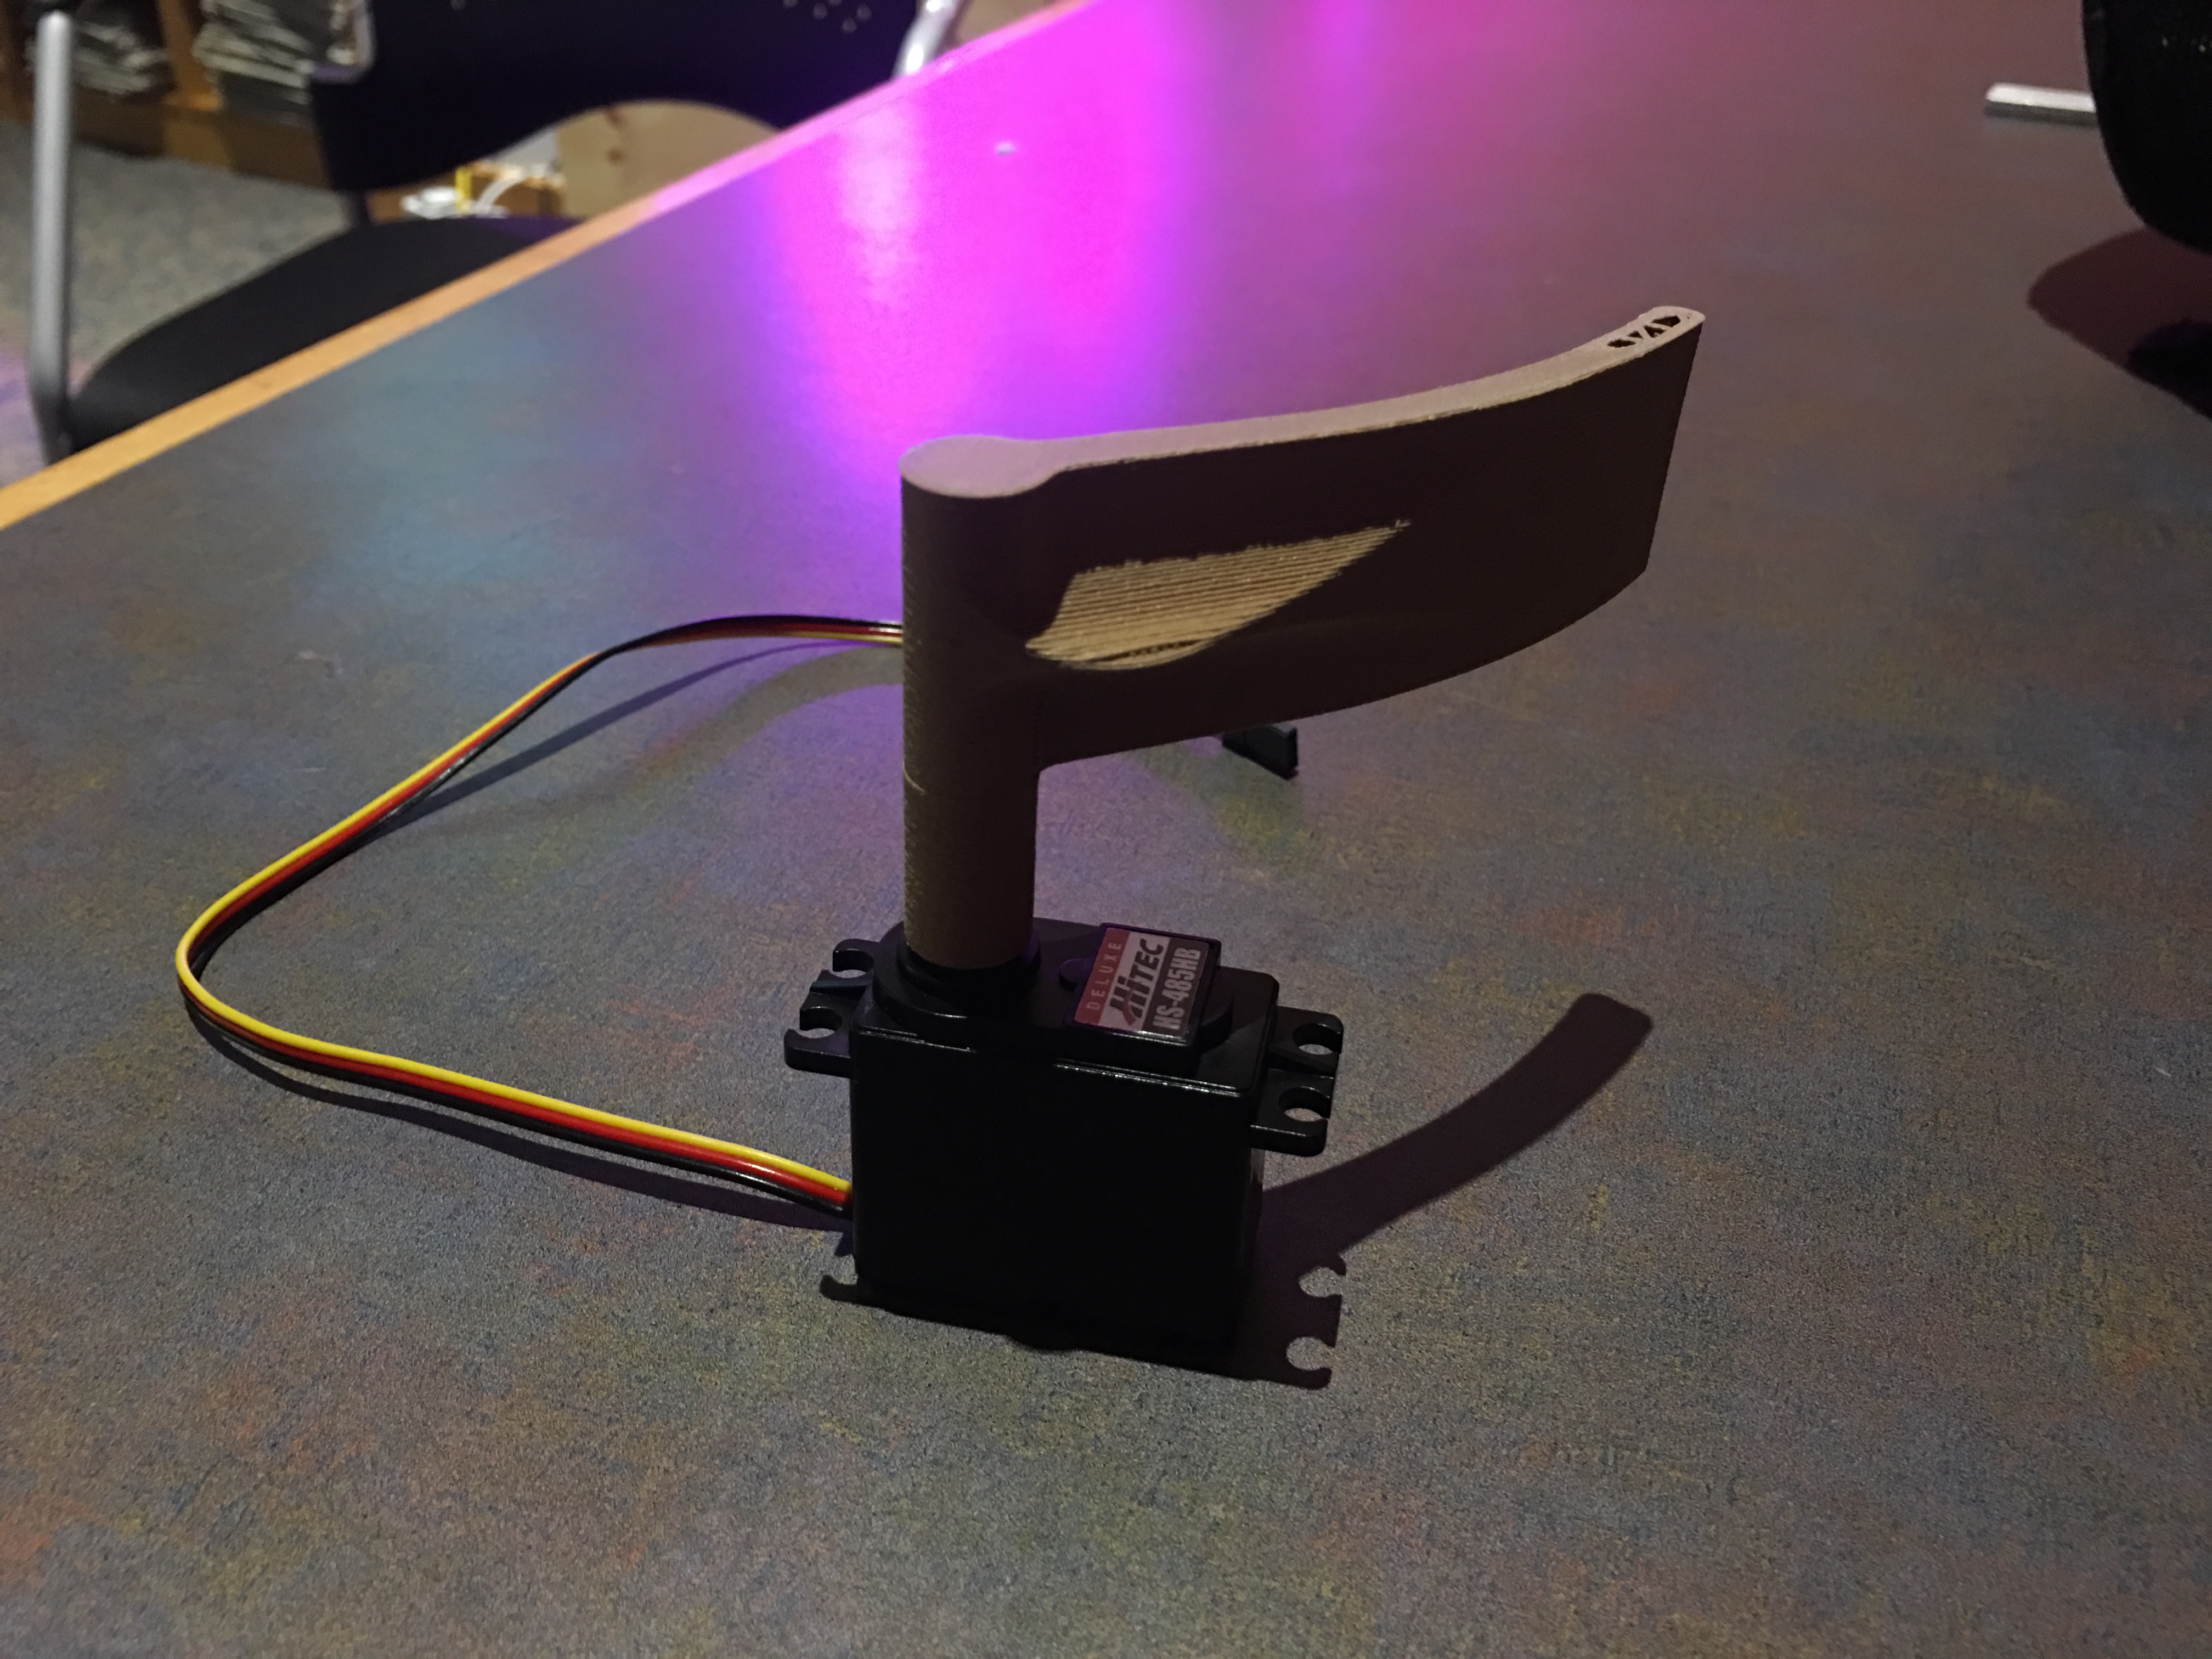
The center of the hexagonal structure is guarded by a rotating wall driven
by a servo. The wall has two layers: the inner layer, a full circle guards the
servo itself from the ball, and the outer layers, which are two arcs along a bigger
circle with two openings. By rotating the middle circular wall (over a maximum range of
180o), Player 2 can trap the ball within the walls in an attempt to prevent Player 1 from
proceeding.

Start Area
The game starts with Player 2 taking the ball and placing it in the start area, through a hole in the lid. For safety’s sake, we added a lid to the tilting box, to prevent the ball from being thrown from the game area. The lid is made of clear polycarbonate, due to its ability to be jump sheared and drilled into more easily than acrylic can. It is mounted on the game area with two door hinges from McMaster Carr, which allow for smooth opening and closing without a need for a latch. The lid also has a collapsible handle, so it stays out of the way during gameplay, but the lid can be easily opened. The hole in the corner leading to the start area is cut by a 1 inch hole saw. The start area is a simple servo with a 3D-printed wall attached. When both Player s are ready, the servo rotates just under 90 degrees to open the wall so Player 1 can guide the ball into the Main Area.
End Area
The final area of the game has several main components. The first greeting the Player 1 on the way to the goal is a final electromagnet. If that fails, next trick in Player 2’s arsenal are the pinball-esque flippers. In our implementation, they work slightly differently than in pinball. Yes, they can be used to swat away the approaching ball, but they are strategically placed so that Player 2 can box out Player 1 into a single side of the and area and keep them from getting to the goal. If Player 1 does manage to avoid these perils, the end goal is a 3D printed wall attachment designed to funnel the Player in the end goal contact. Given the structure was to be 3D printed, some liberties were taken in respect to its freeform design.
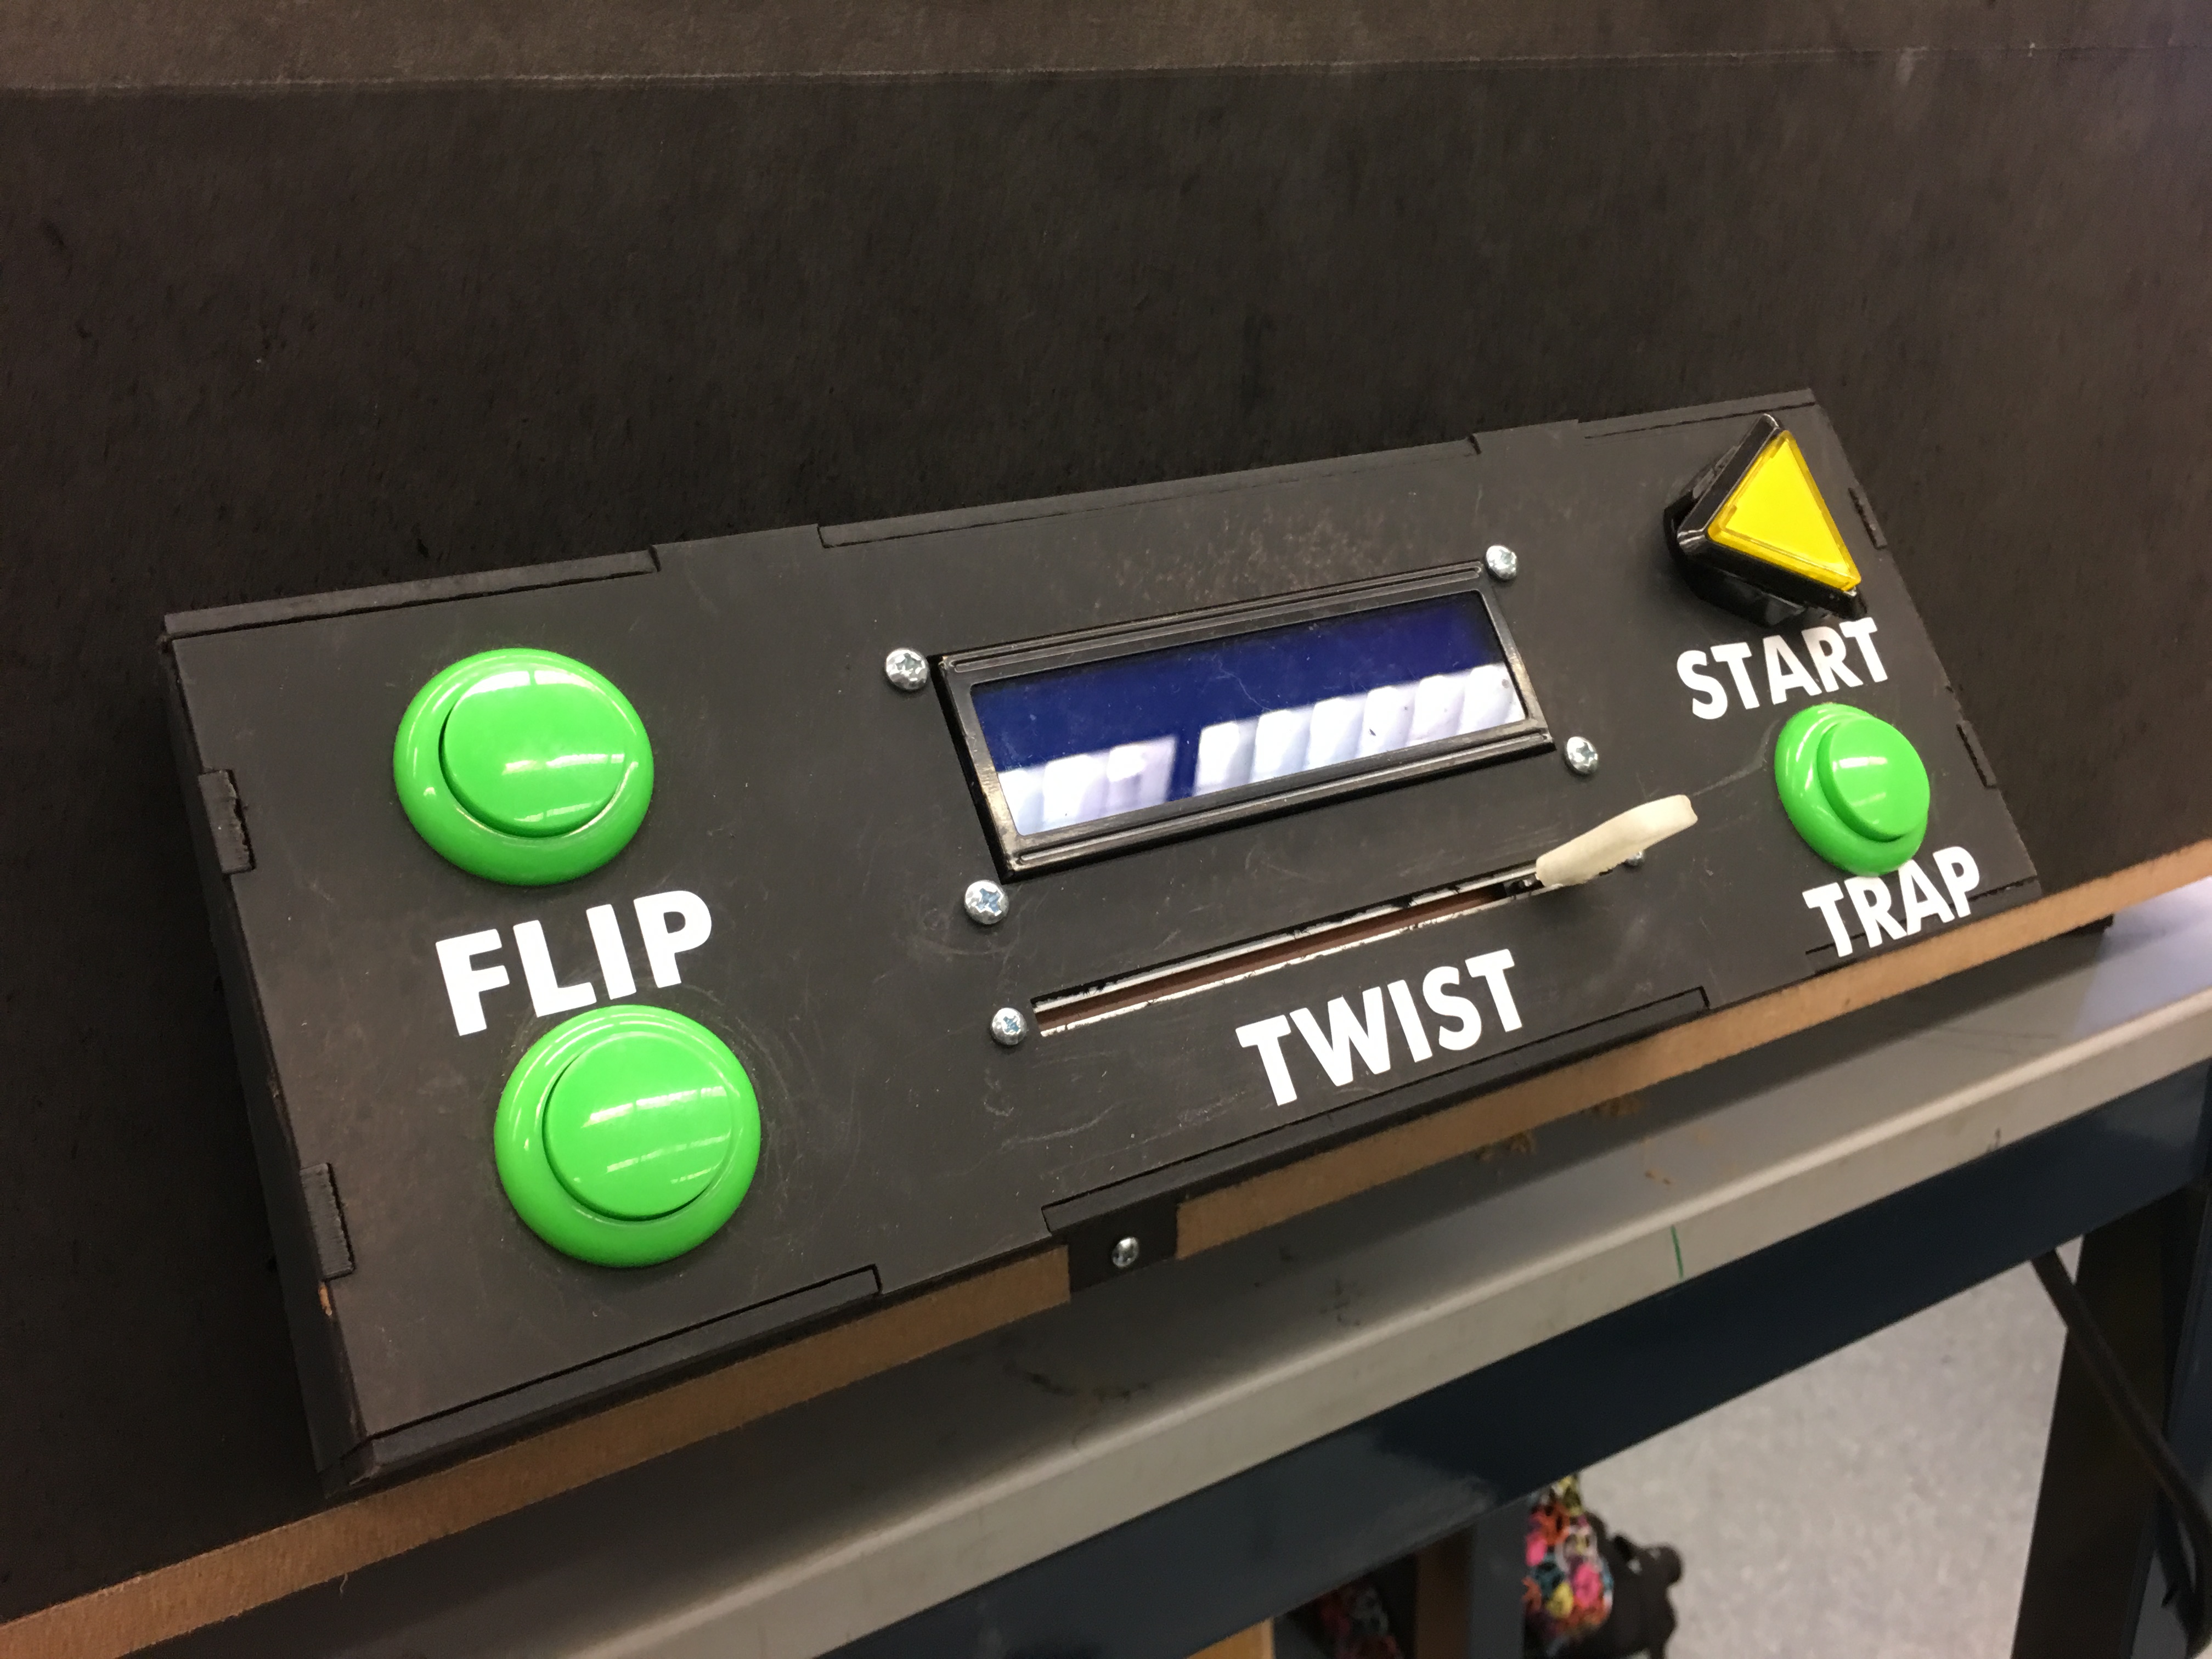
Control Panel
While Player 1’s sole form of input is the Wii balance board with the instruction of an LCD integrated into the sidewall of the game. Player 2 gets their own control panel (also with an LCD). The panel has 4 discrete buttons and a slide potentiometer for them to interact with. 2 buttons on the left side are dedicated to the actuation of their respective flippers. The middle potentiometer dictates rotation of the central spinner. The lower right button, activates the game area’s 3 electromagnets. Due to pin-count constraints, the single button actuates all the electromagnets simultaneously. Finally, the start button is located in the top right of the panel and doubles to reverse the tilting direction of Player 1 during gameplay. Both the electromagnets and reversing function have a “cool down” period as to make gameplay more competitive.